
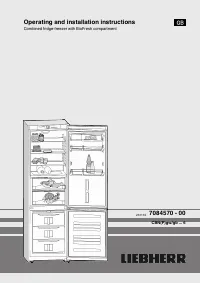
Холодильник Liebherr CBNPgw 3956 - инструкция пользователя по применению, эксплуатации и установке на русском языке. Мы надеемся, она поможет вам решить возникшие у вас вопросы при эксплуатации техники.
Если остались вопросы, задайте их в комментариях после инструкции.
"Загружаем инструкцию", означает, что нужно подождать пока файл загрузится и можно будет его читать онлайн. Некоторые инструкции очень большие и время их появления зависит от вашей скорости интернета.

WARNING
Fire hazard due to dampness!
If live parts or the mains lead become damp this may cause
short circuits.
u
The appliance is designed for use in enclosed areas. Do not
operate the appliance outdoors or in areas where it is
exposed to splash water or damp conditions.
WARNING
Fire hazard due to refrigerant!
The refrigerant R 600a is environmentally friendly but flam-
mable. Escaping refrigerant may ignite.
u
Do not damage the piping of the refrigeration circuit.
WARNING
Fire hazard and danger of damage!
u
Do not place appliances emitting heat e.g. microwaves,
toasters etc. on the appliance!
WARNING
Blocked ventilation openings pose a risk of fire and damage!
u
Always keep the ventilation openings clear. Always ensure
that the appliance is properly ventilated!
u
Detach the connecting cable from the rear of the appliance,
removing the cable holder at the same time because other-
wise there will be vibratory noise!
u
Remove the protective film from the decorative trims and
drawer fronts.
u
Remove all transit supports.
u
Dispose of packaging material (see 4.5) .
NOTICE
Risk of damage due to condensate!
u
Do not install the appliance directly alongside a further
refrigerator/freezer.
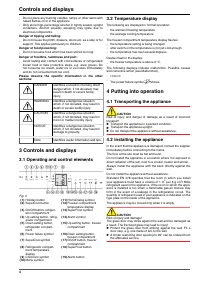
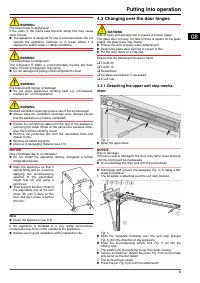
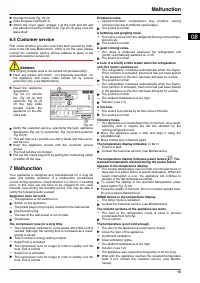
u
Align the appliance so that it
stands firmly and on a level by
applying the accompanying
spanner to the adjustable-
height feet (A) and using a
spirit level.
u
Then support the door: Extend
the adjustable foot at the turn
hinge (B) until it rests on the
floor and then make a further
90° turn.
Note
u
Clean the appliance (see 6.2) .
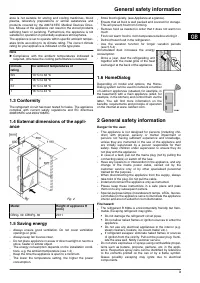
If the appliance is installed in a very damp environment,
condensate may form on the outside of the appliance.
u
Always see to good ventilation at the installation site.
4.3 Changing over the door hinges
WARNING
Risk of injury and damage due to pieces of broken glass!
The glass door is heavy. If it falls or there is impact on the glass
edges, the glass pane may shatter.
u
Protect the door properly when detaching it!
u
Detach the glass door working in a team of two.
u
Put the door down on a soft mat.
Ensure that the following tools are to hand:
q
Torx® 25
q
Torx® 15
q
Screwdriver
q
Cordless screwdriver, if necessary
q
A soft mat
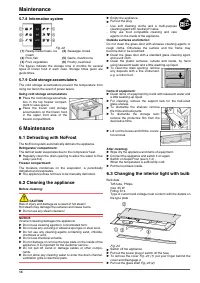
4.3.1 Detaching the upper soft stop mecha-
nism
Fig. 4
u
Open the upper door.
NOTICE
Risk of damage!
If the door seal is damaged, the door may fail to close properly
and the cooling will be inadequate.
u
Do not damage the door seal with the screwdriver!
u
Disengage and remove the faceplate
Fig. 4 (1) using a flat-
blade screwdriver.
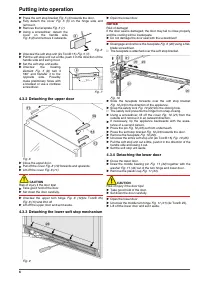
w
The faceplate is attached over the soft stop bracket.
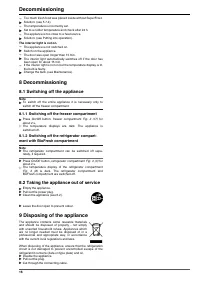
Fig. 5
u
Slide the faceplate forwards over the soft stop bracket
Fig. 5 (4) in the direction of the appliance.
u
Snap the accompanying safety lock
Fig. 5 (2) into the
oblong hole.
w
The safety lock prevents the hinge from snap-closing.
u
Using a screwdriver, detach the cover
Fig. 5 (5) on the hinge
side as far as the first detent.
w
The pin becomes visible.
u
Press the pin
Fig. 5 (3) out from underneath.
Putting into operation
5
Характеристики

Остались вопросы?Не нашли свой ответ в руководстве или возникли другие проблемы? Задайте свой вопрос в форме ниже с подробным описанием вашей ситуации, чтобы другие люди и специалисты смогли дать на него ответ. Если вы знаете как решить проблему другого человека, пожалуйста, подскажите ему :)


