Газонокосилки AL-KO FRS 4125 - инструкция пользователя по применению, эксплуатации и установке на русском языке. Мы надеемся, она поможет вам решить возникшие у вас вопросы при эксплуатации техники.
Если остались вопросы, задайте их в комментариях после инструкции.
"Загружаем инструкцию", означает, что нужно подождать пока файл загрузится и можно будет его читать онлайн. Некоторые инструкции очень большие и время их появления зависит от вашей скорости интернета.


GB 8
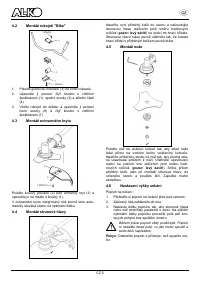
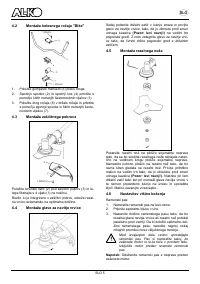
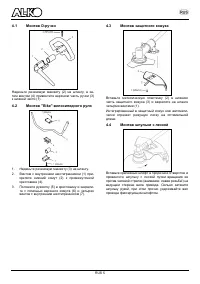
WORKING WITH WEED-CUTTING BLADES
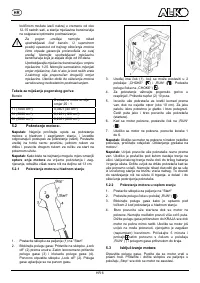
MOWING WEEDS
Mowing means moving the blade in a horizontal curve
from one side to the other. This is very effective for
grass-like weeds and small undergrowth. It is not suit-
able for cutting large, tough weeds or woody vegeta-
tion.
Do not use weed-cutting blades for cutting
scrub or young trees!
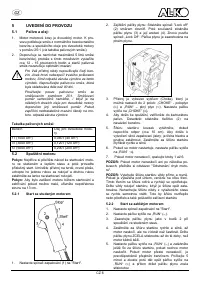
JAMMING
Very thick vegetation, such as young trees or thick
scrub may jam the blade and bring it to a standstill.
Prevent the blade from jamming by anticipating the
direction in which the scrub leans and cut it from the
opposite side.
If the blade jams while cutting, switch off the engine
immediately. Hold the machine level so that the blade
does not jump or break while you push the young tree
away from the cut to free the blade.
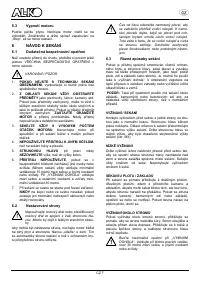
TO PREVENT RECOIL
When using metal cutting tools (grass blades, thicket
knives) there is a risk that the machine will recoil if the
tool strikes a solid object (tree truck, branch, tree
stump, stone or the like). In this case the machine will
jump backwards in the opposite direction to which the
tool is rotating. This may lead to a loss of control of the
tool and risk of injury to the user and onlookers.
Do not use metal cutting tools near fences, metal
posts, boundary stones or foundations.
The safety blade is designed to reduce recoil if the
blade strikes a hard, solid object.
7 MAINTENANCE
7.1 Air
filter
Never work without an air filter. Make sure it is
always clean. If it is damaged then it must be
replaced with a new filter. Empty the petrol
tank and pour the fuel into a suitable jerry can.
Open the petrol tank slowly so that any poten-
tial pressure can be released
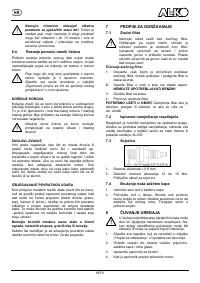
Cleaning the air filter:
1.
Unscrew the screw with which the air filter cover
is secured; remove the cover and lift the filter out
of the air inlet.
2. Wash the filter in soapy water. DO NOT USE
ANY PETROL!
3.
Air-dry the filter.
4. Re-insert
the
filter.
PLEASE NOTE: Replace the filter if it is worn away,
torn or damaged, or if it can no longer be cleaned.
7.2 Carburettor
adjustment
The carburettor was pre-set at the factory for optimum
performance. If further adjustments are necessary,
please take your unit to the nearest Authorized Service
Centre.
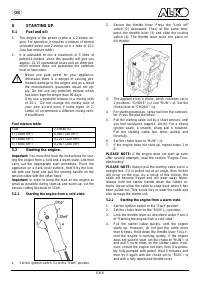
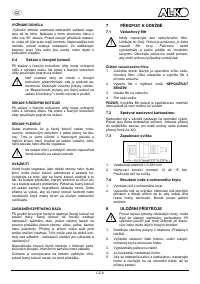
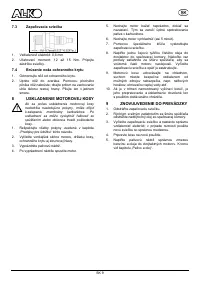
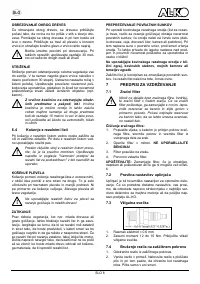
7.3 Spark
plug
1.
Spark plug gap = .025" (.635mm).
2.
Torque to 105 to 130 inch pounds (12 to 15 Nm).
Connect spark plug boot.
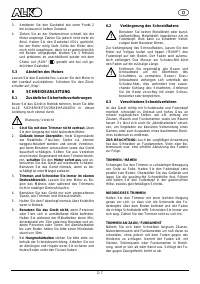
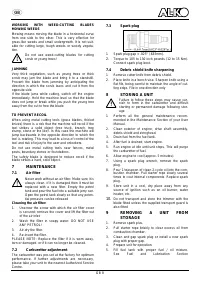
7.4
Debris shield knife sharpening
1.
Remove cutter knife from debris shield.
2.
Place knife in a bench vise. Sharpen knife using a
flat file, being careful to maintain the angle of cut-
ting edge. File in one direction only
8
STORING A UNIT
Failure to follow these steps may cause var-
nish to form in the carburettor and difficult
starting or permanent damage following stor-
age
1. Perform all the general maintenance recom-
mended in the Maintenance Section of your User
Manual.
2.
Clean exterior of engine, drive shaft assembly,
debris shield and stringhead.
3.
Drain fuel from the fuel tank.
4.
After fuel is drained, start engine.
5.
Run engine at idle until unit stops. This will purge
the carburettor of fuel.
6.
Allow engine to cool (approx. 5 minutes).
7. Using a spark plug wrench, remove the spark
plug.
8.
Pour 1 teaspoon of clean 2-cycle oil into the com-
bustion chamber. Pull starter rope slowly several
times to coat internal components. Replace spark
plug.
9.
Store unit in a cool, dry place away from any
source of ignition such as an oil burner, water
heater, etc.
10.
Do not transport and store the trimmer with the
blade fitted unless the supplied transport guard is
also fitted
9
REMOVING A UNIT FROM
STORAGE
1. Remove
spark
plus.
2.
Pull starter rope briskly to clear excess oil from
combustion chamber.
3.
Clean and gap spark plug or install a new spark
plug with proper gap.
4.
Prepare unit for operation.
5. Fill fuel tank with proper fuel / oil mixture.
See Fuel and Lubrication Section


