
Духовые шкафы Kuppersberg HO 658 W - инструкция пользователя по применению, эксплуатации и установке на русском языке. Мы надеемся, она поможет вам решить возникшие у вас вопросы при эксплуатации техники.
Если остались вопросы, задайте их в комментариях после инструкции.
"Загружаем инструкцию", означает, что нужно подождать пока файл загрузится и можно будет его читать онлайн. Некоторые инструкции очень большие и время их появления зависит от вашей скорости интернета.


8
9
Technical passporT
english
english
Technical passporT
electric oven
electric oven
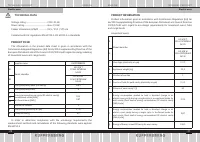
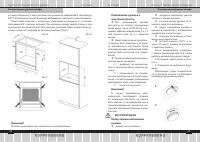
electrical connection
The oven is manufactured to work
with a one-phase alternating current
(230V 1N~50 Hz) and is equipped with
a 3 x 1,5 mm2 connection lead of 1.5
mm length with a plug including a
protection contact.
A connection socket for electricity
supply should be equipped with a
protection pin and may not be located
above the cooker. After the cooker is
positioned, it is necessary to make the
connection socket accessible to the
user.
Before connecting the oven to
the socket, check if:
the fuse and electricity supply
are able to withstand the cooker load,
the electricity supply is
equipped with an effi cacious ground
system which meets the requirements of
current standards and provisions,
the plug is within easy reach.
important!
If the fi xed power supply cable
is damaged, it should be replaced at
the manufacturer or at an au thorized
servicing outlet, or by a qualifi ed person
to avoid danger.
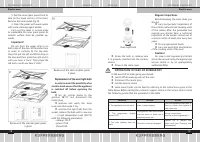
O P e rat i O N
before using the oven for the
fi rst time
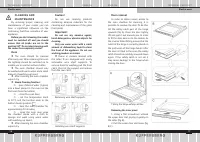
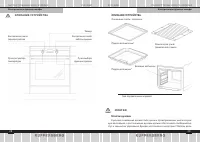
Remove packaging, clean the
interior of the oven and the hob.
Take out and wash the oven
fi ttings with warm water and a little
washing–up liq uid.
Switch on the ventillation in the
room or open a window.
Heat the oven (to a temperature
of 250°C, for approx. 30 min.), remove
any stains and wash carefully; the
heating zones of the hob should be
heated for around 4 min. without a pan.
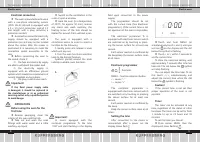
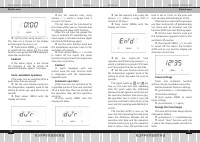
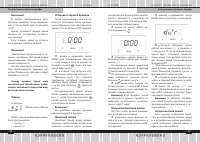
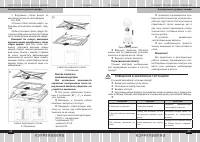
The oven is equipped with a
retractable knobs. In order to select a
function do the following:
1. Gently press and release a knob
which will pop out,
2. Turn the oven functions selection
knob to the desired function.
Symbols printed around the knob
indicate available oven functions.
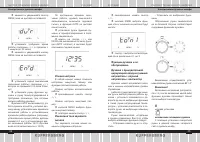
1.
2.
important!
In ovens equipped with the
electronic programmer Ts, the time
“0.00” will start fl ashing in the display
fi eld upon connection to the power
supply.
The programmer should be set
with the current time. (See Electronic
programmer ). If the current time is not
set operation of the oven is impossible.
The electronic prgrammer Ts is
equipped with electronic sensors which
are switched on by touching or press-
ing the sensor surface for at least one
second.
Each sensor reaction is confi rmed by
the beep.Keep the sensor surface clean
at all times.
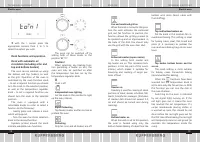
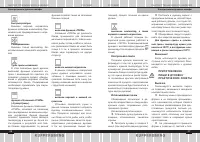
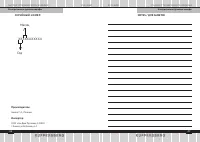
electronic programmer
functions
MENU – function selection button
< – sensor “–”
> – sensor “+”
The electronic prgrammer is
equipped with electronic sensors which
are switched on by touching or pressing
the sensor surface for at least one
second.
Each sensor reaction is confi rmed by
the beep.
Keep the sensor surface clean at all
times.
Setting the time
After connection to the mains or
reconnec
tion after a power cut the
display shows fl ash
Touch and hold MENU (or
si
multaneously touch < and >) until you
will see on the display and the dot
below the symbol is fl ashing,
Touch < or > within 7 seconds to
set the current time.
To store the new time setting, wait
approxi mately 7 seconds after time has
been set. The dot below the symbol
will stop fl ashing.
You can adjust the time later. To do
this touch < / >, simultaneously and
adjust the current time while the dot
below the
symbol is fl ashing.
Caution!
If the correct time is not set then
proper opera tion of the oven is not
possible.
timer
The timer can be activated at any
time, re gardless of the status of other
functions. The timer can be set for from
1 minute to up to 23 hours and 59
minutes.
To set the timer you should:
Press sensor MENU, then the
display will show fl ashing
,
Содержание
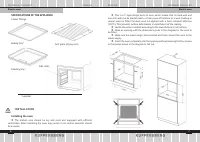
- 14 РАСПАКОВКА
- 15 О П И СА Н И Е УС Т Р О Й С Т В А; Решетка для гриля; М О Н ТА Ж
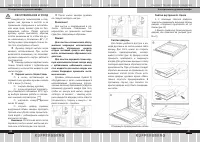
- 16 Подключение духовки к
- 17 Камеру духовки нужно мыть; Таймер
- 18 независимое освещение духовки
- 20 Поджаривание мяса
- 21 О Б С Л УЖ И В А Н И Е И У Х О Д
- 22 Замена лампочки
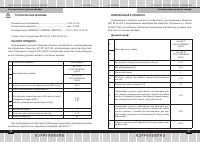
- 23 Т Е Х Н И Ч Е С К И Е Д А Н Н Ы Е; Номинальное напряжение:; ПАСПОРТ ПРОДУКТА; измерения и расчета из следующих стандартов: EN 60350-1; ИНФОРМАЦИЯ О ПРОДУКТЕ
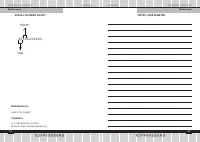
- 24 С Е Р И Й Н Ы Й Н О М Е Р:; Месяц
- 26 О О О «КУ П П Е Р С Б Е Р Г-С Е Р В И С»; УС ТА Н О В КА, ГА РА Н Т И Й Н О Е И П О С Т ГА РА Н Т И Й Н О Е О Б С Л УЖ И В А Н И Е; Телефон горячей линии Kuppersberg:; Полный список авторизованных сервисных центров Kuppersberg; УСЛОВИЯ ГАРАНТИИ


