
Водонагреватели Timberk SWH FSL3 100 VH - инструкция пользователя по применению, эксплуатации и установке на русском языке. Мы надеемся, она поможет вам решить возникшие у вас вопросы при эксплуатации техники.
Если остались вопросы, задайте их в комментариях после инструкции.
"Загружаем инструкцию", означает, что нужно подождать пока файл загрузится и можно будет его читать онлайн. Некоторые инструкции очень большие и время их появления зависит от вашей скорости интернета.


www.timberk.com • electrical storage water heater
7
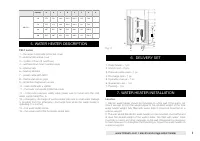
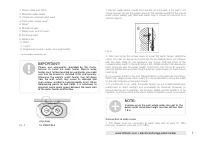
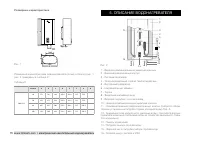
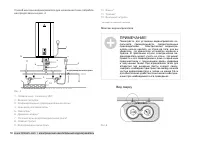
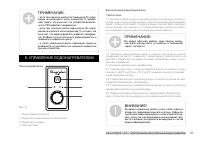
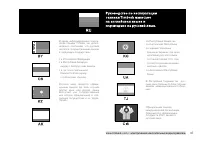
1. Power cable with GFCI
2. Mounted water heater
3. Composite pressure-relief valve
4. Cold water supply valve*
5. Mixer*
6. Shower header*
7. Water main shut-off valve
8. Discharge pipe
9. Water main
10. Bath*
11. T-joint*
12. Magnesium anode – water discharge nozzle
* not included in the delivery set
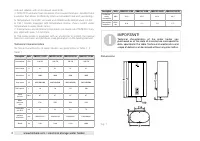
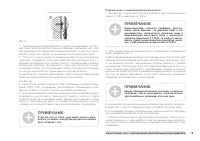
IMPORTANT!
Please, use accessories, provided by the manu-
facturer, to install the water heater. Electric water
heater must not be mounted on a wall prior you make
sure that the bracket is installed firmly and securely.
Otherwise the electric water heater may fall down
from the wall, which may cause its damage and
even serious accidents involving bodily injury. When
determining points for bolt holes, it is necessary to
provision some spare space between the lower part
of the water heater and the floor.
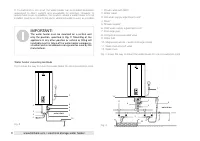
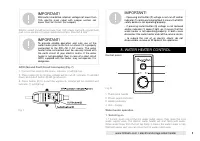
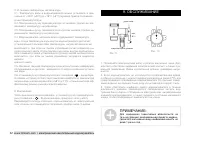
(top view)
for SWH FSL3
Fig. 5
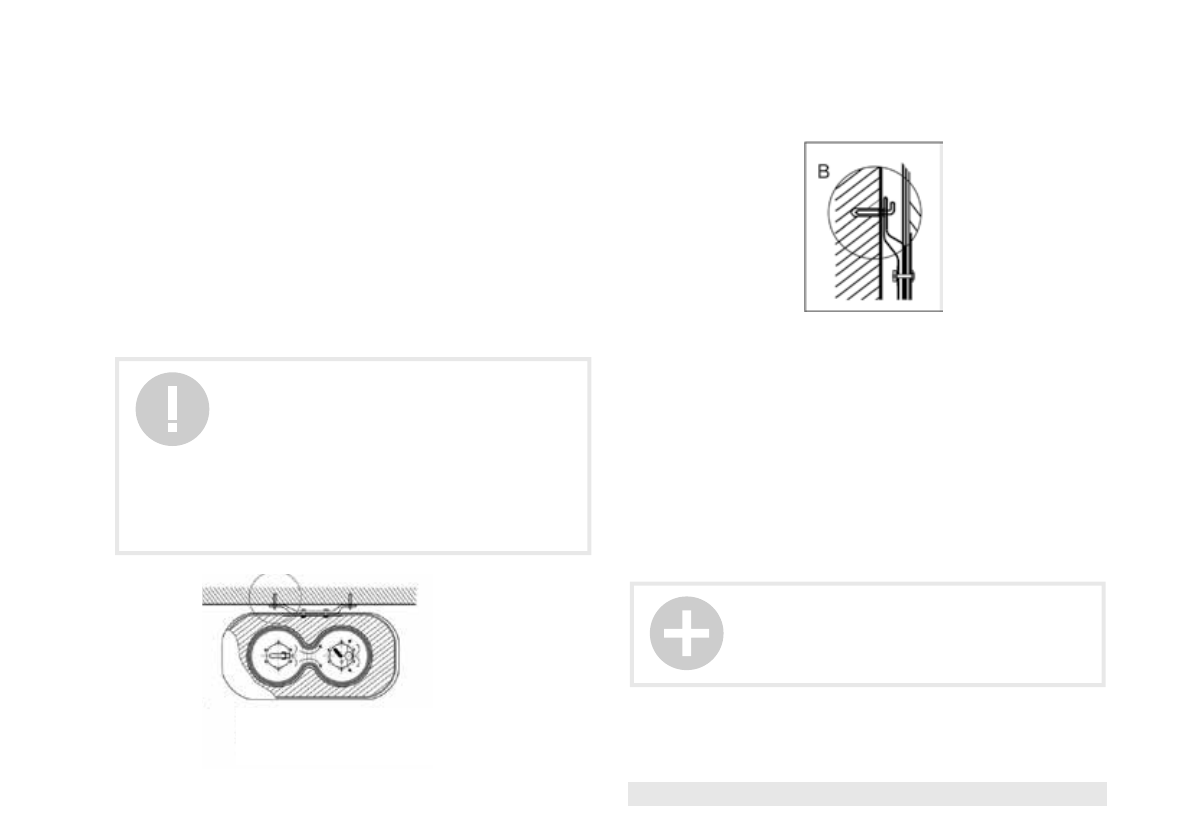
1. Electric water heater should be mounted on a firm wall. If the wall is not
robust enough to hold the weight equal to the doubled weight of the overall
water heater weight, fully filled with water, then it should be mounted on a
special support.
Fig. 6
2. After you chose the proper place to install the water heater, determine
points for holes for expansion hook bolts (to be determined in accordance
with the data sheet for the appliance you chose). Drill two holes of the
corresponding depth in the wall using a drill, dimensionally fit for expansion
bolts, enclosed with the water heater, insert bolts, turn the hook upwards,
securely tighten nuts and then hang the electric water heater on these hooks
(see Fig. 6).
3. Fix a power outlet to the wall. Requirements to the outlet are as follows:
230V/10A, single-phase, three-wired. It is recommended to place the outlet
on the right side above the water heater.
4. If a bathroom is too small, the water heater can be installed elsewhere,
unexposed to direct sunlight and unavailable for moisture. However, to
reduce heat losses in pipelines, the location, where a water heater is to be
installed, must be as close to the place, where hot water is used, as possible.
Connection to water main
1. The heater must be connected to water main with at least 0.1 MPa
pressure; maximum pressure is 0.7 MPa.
NOTE:
In places or on the wall, where water may get to, the
power outlet installation height must be not less than
1.8 m.
Содержание
- 13 Уважаемый покупатель!; Важные меры предосторожности и инструкции, со-; СОДЕРЖАНИЕ
- 14 МЕРЫ ПРЕДОСТОРОЖНОСТИ
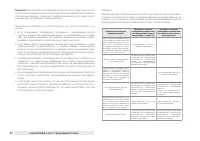
- 15 РАБОЧИЕ ХАРАКТЕРИСТИКИ; Основные особенности; НАЗНАЧЕНИЕ ПРИБОРА; Технические характеристики
- 16 ОПИСАНИЕ ВОДОНАГРЕВАТЕЛЯ; Таблица 2
- 17 КОМПЛЕКТ ПОСТАВКИ; Местоположение; Способы монтажа водонагревателя; Способ монтажа водонагревателя для одной точки потребления
- 18 Способ монтажа водонагревателя для нескольких точек потребле-; Монтаж водонагревателя; Вид сверху
- 21 УПРАВЛЕНИЕ ВОДОНАГРЕВАТЕЛЕМ; Панельуправления
- 22 Для сохранения гарантийных обязательств на
- 23 УСТРАНЕНИЕ НЕИСПРАВНОСТЕЙ
- 24 ЭЛЕКТРИЧЕСКАЯ ПРИНЦИПИАЛЬНАЯ СХЕМА; СЕРИЙНЫЙ НОМЕР И ДАТА ПРОИЗВОДСТВА
- 27 Гарантийные обязательства; Если при эксплуатации изделия Вы столкнулись с неполадками в его
- 29 Изготовитель не несет гарантийных обязательств за изделие в
- 31 ным письмом Производителя.
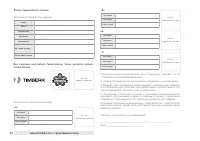
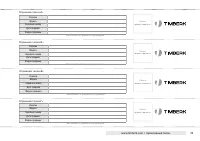
- 32 Бланк гарантийного талона.; Заполняется фирмой-продавцом; Без подписи покупателя Гарантийный талон является недей-; ности (если прибор провер ялся в его присутствии при продаже) приоб-
- 39 сообщите нам об этом, связавшись с нами по электронной почте,


