Водонагреватели AEG DDLT PinControl 13 / 18 / 21 / 24 - инструкция пользователя по применению, эксплуатации и установке на русском языке. Мы надеемся, она поможет вам решить возникшие у вас вопросы при эксплуатации техники.
Если остались вопросы, задайте их в комментариях после инструкции.
"Загружаем инструкцию", означает, что нужно подождать пока файл загрузится и можно будет его читать онлайн. Некоторые инструкции очень большие и время их появления зависит от вашей скорости интернета.


30
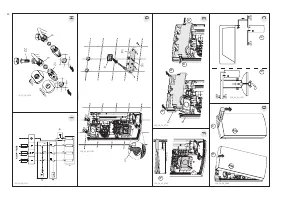
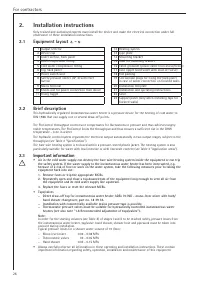
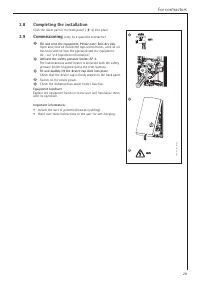
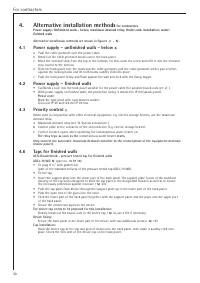
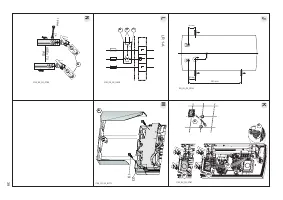
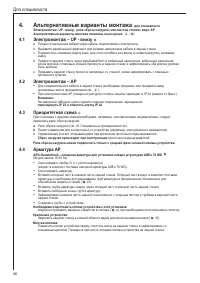
For contractors
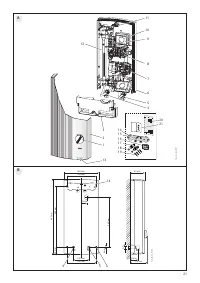
Alternative installation methods are shown in figures
J
-
N
.
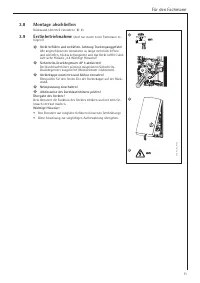
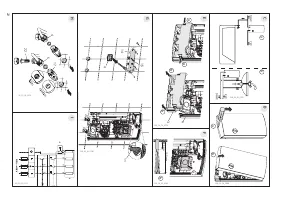
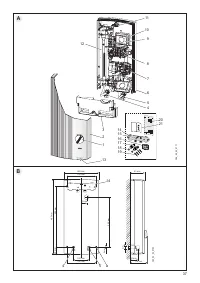
4.1
Power supply – unfinished walls - below
K
a Push the cable grommet over the power cable.
b Break out the cable grommet knock-out in the back panel.
c Movetheterminalstripfromthetoptothebottom;forthis,undothescrewandreititintotheterminal
strip moved to the bottom.
d Slide the back panel over the studs and the cable grommet, pull the cable grommet with a pair of pliers
against the locking hooks and let both hooks audibly click into place.
e Pushthebackpanelirmlyandlushagainstthewallandlockwiththeixingtoggle.
4.2
Power supply – finished walls
• Cut/breakaholeintothebackpanelsuitableforthepowercable(forpossibleknock-outssee
J
).
• Withpowersupplyoninishedwalls,theprotectionratingisreducedtoIP24(splash-proof).
Please note:
Mark the type plate with a permanent marker:
Cross out IP 25 and tick the IP 24 box.
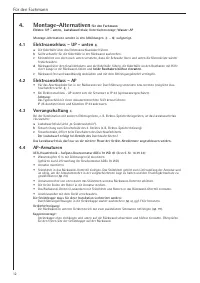
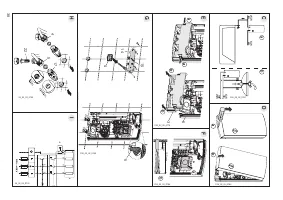
4.3
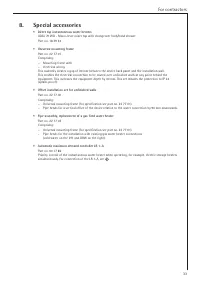
Priority control
L
When used in conjunction with other electrical equipment, e.g. electric storage heaters, use the maximum
demand relay:
a
Maximum demand relay (see "8. Special accessories").
b
Control cable to the contactor of the second device (e.g. electric storage heater).
c
Control contact, opens when switching the instantaneous water heater on.
The relay trips as soon as the
instantaneous water heater
starts.
Only connect the automatic maximum demand controller to the central phase of the equipment terminals
(mains power).
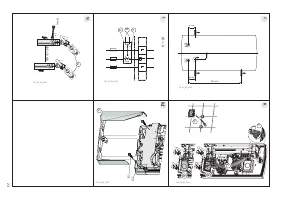
4.6
Taps for finished walls
AEG-Haustechnik - pressure tested tap for finished walls
ADEo 70 WD
N
(part no. 18 39 34)
:
• FitplugG½"withgaskets(a)
(part of the standard delivery of the pressure tested tap ADEo 70 WD).
• Fitthetap.
• Insertthesupportplateintothelowerpartofthebackpanel.Thesupportplateispartofthestandard
delivery of the tap and is designed to hold the tap pipes in the designated location as well as to ensure
the necessary protection against moisture (
M
23).
•
Push the tap pipes from above through the support plate up to the lower part of the back panel.
• Pushtheopenendofthepipesintothevalve.
• Clickthelowerpartofthebackpaneltogetherwiththesupportpanelandthepipesintotheupperpart
of the back panel.
• Securetheconnectionpipesonthedevice.
The device cap needs to be prepared for this installation:
Cleanly break out the knock-outs in the device cap (
M
a),useaileifnecessary.
Device fixing:
Secure the back panel in the lower part of the device with two additional screws (
M
19).
Cap installation:
Hook the device cap at the top and pivot it down onto the back panel, then make it audibly click into
place.
Checktheirmseatofthedevicecaponthebackpanel.
4.
Alternative installation methods
for contractors
Power supply: Unfinished walls - below, maximum demand relay; Under-sink installation; water:
finished walls
Содержание
- 36 Оглавление
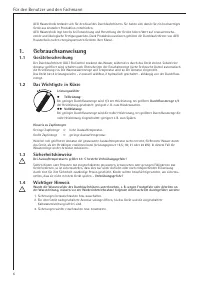
- 40 Для пользователя и специалиста; Описание устройства; Указания по технике безопасности; Руководство по применению
- 41 Продуктивность нагрева горячей воды; Первая помощь при неполадках; Руководство по применению и монтажу
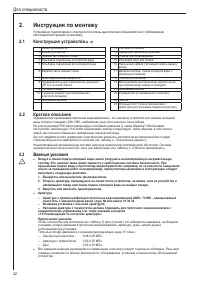
- 42 Конструкция устройства; Для специалиста; Инструкция по монтажу
- 43 Предписания и нормы
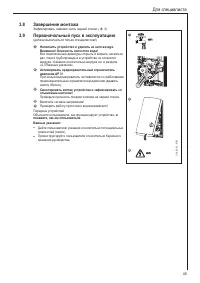
- 44 Стандартный монтаж
- 46 Электромонтаж – UP - внизу; Альтернативные варианты монтажа
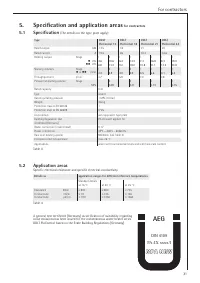
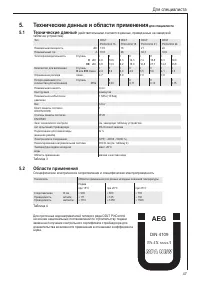
- 47 Технические данные и области применения; Технические данные
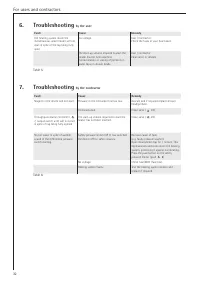
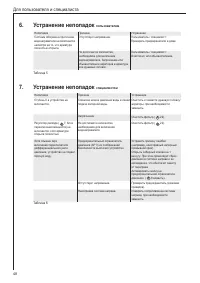
- 48 Устранение неполадок
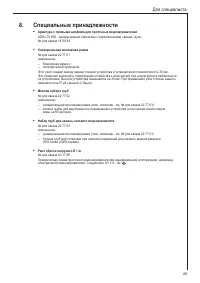
- 49 Специальные принадлежности
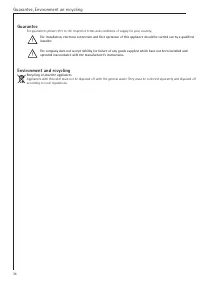
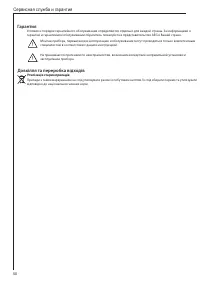
- 50 Сервисная служба и гарантия; Гарантия


