
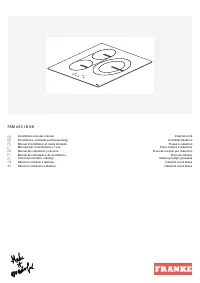
Варочная панель Franke FSM 653 I D BK - инструкция пользователя по применению, эксплуатации и установке на русском языке. Мы надеемся, она поможет вам решить возникшие у вас вопросы при эксплуатации техники.
Если остались вопросы, задайте их в комментариях после инструкции.
"Загружаем инструкцию", означает, что нужно подождать пока файл загрузится и можно будет его читать онлайн. Некоторые инструкции очень большие и время их появления зависит от вашей скорости интернета.


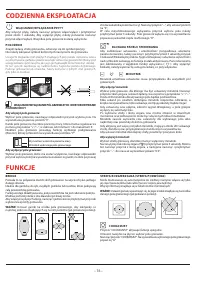
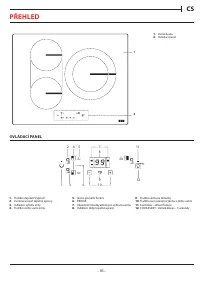


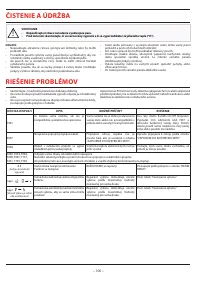


DAILY USE
SWITCHING THE HOB ON/OFF
To turn the hob on, press the power button for around 1 second.
To turn the hob off, press the same button again, and all cooking zones will
be deactivated.
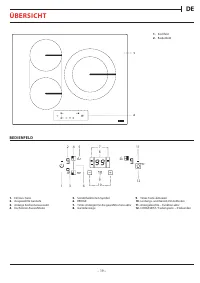
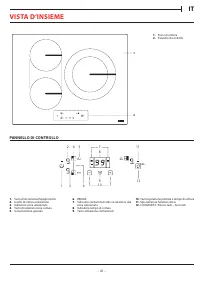
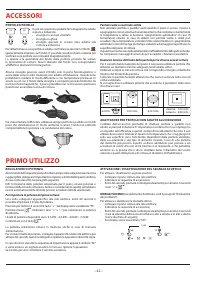
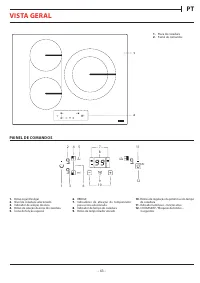
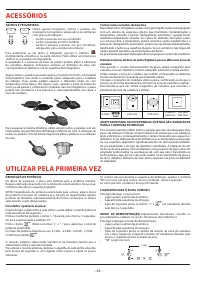
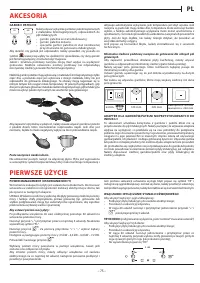
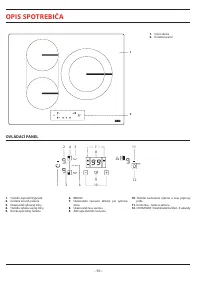
POSITIONING
Locate the desired cooking zone by referring to the position symbols.
Do not cover the control panel symbols with the cooking pot.
Please note: In the cooking zones close to the control panel, it is advisable to
keep pots and pans inside the markings (taking both the bottom of the pan
and the upper edge into consideration, as this tends to be larger).
This prevents excessive overheating of the keypad. When grilling or frying,
please use the rear cooking zones wherever possible.
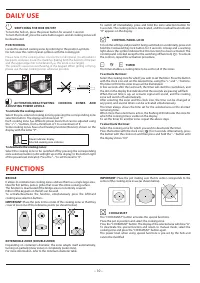
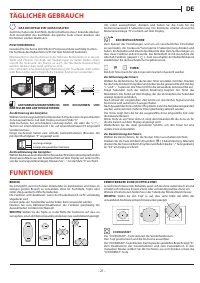
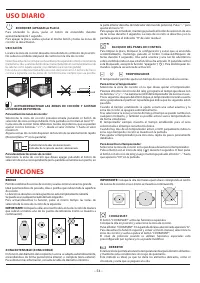
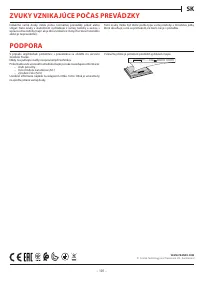
ACTIVATING/DEACTIVATING COOKING ZONES AND
ADJUSTING POWER LEVELS
To activate the cooking zones:
Select the pre-selected cooking zone by pressing the corresponding zone
selection button. The display will show level “0“.
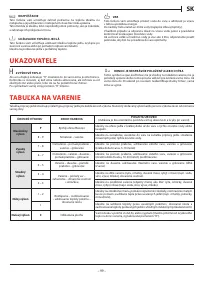
Each cooking zone has different power levels that can be adjusted using
the “+“/“−“ buttons, from a minimum of 1 to a maximum of 9.
Some cooking zones have a fast heating function (Booster), shown on the
display with the letter “P“.
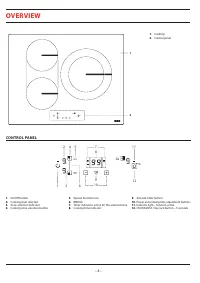
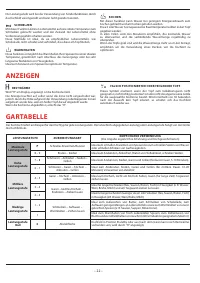
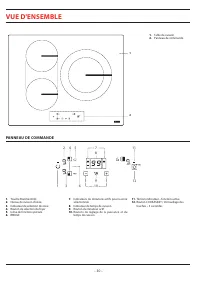
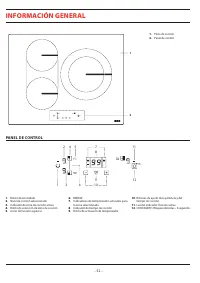
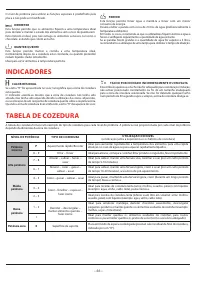
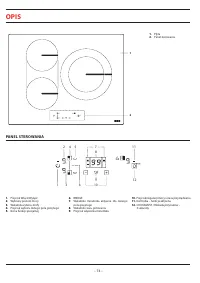
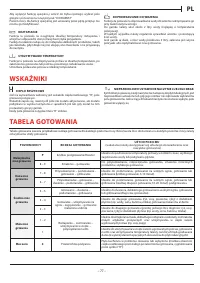
Power indicator display
Selected cooking zone indicator
To deactivate the cooking zones:
Select the cooking zone to be switched off by pressing the corresponding
zone selection button (a dot will light up on the display, to the bottom right
of the power level indicator). Press the “−“ to set the level to “0“.
To switch off immediately, press and hold the zone selection button for
3 seconds. The cooking zone is deactivated, and the residual heat indicator
“H“ appears on the display.
CONTROL PANEL LOCK
To lock the settings and prevent it being switched on accidentally, press and
hold the Cookassist/Key lock button for 3 seconds. A beep and a warning
light above the symbol indicate that this function has been activated. The
control panel is locked except for the switching off function( ). To unlock
the controls, repeat the activation procedure.
TIMER
The timer enables a cooking time to be set for all of the zones.
To activate the timer
:
Select the cooking zone for which you wish to set the timer. Press the button
with the clock icon and set the desired time, using the “+“ and “−“ buttons.
The timer LED for the zone in use will be illuminated.
A few seconds after the last touch, the timer will start the countdown, and
the dot on the display that indicates that the seconds are passing will flash.
When the set time is up, an acoustic signal will sound, and the cooking
zone will switch off automatically.
After selecting the zone and the clock icon, the time can be changed at
any point, and several timers can be activated simultaneously.
The timer always shows the time set for the selected area or the shortest
remaining time.
When more than one timer is active, the flashing LED indicates the zone for
which the cooking time is visible on the display.
To set the timer for another zone, repeat the above steps.
To deactivate the timer:
Select the cooking zone for which you wish to deactivate the timer.
Press the button with the clock icon (
) for 3 seconds. Alternatively, press
the button with the clock icon and then press and hold the “−“ button until
the display shows “0:0“.
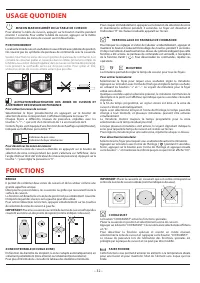
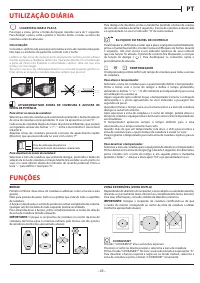
FUNCTIONS
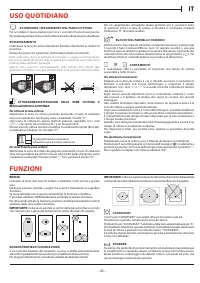
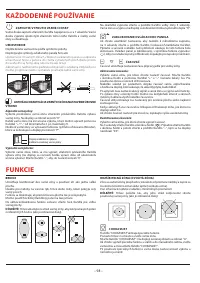
BRIDGE
It allows to combine two cooking zones and use them as a single large area.
Ideal for fish kettles, pots or grilles that cover the entire cooking surface.
The function is deactivated if the bridge area is not entirely covered.
Either of the keypads on the left can be used.
To activate/deactivate the function, simultaneously press the left-hand
cooking area selection buttons.
IMPORTANT:
Place the pots in the center of the cooking zone so that they
cover at least one of the reference points (as shown below).
EXTENDIBLE ZONE (DOUBLE ZONE)
Depending on container's diameter, the zone adapts itself automatically,
turning on partially (inner zone) or completely (outer zone).
For more information, refer to the minimum diameter table.
IMPORTANT:
Place the pot making sure that its center corresponds to the
center of the cooking zone in use (as shown below).
COOK ASSIST
The “COOKASSIST“ button activates the special functions.
Place the pot in position and select the cooking zone.
Press the “COOKASSIST“ button. The display of the selected area will show “A“.
To deactivate the special function and return to manual mode, select the
cooking zone and press the “COOKASSIST“ button again.
The power level when using special functions is pre-set by the hob and
cannot be modified.
– 10 –
Характеристики

Остались вопросы?Не нашли свой ответ в руководстве или возникли другие проблемы? Задайте свой вопрос в форме ниже с подробным описанием вашей ситуации, чтобы другие люди и специалисты смогли дать на него ответ. Если вы знаете как решить проблему другого человека, пожалуйста, подскажите ему :)


