
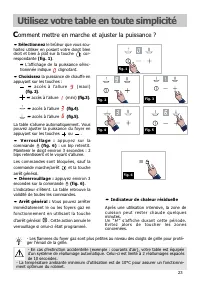
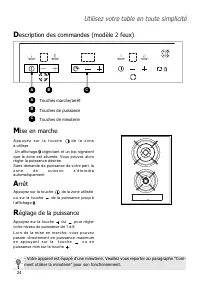
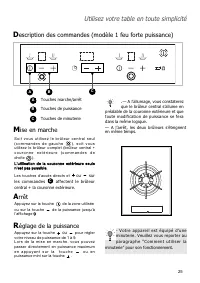
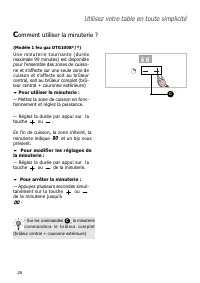
Варочная панель De Dietrich DTG 1008 X - инструкция пользователя по применению, эксплуатации и установке на русском языке. Мы надеемся, она поможет вам решить возникшие у вас вопросы при эксплуатации техники.
Если остались вопросы, задайте их в комментариях после инструкции.
"Загружаем инструкцию", означает, что нужно подождать пока файл загрузится и можно будет его читать онлайн. Некоторые инструкции очень большие и время их появления зависит от вашей скорости интернета.


C
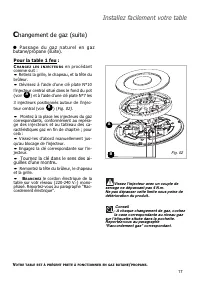
hanging the type of gas supply (cont'd)
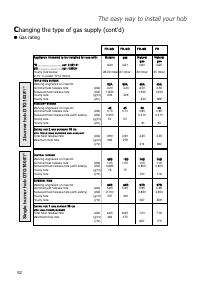
●
Changing from butane / propane gas
to natural gas
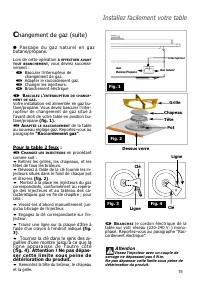
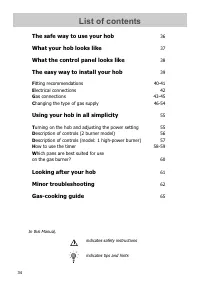
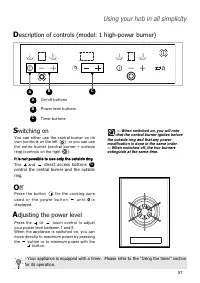
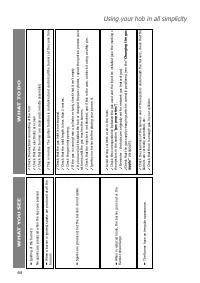
The easy way to install your hob
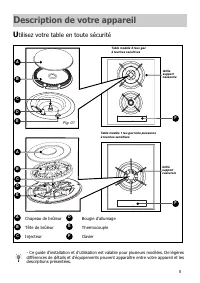
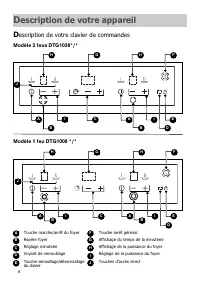
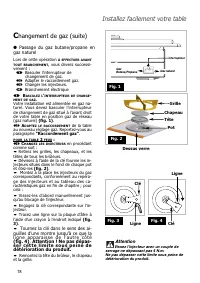
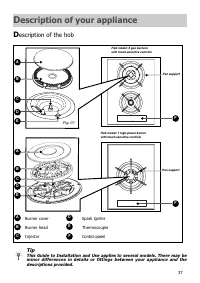
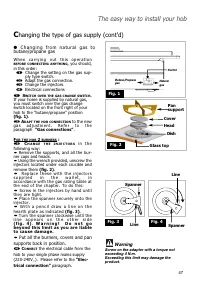
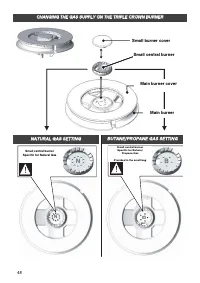
Cover
Head
Dish
Pan
support
Glass top
Fig. 2
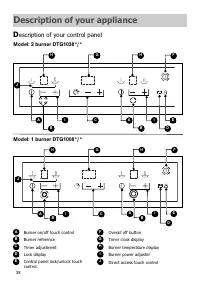
Switch
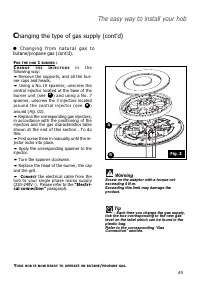
Fig. 1
Natural
gas
Butane/Propane
gas
50
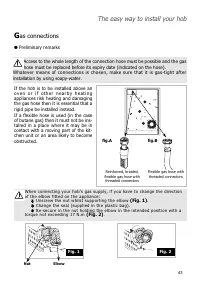
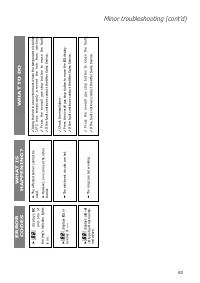
W h e n c a r r y i n g o u t t h i s o p e r a t i o n
BEFORE CONNECTING ANYTHING
, you should
successively:
➊
Change the setting on the gas sup-
ply tpe switch.
❷
Adapt the gas connection.
❸
Change the injectors.
➍
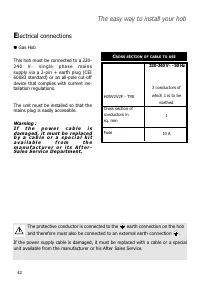
Electrical connections
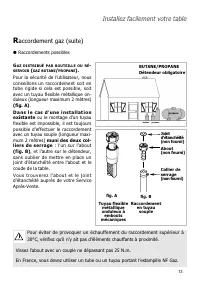
➊
S
WITCH OVER THE GAS CHANGE SWITCH
.
If your home is supplied by butane/propa-
n e g a s , y o u m u s t s w i t c h o v e r t h e g a s
change switch located on the front right of
your hob to the mains gas (natural gas)
position
(fig. 1)
.
❷
A
DAPT THE HOB CONNECTION
to the new
g a s a d j u s t m e n t . R e f e r t o t h e
paragraph
“Gas connections”
.
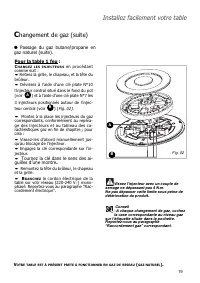
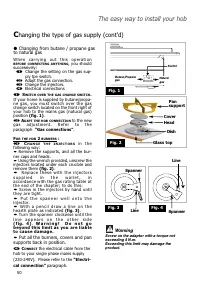
F
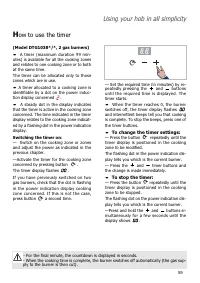
OR THE HOB
2
BURNERS
:
❸
C
H A N G E
T H E
I N J E C T O R S
i n t h e
following way:
• Remove the supports, and all the bur-
ner caps and heads.
• Using the wrench provided, unscrew the
injectors located under each crucible and
remove them
(fig. 2)
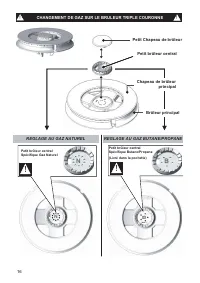
.
•
R e p l a c e t h e s e w i t h t h e i n j e c t o r s
s u p p l i e d i n t h e w a l l e t , i n
accordance with the gas rating table at
the end of the chapter; to do this:
•
Screw in the injectors by hand until
they are tight.
•
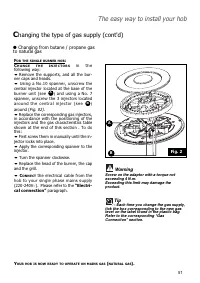
P u t t h e s p a n n e r w e l l o n t o t h e
injector.
•
W i t h a p e n c i l d r a w a l i n e o n t h e
hearth plate as indicated
(fig. 3)
.
•
Turn the spanner clockwise until the
l i n e a p p e a r s o n t h e o t h e r s i d e
( f i g . 4 )
.
W a r n i n g ! D o n o t g o
b e y o n d t h i s l i m i t a s y o u a r e l i a b l e
t o c a u s e d a m a g e .
• Put all the burners, covers and pan
supports back in position.
➍
C
ONNECT
the electrical cable from the
hob to your single phase mains supply
(220-240V). Please refer to the
“Electri-
cal connection”
paragraph.
Spanner
Spanner
Line
Line
Fig. 4
Fig. 3
Warning
Screw on the adaptor with a torque not
exceeding 4 N.m.
Exceeding this limit may damage the
product.
Характеристики

Остались вопросы?Не нашли свой ответ в руководстве или возникли другие проблемы? Задайте свой вопрос в форме ниже с подробным описанием вашей ситуации, чтобы другие люди и специалисты смогли дать на него ответ. Если вы знаете как решить проблему другого человека, пожалуйста, подскажите ему :)


