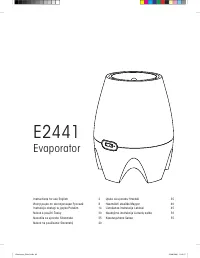
Увлажнители Boneco E2441A - инструкция пользователя по применению, эксплуатации и установке на русском языке. Мы надеемся, она поможет вам решить возникшие у вас вопросы при эксплуатации техники.
Если остались вопросы, задайте их в комментариях после инструкции.
"Загружаем инструкцию", означает, что нужно подождать пока файл загрузится и можно будет его читать онлайн. Некоторые инструкции очень большие и время их появления зависит от вашей скорости интернета.


5
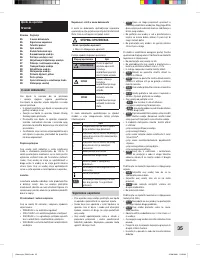
CAUTION
Damage to and cracks in the plastic caused by
additives in the water!
Do not put any additives (e.g. essential oils or
other fragrances) into the water.
Ensure that there are no water-soluble additives
(e.g. plant fertilizer) in a container before using
it to fill the unit.
Ⴇ
Ⴇ
CAUTION
Water damage due to overfilling!
When filling, do not exceed the maximum filling
capacity of 3.8 l, indicated by the filling level
line.
Ⴇ
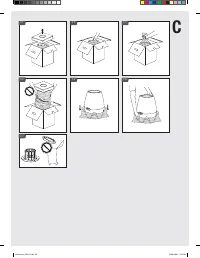
Filling the unit at the filling opening:
Fill the unit with a clean container (e.g. a
jar or a watering can).
Pour fresh, cold water into the filling
opening of the upper part with a clean container.
Stop filling the unit as soon as the water
level indicator ring of the float appears in the fill-
ing opening.
The unit is filled with water and can be switched
on.
Filling the unit at the water base:
((
The unit is switched off and the power
plug is unplugged (see chapter "Switching the
unit on and off").
Lift the upper part from the base.
Lift the water base including the float as-
sembly by the base handles.
Fill fresh, cold water directly into the wa-
ter base.
Only pour water in until the maximum wa-
ter capacity fill line on the inner side of the water
base is reached.
Place the filled water base including the float as-
sembly onto the base.
Place the upper part on the base.
The unit is filled with water and can be switched
on.
Switching the unit on and off
If the unit is put into operation with an empty
water base or if the water base goes empty dur-
ing operation, the evaporator wick dries out, no
evaporation is generated and an unpleasant odor
can result.
The unit is filled with water.
Plug the power plug into the electrical socket.
Set the slide switch to position I or position II
according to your needs (see chapter "Operating
modes").
The unit is switched on.
Set the slide switch to position 0.
WARNING
Danger to life through electrical shock!
Do not unplug the unit from the electrical socket
with wet hands.
Ⴇ
1.
2.
3.
ᇒ
ᅛ
1.
2.
3.
4.
5.
6.
ᇒ
ᅛ
1.
2.
ᇒ
1.
D 1
D 1
D 2
D 2
D 3
D 3
E 1
E 1
E 2
E 2
E 3
E 3
E 4
E 4
E 4
E 4
Switching the unit on and off
Unplug the power plug.
The unit is switched off and currentless.
Cleaning and servicing the unit
With increasing operating time, the air through-
put and evaporator performance of the evaporator
wick decrease. Therefore, regular maintenance and
cleaning of the unit is a requirement for smooth and
trouble-free operation.
CAUTION
Damage to the plastic due to unsuitable clean-
ing agents!
Do not use acidic cleaning agents.
Ⴇ
Wipe the unit with a damp cloth.
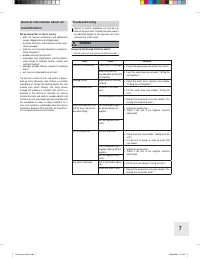
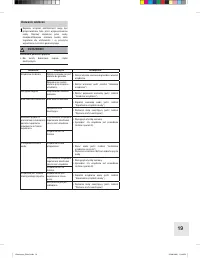
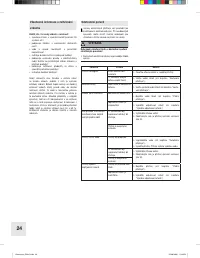
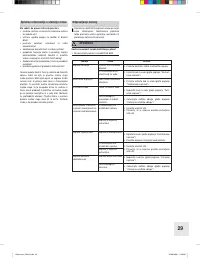
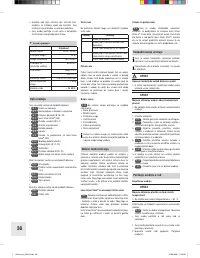
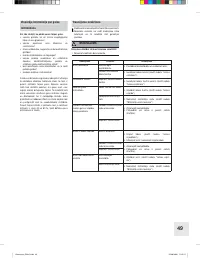
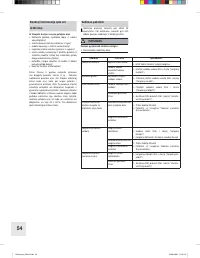
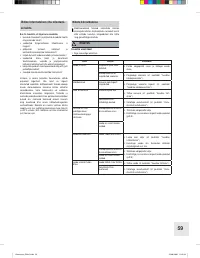
Cleaning and servicing intervals
Recommended cleaning and servic-
ing intervals depend on air and water qual-
ity as well as actual operating time.
Interval
Activity
once a day
Check water level,
if necessary, refill water (see
chapter "Filling the unit")
1 week or
more without
operation
Empty and clean the unit (see
chapter "Taking apart and
emptying the unit")
every 2 weeks
Clean water base (see chapter
"Cleaning the water base")
every 10–12
weeks (or as
needed)
Replace the evaporator wick
(see chapter "Replacing the
evaporator wick")
1–2 times a
year
Clean the fan (see chapter
"Cleaning the fan")
once a year
Replace Ionic Silver Stick
®
(see chapter "Replacing the
Ionic Silver Stick
®
")
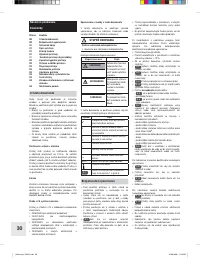
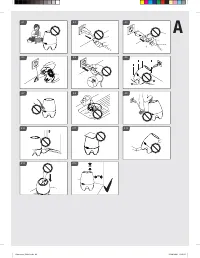
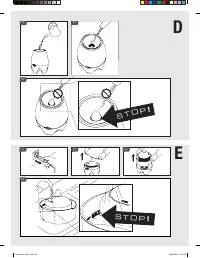
Taking apart and emptying the unit
The unit can easily be taken apart for cleaning.
WARNING
Danger to life through electrical shock!
Do not unplug the unit from the electrical socket
with wet hands.
Ⴇ
The unit is switched off and the power
plug is unplugged
Lift the upper part from the base.
Remove the water base including float as-
sembly using the provided base handles.
Empty the residual water from the water
base using the spout.
Remove the float assembly from the emp-
ty water base.
2.
ᇒ
Ⴇ
ᅛ
1.
2.
3.
4.
E 1
E 1
Cleaning and servicing the unit
F 1
F 1
F 3
F 3
F 4
F 4
F 5
F 5
F 6
F 6
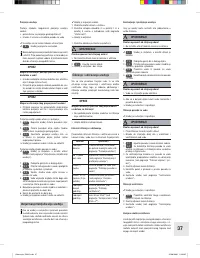
WARNING
Danger to life through electrical shock!
Do not empty water over the electrical part.
Ⴇ
If water is in the base: Empty and dry the base.
The unit is taken apart and emptied from water.
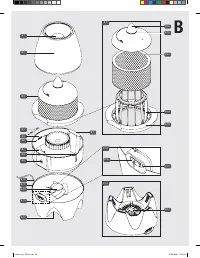
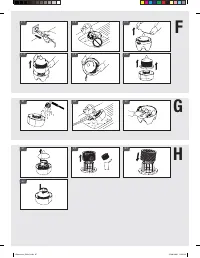
Cleaning the water base
Unit is taken apart and emptied from water
WARNING
Danger to life through electrical shock!
Unplug the power plug prior to cleaning.
Never submerge the base with the electrical part
and the fan in water.
Ⴇ
Ⴇ
Rinse out the water base with lukewarm
water.
For more thorough cleaning, clean the
water base with a commercial dish brush.
To decalcify the water base, use the recommend-
ed decalcification agent (see chapter "Spare
parts and accessories").
Dry the parts after cleaning.
Insert the float assembly into the empty water
base.
Put the unit together (see chapter "Putting the
unit together").
Cleaning the fan
Unit is taken apart and emptied from water.
Wipe off the fan with a slightly damp
cloth or cleaning rag.
Dry the parts after cleaning.
Put the unit together (see chapter "Putting the
unit together").
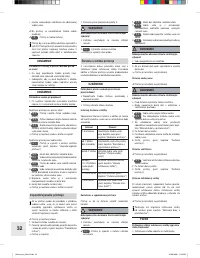
Replacing the evaporator wick
The evaporator wick should be replaced in the case
of heavy pollution, calcification, unpleasant odor,
reduced air throughput, etc. Evaporator wicks are
available from the specialty retailer where you pur-
chased the unit.
Unit is taken apart and emptied from water.
Only use the manufacturer's original evaporator
wicks (see chapter "Spare parts and accesso-
ries").
CAUTION
Damage to the damp evaporator wick due to
rinsing or wringing!
Do not rinse or wring out the evaporator wick.
Ⴇ
To open the float assembly, turn the float
tip counter-clockwise (OPEN arrow) and pull up.
Pull the used evaporator wick up and out
of the float basket and discard it.
5.
ᇒ
ᅛ
1.
2.
3.
4.
5.
6.
ᅛ
1.
2.
3.
ᅛ
1.
2.
G 1
G 1
G 2
G 2
G 3
G 3
H 1
H 1
H 2
H 2
Osteuropa_E2441.indb 5
25.06.2008 11:04:50

