Телескопы Bresser National Geographic 76 700 EQ - инструкция пользователя по применению, эксплуатации и установке на русском языке. Мы надеемся, она поможет вам решить возникшие у вас вопросы при эксплуатации техники.
Если остались вопросы, задайте их в комментариях после инструкции.
"Загружаем инструкцию", означает, что нужно подождать пока файл загрузится и можно будет его читать онлайн. Некоторые инструкции очень большие и время их появления зависит от вашей скорости интернета.


12
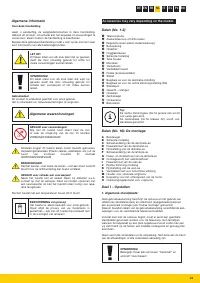
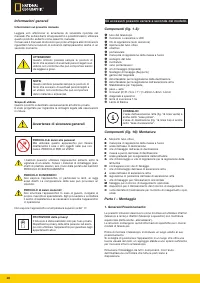
General Information
About this Instruction Manual
Please read the safety instructions in this manual carefully. To avoid
damage to the unit and the risk of injury, only use this product as
described in the manual.
Keep the instruction manual handy so that you can easily look up
information on all the functions.
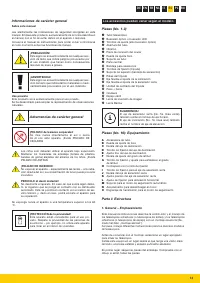
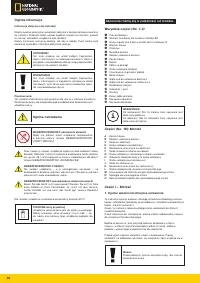
CAREFUL!
You will find this symbol before every section of
text that deals with the risk of minor to severe
injuries resulting from improper use.
NOTE!
You will find this symbol in front of every section
of text which deals with the risk of damage to
property or the environment.
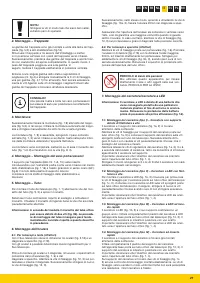
Intended Use
This product is intended only for private use.
It was developed for the magnified display of things in nature.
General Warning
Risk of bodily injury!
Never use this device to look directly at the sun or
in the direct proximity of the sun. This will result in
a risk of blindness.
Children should only use the device under adult supervision.
Keep packaging material , like plastic bags and rubber bands,
out of the reach of children, as they pose a choking hazard.
FIRE RISK!
Do not place the device, particularly the lenses, in direct sun-
light. The concentration of light could cause a fire.
Risk of property damage!
Do not disassemble the device. In the event of a defect, please
contact your dealer. The dealer will contact the Service Centre
and can send the device in to be repaired, if necessary.
Do not expose the device to temperatures above 60°C.
Privacy PROTECTION!
This device is intended only for private use.
Please heed the privacy of other people. Do not
use it to look into apartments, for example.
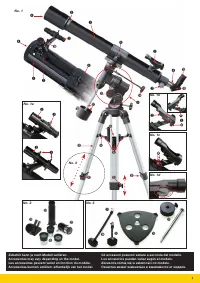
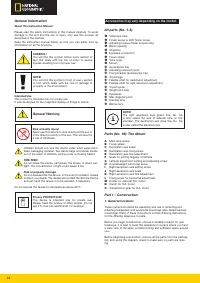
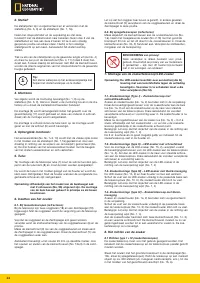
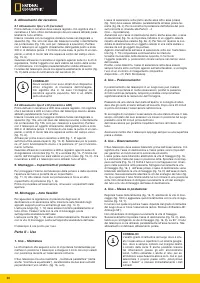
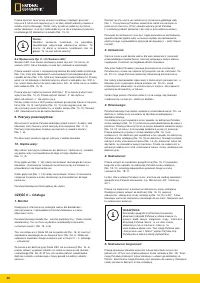
Accessories may vary depending on the model.
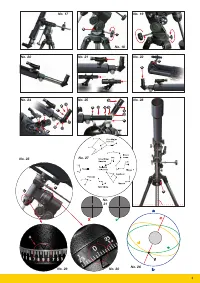
All parts (No. 1-3)
B
Telescope tube
C
Finder scope or LED finder scope
D
Adjusting screws (finder scopes only)
E
Barrel opening
F
Objective
G
Eyepiece connection
H
Focus wheel
I
Tube rings
J
Mount
1)
Accessories tray
1!
Adjusting screws (tripod)
1@
Fixing bracket (accessories tray)
1#
Tripod legs
1$
Flexible shaft for declination adjustment
1%
Flexible shaft for right ascension adjustment
1^
Tripod spider
1&
Weight and pole
1*
Eyepieces
1(
Star diagonal prism
2)
Erecting lens
2!
Barlow lens
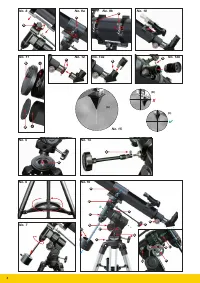
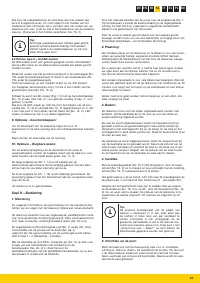
NOTE!
The right ascension axis (green line, No. 16)
is also called the axis of sidereal time on the
meridian. The declination axis (blue line, No. 16)
is also called the elevation axis.
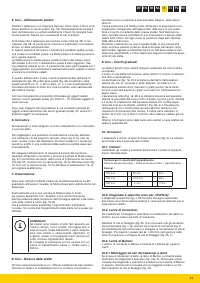
i
Parts (No. 16): The Mount
A
Main tube clamp
B
Focus wheel
C
Declination axis scale
D
Declination axis fixing screw
E
Declination axis fine adjustment
F
Scale for setting degrees of latitude
G
Latitude adjustment setting and adjusting screw
H
Counterweight with fixing screw
I
Right ascension axis setting screw
J
Right ascension axis scale
K
Right ascension axis fine adjustment
L
Fixing screw for horizontal adjustment
M
Holder for optional R.A. motor
N
Clutch for R.A. motor
O
Transmission gear for R.A. motor
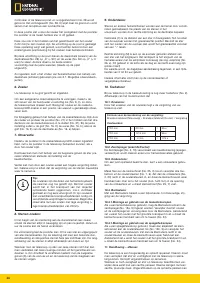
Part I – Construction
1. General/Location:
These instructions detail the assembly and use of refracting and
reflecting telescopes with equatorial mountings (also called German
mountings). Parts of these instructions contain differing instructions
for the differing telescope models.
Before you begin construction, choose a suitable location for your
telescope. It is best to build this appliance in a place where you have
a clear view of the skies, a stable footing and sufficient space around
you.
Before beginning construction, remove all the parts from the packag-
ing, and, using the diagram, check to make sure no parts are miss-
ing.

