
Строительные пылесосы Makita DVC261ZX11 - инструкция пользователя по применению, эксплуатации и установке на русском языке. Мы надеемся, она поможет вам решить возникшие у вас вопросы при эксплуатации техники.
Если остались вопросы, задайте их в комментариях после инструкции.
"Загружаем инструкцию", означает, что нужно подождать пока файл загрузится и можно будет его читать онлайн. Некоторые инструкции очень большие и время их появления зависит от вашей скорости интернета.


12 ENGLISH
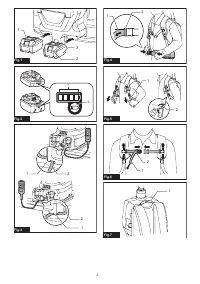
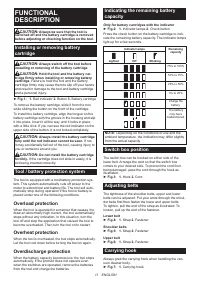
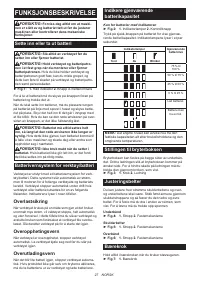
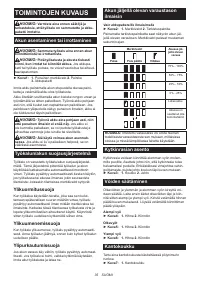
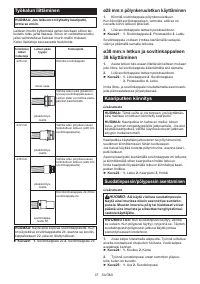
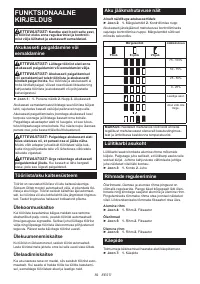
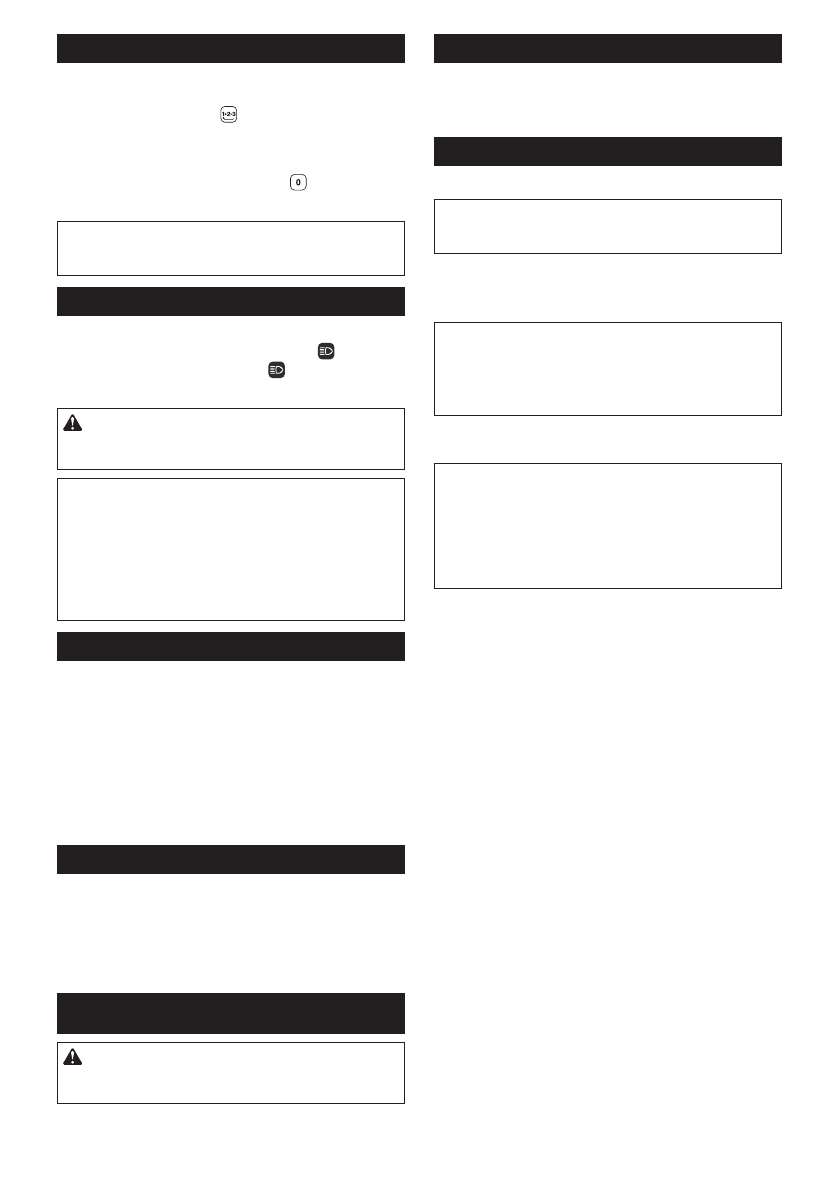
Switch action
You can change the suction power in three steps: nor-
mal (1), high (2), and max (3).
To start vacuuming, press button once. When you
change the suction power, press the button while the
vacuum cleaner is running. The suction power switches
in order normal (1) , high (2) , and max (3).
To turn off the vacuum cleaner, press button.
►
Fig.8
NOTE:
When you start the vacuum cleaner again, it
will start in the same suction power as the previous
setting.
LED light
LED light is installed in the head of the switch box to
ease the operations in dark places. Press button to
turn the light on. To turn off, press button again.
►
Fig.9
CAUTION:
Do not look in the light or see the
source of light directly. Never aim the light to
other people's eyes.
NOTE:
The LED light is automatically turned off when
the vacuum cleaner is not operated for more than 10
minutes.
NOTE:
The vacuum cleaner will automatically
switches off and the LED light flashes when the vac
-
uum cleaner is overheated due to the reduced air-flow
into the machine caused by clogged hose, pipe, filter
or other reasons.
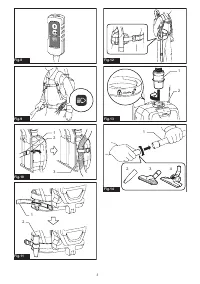
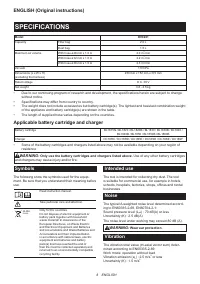
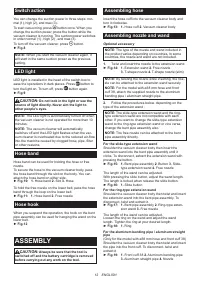
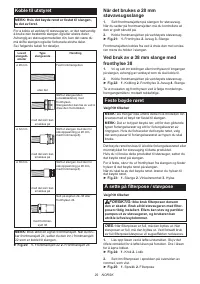
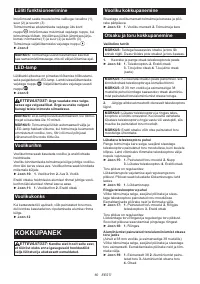
Hose band
Hose band can be used for holding the hose or free
nozzle.
To secure the hose to the vacuum cleaner body, pass
the hose band through the slot on the body. You can
attach the hose band on either side.
►
Fig.10:
1.
Hose band
2.
Slot
3.
Hose
To hold the free nozzle on the lower belt, pass the hose
band through the loop on the lower belt.
►
Fig.11:
1.
Hose band
2.
Free nozzle
Hose hook
When you suspend the operation, the hook on the bent
pipe assembly can be used for hanging the wand on the
lower belt.
►
Fig.12
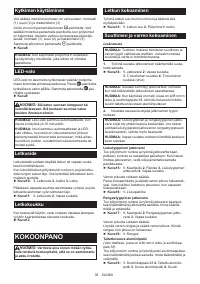
ASSEMBLY
CAUTION:
Always be sure that the tool is
switched off and the battery cartridge is removed
before carrying out any work on the tool.
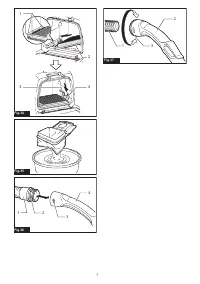
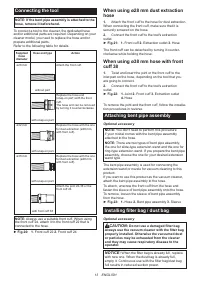
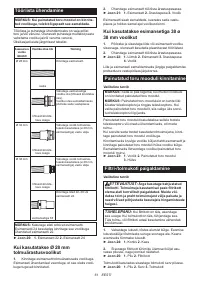
Assembling hose
Insert the hose cuff into the vacuum cleaner body and
turn it clockwise.
►
Fig.13:
1.
Hose cuff
2.
Vacuum cleaner body
Assembling nozzle and wand
Optional accessory
NOTE:
The type of the nozzle and wand included in
the product varies depending on countries. In some
countries, the nozzle and wand are not included.
1.
Twist and insert the nozzle to the extension wand.
►
Fig.14:
1.
Extension wand
2.
Free nozzle
3.
T-shape nozzle
4.
T-shape nozzle (slim)
NOTE:
By twisting the nozzle while inserting, the noz-
zle can be attached to the extension wand securely.
NOTE:
For the model with ø38 mm hose and front
cuff 38, attach the supplied nozzle to the aluminum
bending pipe / aluminum straight pipe.
2.
Follow the procedures below, depending on the
type of the extension wand :
NOTE:
The slide-type extension wand and the ring-
type extension wand are not compatible with each
other. If you want to change the slide-type extension
wand to the ring-type extension wand or vice versa,
change the bent pipe assembly also.
NOTE:
The free nozzle can be attached to the bent
pipe assembly directly.
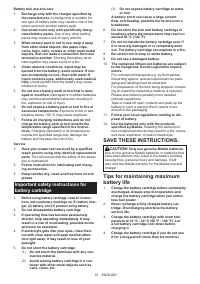
For the slide-type extension wand
Shoulder the vacuum cleaner body then insert the
extension wand into the bent pipe assembly until it
clicks. To disconnect, extract the extension wand with
pressing the button.
►
Fig.15:
1.
Bent pipe assembly
2.
Button
3.
Slide-
type extension wand
4.
Free nozzle
The length of the wand can be adjusted.
With pressing the slide button, adjust the wand length.
The length is locked when release the slide button.
►
Fig.16:
1.
Slide button
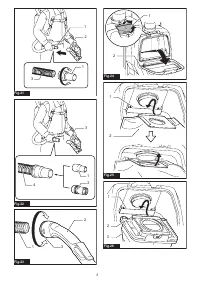
For the ring-type extension wand
Shoulder the vacuum cleaner body then twist and insert
the extension wand into the bent pipe assembly. To
disconnect, twist and extract it.
►
Fig.17:
1.
Bent pipe assembly
2.
Ring-type exten-
sion wand
3.
Free nozzle
The length of the wand can be adjusted.
Loosen the ring on the wand and adjust the wand
length. Tighten the ring at your desired length.
►
Fig.18:
1.
Ring
For the aluminum bending pipe / aluminum straight
pipe
(Only for the model with ø38 mm hose and front cuff 38)
Shoulder the vacuum cleaner body then twist and insert
the pipe into the front cuff. To disconnect, twist and
extract it.
►
Fig.19:
1.
Front cuff 38
2.
Aluminum bending pipe
3.
Aluminum straight pipe
4.
Nozzle
Содержание
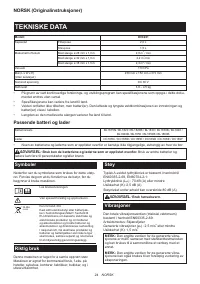
- 64 ТЕХНИЧЕСКИЕ ХАРАКТЕРИСТИКИ; Подходящий блок аккумулятора и зарядное устройство
- 65 Вибрация; МЕРЫ БЕЗОПАСНОСТИ; Правила техники безопасности
- 66 Важные правила техники
- 67 СОХРАНИТЕ ДАННЫЕ; ОПИСАНИЕ РАБОТЫ; Установка или снятие блока
- 68 Защита от перегрева
- 69 Крюк на шланге; СБОРКА; Сборка шланга; Подсоединение инструмента
- 70 При использовании шланга для; Установка мешочного фильтра /
- 71 ЭКСПЛУАТАЦИЯ; Очистка фильтра HEPA
- 72 Очистка пылесборного мешка; ДОПОЛНИТЕЛЬНЫЕ
Характеристики

Остались вопросы?Не нашли свой ответ в руководстве или возникли другие проблемы? Задайте свой вопрос в форме ниже с подробным описанием вашей ситуации, чтобы другие люди и специалисты смогли дать на него ответ. Если вы знаете как решить проблему другого человека, пожалуйста, подскажите ему :)


