Шуруповерты Bosch GSR 36 V LI - инструкция пользователя по применению, эксплуатации и установке на русском языке. Мы надеемся, она поможет вам решить возникшие у вас вопросы при эксплуатации техники.
Если остались вопросы, задайте их в комментариях после инструкции.
"Загружаем инструкцию", означает, что нужно подождать пока файл загрузится и можно будет его читать онлайн. Некоторые инструкции очень большие и время их появления зависит от вашей скорости интернета.


English |
23
Bosch Power Tools
1 609 929 M41 | (23.8.07)
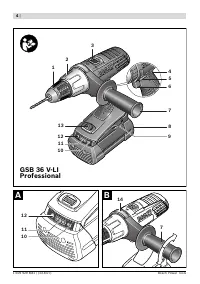
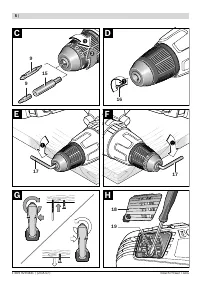
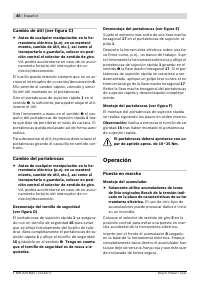
Changing the Tool (see figure C)
f
Before any work on the machine (e. g.,
maintenance, tool change, etc.) as well as
during transport and storage, set the rota-
tional direction switch to the centre posi-
tion.
Unintentional actuation of the On/Off
switch can lead to injuries.
The drill spindle is locked when the On/Off
switch
6
is not pressed. This makes quick, con-
venient and easy changing of the tool in the drill
chuck possible.
Open the keyless chuck
1
by turning in rotation
direction
n
, until the tool can be inserted. Insert
the tool.
Firmly tighten the collar of the keyless chuck
1
by hand in rotation direction
o
until the locking
action (“click”) is no longer heard. This automat-
ically locks the chuck.
The locking is released again to remove the tool
when the collar is turned in the opposite direction.
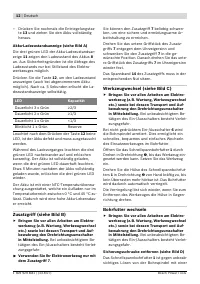
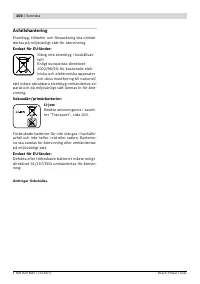
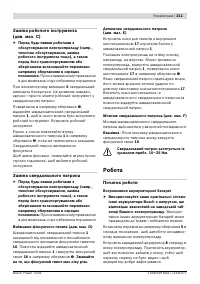
Replacing the Drill Chuck
f
Before any work on the machine (e. g.,
maintenance, tool change, etc.) as well as
during transport and storage, set the rota-
tional direction switch to the centre posi-
tion.
Unintentional actuation of the On/Off
switch can lead to injuries.
Removing the Securing Screw (see figure D)
The keyless chuck
1
is secured with a securing
screw
16
against unintentional loosening from
the drill spindle. Completely open the keyless
chuck
1
and unscrew the securing screw
16
in
rotation direction
n
.
Please note that the se-
curing screw has a left-hand thread.
Removing the Drill Chuck (see figure E)
Clamp the short end of an Allen key
17
into the
keyless chuck
1
.
Place the machine on a stable surface (e.g. a
workbench). Hold the machine firmly and loos-
en the keyless chuck
1
by turning the Allen key
17
in rotation direction
n
. Loosen a tight-seated
keyless chuck by giving the long end of the Allen
key
17
a light blow. Remove the Allen key from
the keyless chuck and completely unscrew the
keyless chuck.
Mounting the Drill Chuck (see figure F)
The keyless chuck is mounted in reverse order.
Note:
After mounting the keyless chuck, screw
the securing screw
16
in again.
The drill chuck must be tightened with a
tightening torque of approx. 10 – 25 Nm.
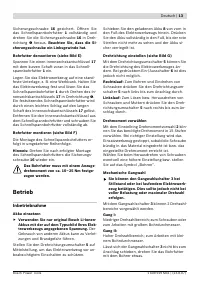
Operation
Starting Operation
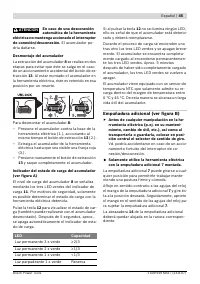
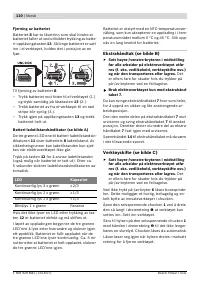
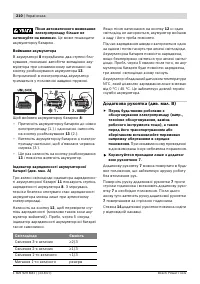
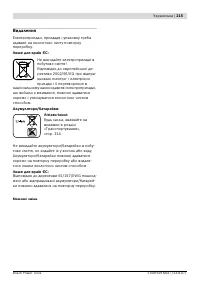
Inserting the Battery
f
Use only original Bosch lithium ion batter-
ies with the voltage listed on the nameplate
of your power tool.
Using other batteries can
lead to injuries and pose a fire hazard.
Set the rotational direction switch
5
to the cen-
tre position to protect the power tool against
accidental starting.
Insert the charged battery
8
from the front into
the base of the power tool. Push the battery
completely into the base until the red stripe can
no longer be seen and the battery is securely
locked.
Reversing the Rotational Direction
(see figure G)
The rotational direction switch
5
is used to re-
verse the rotational direction of the machine.
However, this is not possible with the On/Off
switch
6
actuated.
Right Rotation:
For drilling and driving in
screws, push the rotational direction switch
5
left to the stop.
Left Rotation:
For loosening and unscrewing
screws and nuts, press the rotational direction
switch
5
through to the right stop.
Setting the Torque
The required torque can be preselected in 15
steps with the torque preselection ring
2
. With
the correct setting, the insert tool is stopped as
soon as the screw is screwed flush into the ma-
terial or when the set torque is reached.
Select a higher setting when driving out screws,
or set to the symbol “Drilling”.
OBJ_BUCH-487-001.book Page 23 Thursday, August 23, 2007 9:18 AM
Содержание
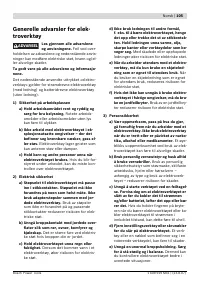
- 194 ) Осторожное обращение и применение
- 195 Крепление заготовки.; Описание функции; Применение по назначению
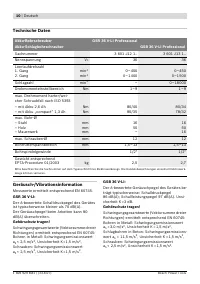
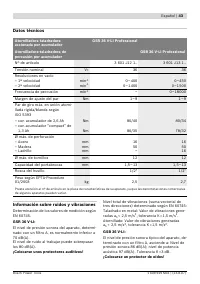
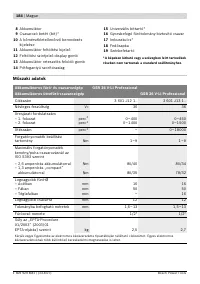
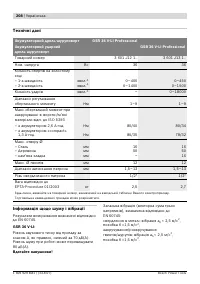
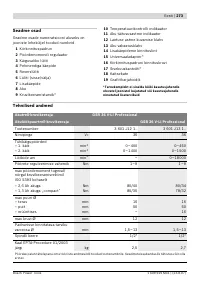
- 196 Технические данные
- 197 Данные по шуму и вибрации; Применяйте средства защиты органов слуха!; Заявление о соответствии
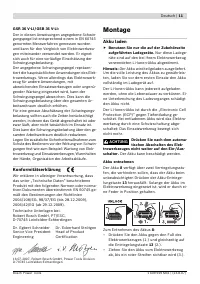
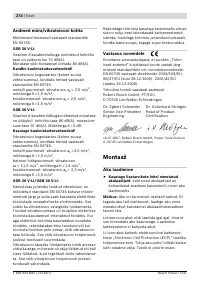
- 198 Сборка; Зарядка аккумулятора; Снятие аккумулятора
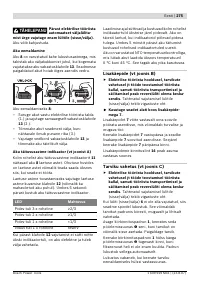
- 199 Смена сверлильного патрона
- 200 Работа с инструментом; Включение электроинструмента
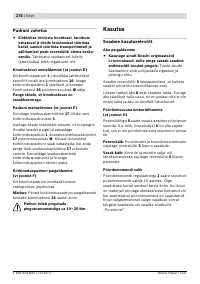
- 201 Установка числа оборотов; Указания по применению; Рукоятка с мягкими накладками
- 202 Техобслуживание и сервис; Техобслуживание и очистка; Россия
- 203 Беларусь; Транспорт


