Шлифмашины VERTO 51G096 - инструкция пользователя по применению, эксплуатации и установке на русском языке. Мы надеемся, она поможет вам решить возникшие у вас вопросы при эксплуатации техники.
Если остались вопросы, задайте их в комментариях после инструкции.
"Загружаем инструкцию", означает, что нужно подождать пока файл загрузится и можно будет его читать онлайн. Некоторые инструкции очень большие и время их появления зависит от вашей скорости интернета.
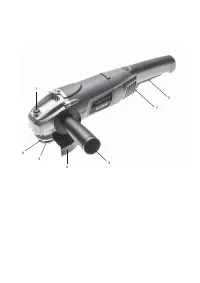


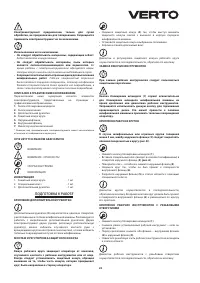
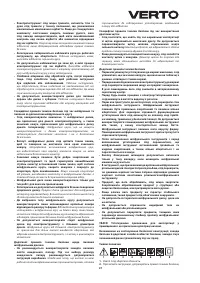

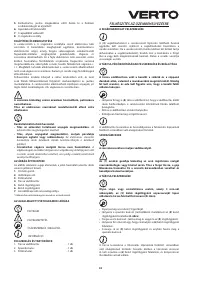
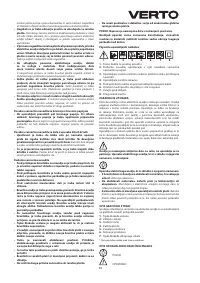
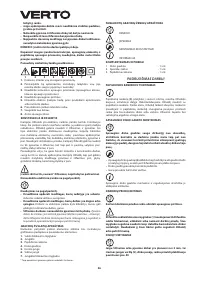
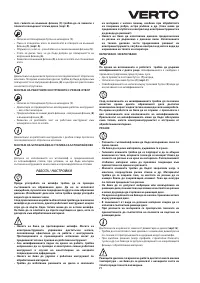


1
3
1
.
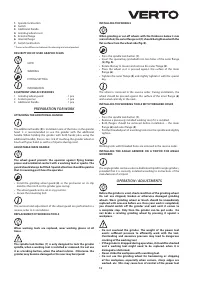
Spindle lock button
2
.
Switch
3.
Additional handle
4.
Grinding wheel cover
5.
External flange
6.
Internal flange
7.
Switch lock button
* There can be differences between the drawing and actual product.
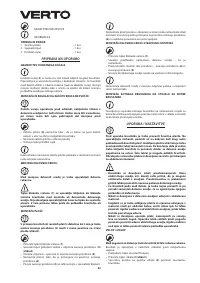
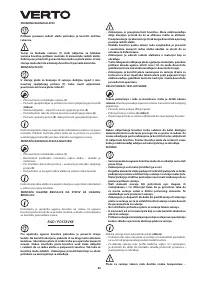
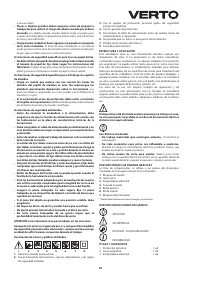
DESCRIPTION OF USED GRAPHIC SIGNS
NOTE
WARNING
FITTING/SETTING
INFORMATION
EQUIPMENT AND ACCESSORIES
1. Grinding wheel guard
- 1 pce
2
. Socket spanner
- 1 pce
3
. Additional handle
- 1 pce
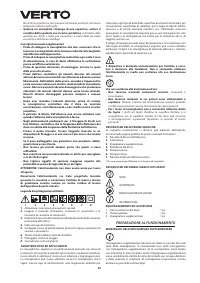
PREPARATION FOR WORK
ATTACHING THE ADDITIONAL HANDLE
The additional handle (
3
) is installed in one of the holes in the grinder
head. It is recommended to use the grinder with the additional
handle. When holding the grinder with both hands (also using the
additional handle), there is less risk of touching the grinder wheel or
brush with your hand, as well as of injuries during recoil.
ADJUSTABLE MAIN HANDLE
The wheel guard protects the operator against flying broken
pieces and accidental contact with a working tool or sparks. The
guard should always be fitted. Special attention should be paid so
that its covering part faces the operator.
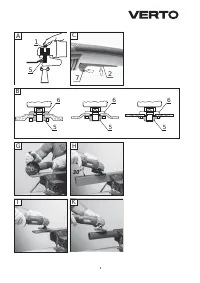
•
Install the grinding wheel guard (
4
) so the protrusion on its clip
matches the notch on the grinder gear casing.
•
The wheel guard can be set in any position.
•
Secure the mounting bolt.
The removal and adjustment of the wheel guard are performed in a
reverse order to its installation.
REPLACEMENT OF WORKING TOOLS
When working tools are replaced, wear working gloves at all
times.
The spindle lock button (
1
) is only designed to lock the grinder
spindle, when a working tool is installed or removed. Do not use
it as a braking button, when the wheel rotates. Otherwise, the
grinder may become damaged or the user may be injured.
INSTALLING THE WHEELS
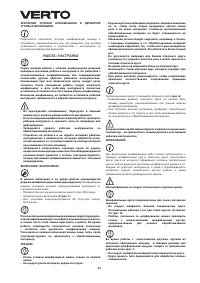
When grinding or cut-off wheels with the thickness below 3 mm
are installed, the outer flange nut (5) should be tightened with the
flat surface from the wheel side (fig. B).
•
Press the spindle lock button (
1
).
•
Insert the special key (included) into two holes of the outer flange
(
5
) (
fig. A
).
•
Rotate the key to loosen and remove the outer flange (
5
).
•
Place the wheel so it is pressed against the surface of the inner
flange (
6
).
•
Tighten the outer flange (
5
) and slightly tighten it with the special
key.
The wheel is removed in the reverse order. During installation, the
wheel should be pressed against the surface of the inner flange (
6
)
and seated centrally in the neck.
INSTALLING THE WORKING TOOLS WITH THREADED HOLES
•
Press the spindle lock button (
1
).
•
Remove a previously installed working tool, if it is installed.
•
Both flanges should be removed before installation – the inner
flange (
6
) and outer flange (
5
).
•
Put the threaded part of a working tool onto the spindle and slightly
tighten.
Working tools with threaded holes are removed in the reverse order.
INSTALLING THE ANGLE GRINDER ON A TRIPOD FOR ANGLE
GRINDERS
The angle grinder can be used on a dedicated tripod for angle grinders,
provided that it is correctly installed according to instructions of the
manufacturer of a tripod.
OPERATION / ADJUSTMENTS
Before the grinder is used, check condition of the grinding wheel.
Do not use chipped, broken or otherwise damaged grinding
wheels. Worn grinding wheel or brush should be immediately
replaced with new one before use. Once your work is completed,
you should switch off the grinder and wait until it comes to
a complete stop. Only then the grinder can be put aside. Do
not brake a rotating grinding wheel by pressing it against a
workpiece.
• Do not overload the grinder. The weight of the power tool
exerts sufficient pressure to efficiently work with the tool.
Overloading and excessive pressure may lead to dangerous
cracking of the working tool.
• If the grinder is dropped during operation, it should be checked
and a working tool might need to be replaced, when it is
damaged or deformed.
• Never strike the workpiece with a working tool.
• Do not use the grinding wheel for hammering or stripping
of the workpiece, especially when corners, sharp edges are
worked, etc. (this may cause loss of control of the power tool
Характеристики

Остались вопросы?Не нашли свой ответ в руководстве или возникли другие проблемы? Задайте свой вопрос в форме ниже с подробным описанием вашей ситуации, чтобы другие люди и специалисты смогли дать на него ответ. Если вы знаете как решить проблему другого человека, пожалуйста, подскажите ему :)
