Пылесос Ardesto CVC-X0621WB - инструкция пользователя по применению, эксплуатации и установке на русском языке. Мы надеемся, она поможет вам решить возникшие у вас вопросы при эксплуатации техники.
Если остались вопросы, задайте их в комментариях после инструкции.
"Загружаем инструкцию", означает, что нужно подождать пока файл загрузится и можно будет его читать онлайн. Некоторые инструкции очень большие и время их появления зависит от вашей скорости интернета.


EN
23
s
Fig. 4-2 Fig.4-3 Fig. 4-4
5. CHARGING INSTRUCTION
5.1 Fix the charger by following Fig.3.3, insert the small end of adaptor into the
charger stand by following Fig. 5-1a.
5.2 Insert the large end of adaptor into power outlet and then connect the power source
well
(
see Fig. 5-1b
)
Fig. 5-1a Fig. 5-1b
5.3 Lift the appliance and put it onto the charger, make the socket of body (1) cover
the charger stand (2) (Fig.5-2a), at that time, the electricity quantity indicator turns on,
4
5
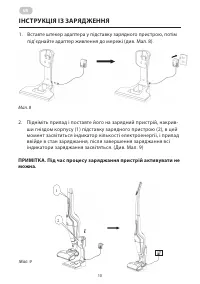
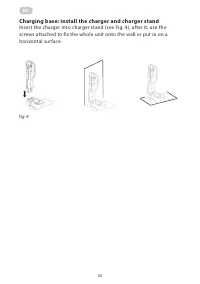
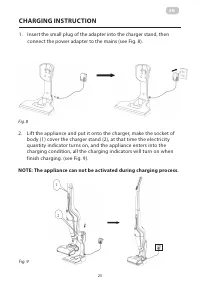
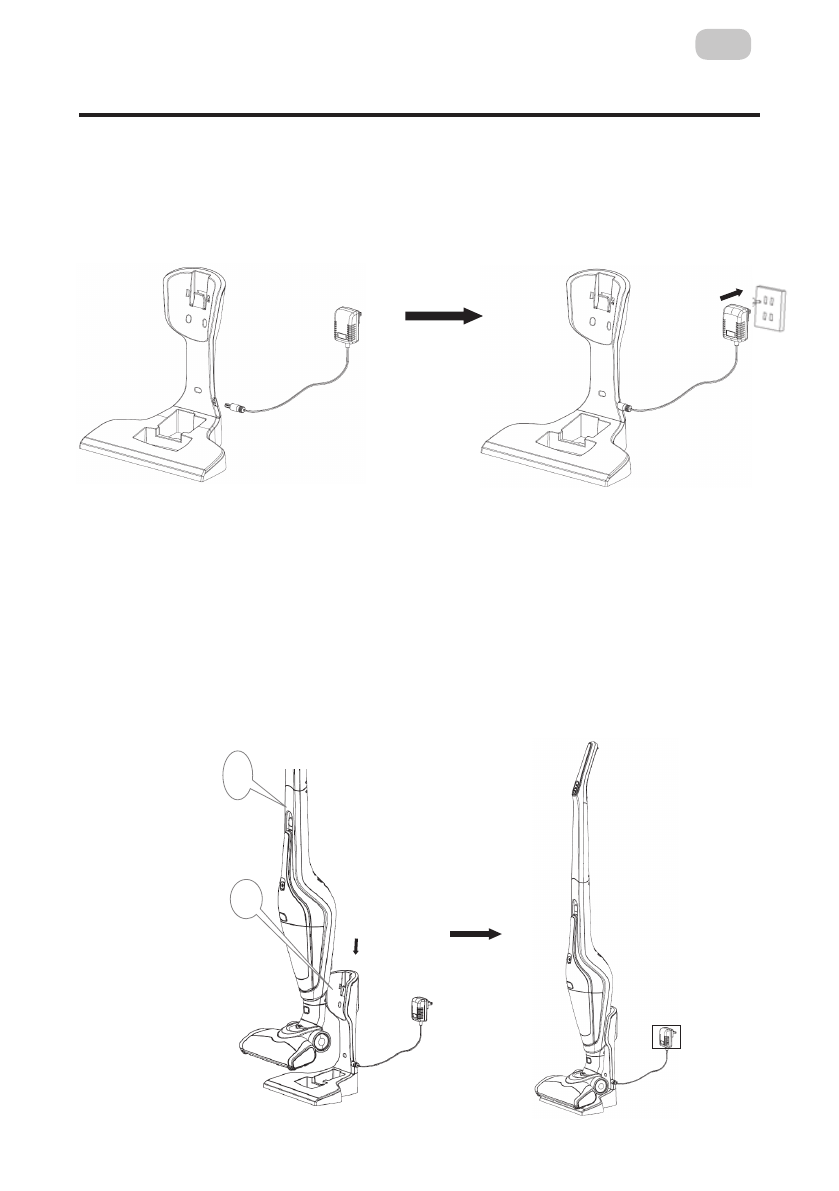
CHARGING INSTRUCTION
1. Insert the small plug of the adapter into the charger stand, then
connect the power adapter to the mains (see Fig. 8).
Fig. 8
Fig. 9
2. Lift the appliance and put it onto the charger, make the socket of
body (1) cover the charger stand (2), at that time the electricity
quantity indicator turns on, and the appliance enters into the
charging condition, all the charging indicators will turn on when
finish charging. (see Fig. 9).
NOTE: The appliance can not be activated during charging process.
s
and the appliance enters into the charging condition, all the charging indicators will
turn on when finish charging. (see Fig.5-2b)
NOTE: The appliance can not be activated during charging process.
Fig. 5-2a Fig. 5-2b
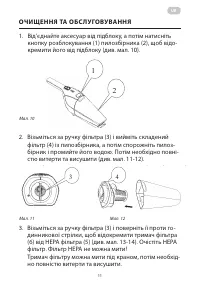
6. CLEANING AND MAINTENANCE
1) Detach the accessory on the sub-unit, and then press the release button (1) to
make dust cup(2) be seperated from the sub-unit.
Fig. 6-1
2) Grasp the filter handle (3) and remove the filter assembly (4) in the dust cup, and
1
2
2
1
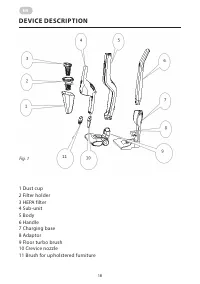
Характеристики

Остались вопросы?Не нашли свой ответ в руководстве или возникли другие проблемы? Задайте свой вопрос в форме ниже с подробным описанием вашей ситуации, чтобы другие люди и специалисты смогли дать на него ответ. Если вы знаете как решить проблему другого человека, пожалуйста, подскажите ему :)
