Пылесос Ardesto CVC-X0621WB - инструкция пользователя по применению, эксплуатации и установке на русском языке. Мы надеемся, она поможет вам решить возникшие у вас вопросы при эксплуатации техники.
Если остались вопросы, задайте их в комментариях после инструкции.
"Загружаем инструкцию", означает, что нужно подождать пока файл загрузится и можно будет его читать онлайн. Некоторые инструкции очень большие и время их появления зависит от вашей скорости интернета.


EN
19
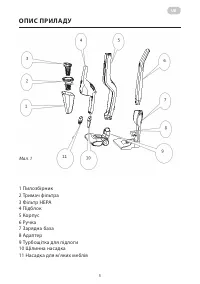
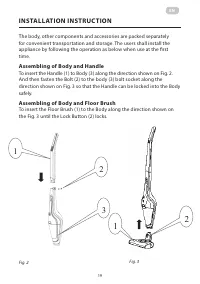
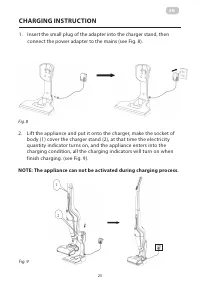
INSTALLATION INSTRUCTION
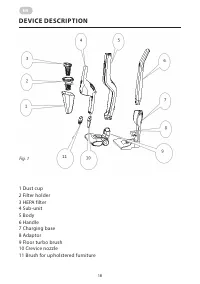
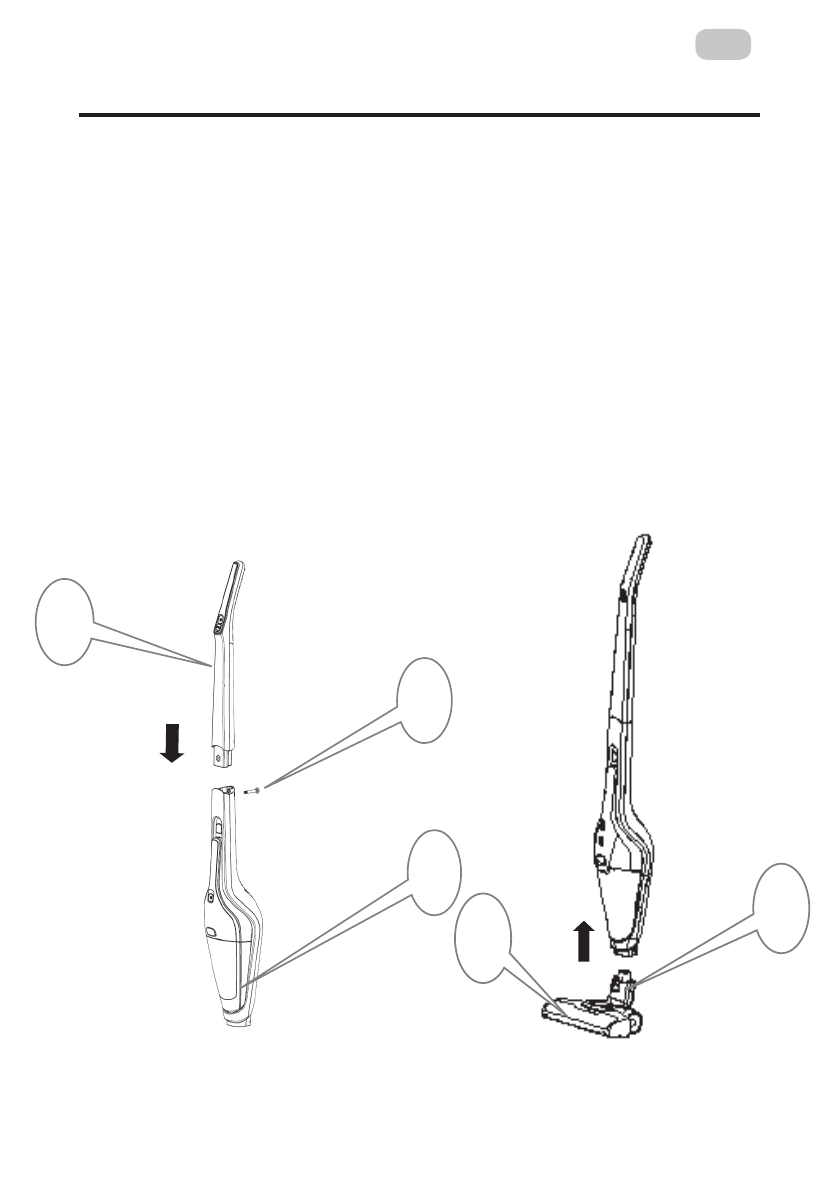
The body, other components and accessories are packed separately
for convenient transportation and storage. The users shall install the
appliance by following the operation as below when use at the first
time.
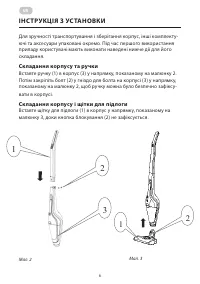
Assembling of Body and Handle
To insert the Handle (1) to Body (3) along the direction shown on Fig. 2.
And then fasten the Bolt (2) to the body (3) bolt socket along the
direction shown on Fig. 3 so that the Handle can be locked into the Body
safely.
Assembling of Body and Floor Brush
To insert the Floor Brush (1) to the Body along the direction shown on
the Fig. 3 until the Lock Button (2) locks.
s
for convenient transportation and storage. The users shall install the appliance by
following the operation as below when use at the first time.
3.1 Assembling of Body and Handle
To insert the Handle (1) to Body (3) along the direction shown on illustration 3-1.
And then fasten the Bolt (2) to the Body’s (3) bolt socket along the direction shown on
illustration 3-1 so that the Handle can be locked into the Body safely.
3.2 Assembling of Body and Floor Brush
To insert the Floor Brush (1) to the Body along the direction shown on the illustration
3-2 until the Lock Button (2) locks.
Fig. 3-1
Fig. 3-2
1
2
3
2
1
Fig. 2
Fig. 3
Характеристики

Остались вопросы?Не нашли свой ответ в руководстве или возникли другие проблемы? Задайте свой вопрос в форме ниже с подробным описанием вашей ситуации, чтобы другие люди и специалисты смогли дать на него ответ. Если вы знаете как решить проблему другого человека, пожалуйста, подскажите ему :)
