
Пилы дисковые STATUS CP190C - инструкция пользователя по применению, эксплуатации и установке на русском языке. Мы надеемся, она поможет вам решить возникшие у вас вопросы при эксплуатации техники.
Если остались вопросы, задайте их в комментариях после инструкции.
"Загружаем инструкцию", означает, что нужно подождать пока файл загрузится и можно будет его читать онлайн. Некоторые инструкции очень большие и время их появления зависит от вашей скорости интернета.


9
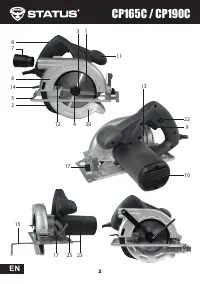
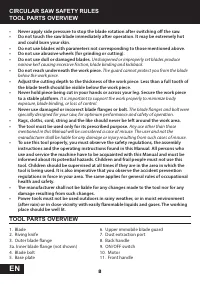
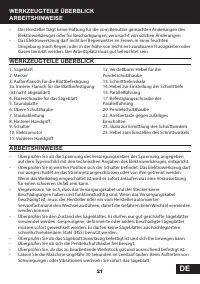
TOOL PARTS OVERVIEW
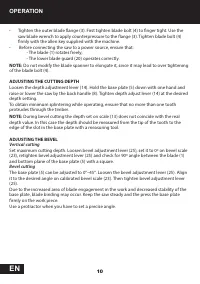
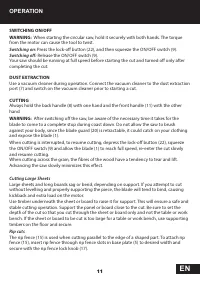
OPERATION
EN
OPERATION
12. Blade guard lever
13. Depth adjustment scale
14. Depth adjustment lever
15. Rip fence
17. Rip fence lock knob
20. Mobile blade guard
22. Lock-off button
23. Bevel scale
25. Bevel adjustment lever
PRIOR TO INITIAL OPERATION
•
Make sure the power supply voltage corresponds to the value indicated on the name
plate with technical data of the tool.
•
Always check the position of ON/OFF switch. The power tool must be connected to the
power supply socket only when this switch is in OFF position. If the plug is connected
to a receptacle while the power switch is in the ON position, the power tool will start
operating immediately, which could cause a serious accident.
•
Make sure that the cord and the plug are in order. If the replacement of the supply cord
is necessary, this has to be done by the manufacturer or his agent in order to avoid a
safety hazard.
•
Always inspect the blade. Use only well grinded blades. Never use blades with cracks
and indents or HSS-blades.
•
Check if the blade is tightened reliably and moves freely.
•
Check if the mobile guard moves freely.
•
Make sure the work piece or the material is well secured.
•
Let the machine operate at no load for 30 seconds. Replace the blade in case vibrations
are observed.
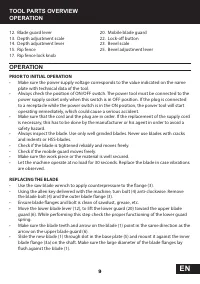
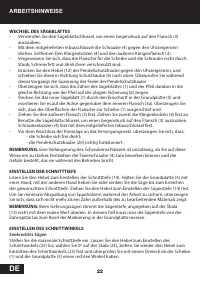
REPLACING THE BLADE
•
Use the saw blade wrench to apply counterpressure to the flange (3).
•
Using the allen key delivered with the machine, turn bolt (4) anti-clockwise. Remove
the blade bolt (4) and the outer blade flange (3).
•
Ensure blade flanges and bolt is clean of sawdust, grease, etc.
•
Move the lower blade lever (12), to lift the lower guard (20) toward the upper blade
guard (6). While performing this step check the proper functioning of the lower guard
spring.
•
Make sure the blade teeth and arrow on the blade (1) point in the same direction as the
arrow on the upper blade guard (6).
•
Slide the new blade (1) through slot in the base plate (5) and mount it against the inner
blade flange (3a) on the shaft. Make sure the large diameter of the blade flanges lay
flush against the blade (1).
Содержание
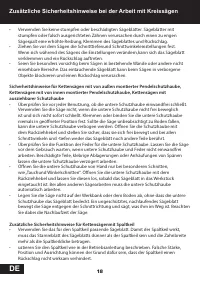
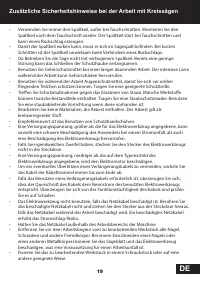
- 52 ОСНОВНЫЕ ТРЕБОВАНИЯ БЕЗОПАСНОСТИ; шумозащитные наушники.
- 53 СЕРВИСНОЕ ОБСЛУЖИВАНИЕ; Использование при ремонте запасных частей не сертифициро-; Не беритесь руками за зону под обрабатываемой деталью.; Предохранитель не; над своими ногами. Закрепите деталь стабильно.; ДОПОЛНИТЕЛЬНЫЕ ТРЕБОВАНИЯ БЕЗОПАСНОСТИ
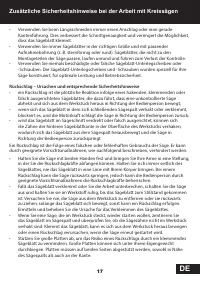
- 54 ДОПОЛНИТЕЛЬНЫЕ ТРЕБОВАНИЯ БЕЗОПАСНОСТИ ПРИ
- 58 ПЕРЕД НАЧАЛОМ РАБОТЬІ; ОПИСАНИЕ
- 59 ЗАМЕНА РЕЖУЩЕГО ДИСКА; УКАЗАНИЯ ПО РАБОТЕ
- 60 Вертикальная резка; УДАЛЕНИЕ ПЫЛИ
- 61 РЕЗКА; Необходимо иметь в виду, что после выключения пилы необхо-; Резка материала больших размеров; перегрузку электродвигателя.; Параллельная резка; правую сторону основания к рейке.
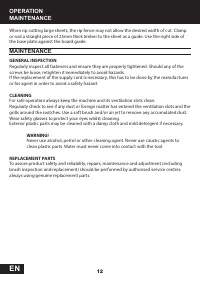
- 62 ОБЩИЙ ОСМОТР; ОБСЛУЖИВАНИЕ
- 63 и его комплектацию без предварительного уведомления.; ТЕХНИЧЕСКИЕ ХАРАКТЕРИСТИКИ; Модель; ДЕКЛАРАЦИИ СООТВЕТСТВИЯ
Характеристики

Остались вопросы?Не нашли свой ответ в руководстве или возникли другие проблемы? Задайте свой вопрос в форме ниже с подробным описанием вашей ситуации, чтобы другие люди и специалисты смогли дать на него ответ. Если вы знаете как решить проблему другого человека, пожалуйста, подскажите ему :)


