
Пилы дисковые Bosch GKS 235 Turbo Professional - инструкция пользователя по применению, эксплуатации и установке на русском языке. Мы надеемся, она поможет вам решить возникшие у вас вопросы при эксплуатации техники.
Если остались вопросы, задайте их в комментариях после инструкции.
"Загружаем инструкцию", означает, что нужно подождать пока файл загрузится и можно будет его читать онлайн. Некоторые инструкции очень большие и время их появления зависит от вашей скорости интернета.
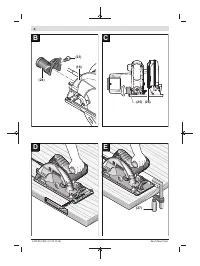


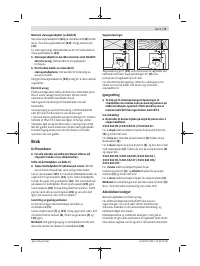


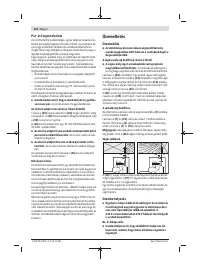


Fitting the dust extraction adapter (see figure B)
Push the dust extraction adapter
(24)
onto the chip ejector
(16)
until it clicks into place. Then secure the dust extraction
adapter
(24)
in place with the screw
(23)
.
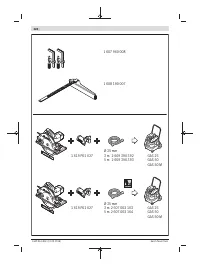
A dust extraction hose with a diameter of 35 mm can be con-
nected to the dust extraction adapter
(24)
.
u
The dust extraction adapter must only be fitted if an
external dust extraction system is connected.
Other-
wise the extraction duct can become clogged.
u
No dust bags should be connected to the dust extrac-
tion adapter
. Otherwise the extraction system can be-
come clogged.
To ensure optimum extraction, the dust extraction adapter
(24)
must be cleaned regularly.
External dust extraction
The power tool can be directly connected to the socket of a
Bosch all-purpose dust extractor with remote starter. This
dust extractor is started up automatically when the power
tool is switched on.
The dust extractor must be suitable for the material being
worked.
When vacuuming dry dust that is especially detrimental to
health or carcinogenic, use a special dust extractor.
In Germany, wood dust extraction requires extraction
devices which have been tested on the basis of TRGS 553;
self-generated dust extraction must not be used in the com-
mercial sector. Commercial operators must clarify the spe-
cific requirements for other materials with the responsible
trade association.
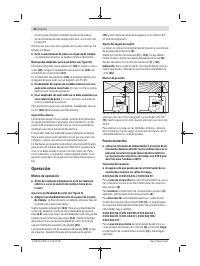
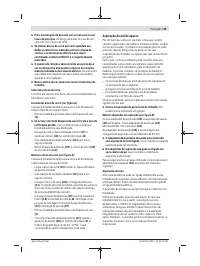
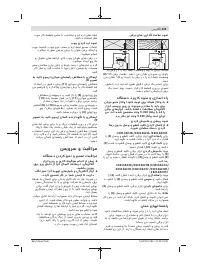
Operation
Operating modes
u
Pull the plug out of the socket before carrying out any
work on the power tool.
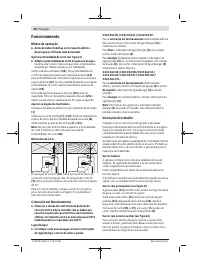
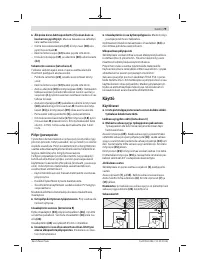
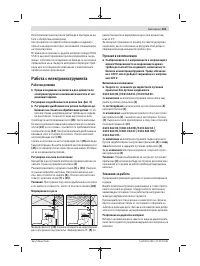
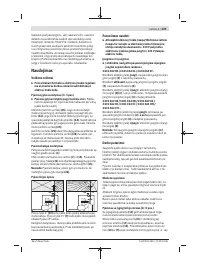
Setting the cutting depth (see figure C)
u
Adapt the cutting depth to the thickness of the work-
piece
. A space of less than the height of one full tooth
should be visible under the workpiece.
Loosen the clamping lever
(25)
. For a smaller cutting depth,
pull the saw away from the base plate
(14)
; for a larger cut-
ting depth, push the saw towards the base plate
(14)
. Adjust
the desired cutting depth at the cutting-depth scale.
Retighten the clamping lever
(25)
.
The clamping force of the clamping lever
(25)
can be read-
justed. To do so, unscrew the clamping lever
(25)
and
retighten it in a position offset by at least 30° in an anticlock-
wise direction.
Adjusting the mitre angle
We recommend that you place the power tool down on the
front side of the protective guard
(1)
.
Loosen the wing bolts
(7)
and
(15)
. Swivel the saw to the
side. Set the required mitre angle on the scale
(6)
. Retighten
the wing bolts
(7)
and
(15)
.
Note:
When making mitre cuts, the cutting depth is less than
the value shown on the cutting depth scale
(26)
.
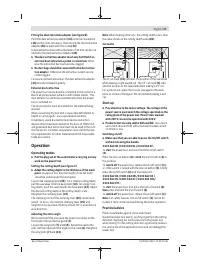
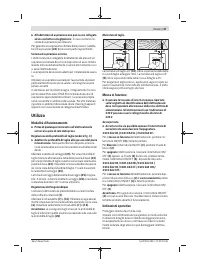
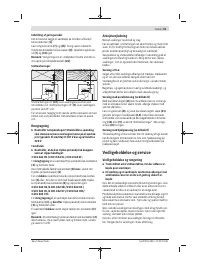
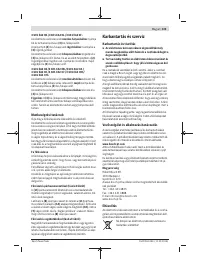
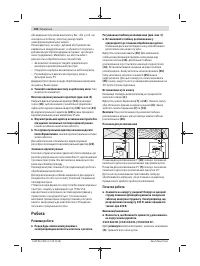
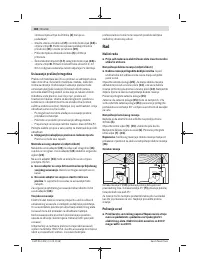
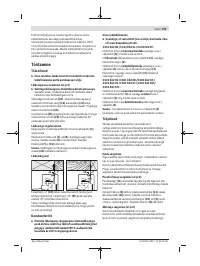
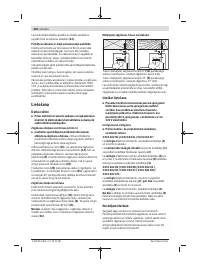
Cut marks
0
45
0
45
The 0° cut mark
(10)
indicates the position of the saw blade
when making a right-angled cut. The 45° cut mark
(9)
indic-
ates the position of the saw blade when making a 45° cut.
For a precise cut, place the circular saw against the work-
piece as shown in the figure. We recommend making a test
cut.
Start-up
u
Pay attention to the mains voltage. The voltage of the
power source must match the voltage specified on the
rating plate of the power tool. Power tools marked
with 230 V can also be operated with 220 V.
u
Products that are only sold in AUS and NZ:
Use a resid-
ual current device (RCD) with a nominal residual current
of 30 mA or less.
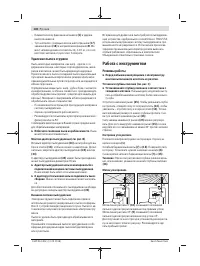
Switching on/off
u
Make sure that you are able to press the On/Off switch
without releasing the handle.
3 601 EA2 0K./3 601 EA2 0L./3 601 EA2 0F.:
To
start
the power tool, press and hold the on/off switch
(3)
.
Press the lock-on button
(2)
to
lock
the on/off switch
(3)
in
this position.
To
switch off
the power tool, release the on/off switch
(3)
;
or, if the switch is locked with the lock-on button
(2)
, briefly
press the on/off switch
(3)
and then release it.
3 601 EA2 08./3 601 EA2 0B./3 601 EA2 04./
3 601 EA2 00./3 601 EA2 07./3 601 EA2 001/
3 601 EA2 071:
To
start
the power tool, first press the lock-off switch
(2)
,
then
press and hold the on/off switch
(3)
.
To
switch off
the power tool, release the on/off switch
(3)
.
Note:
For safety reasons, the on/off switch
(3)
cannot be
locked; it must remain pressed during the entire operation.
Practical advice
Protect saw blades against shock and impact.
Guide the power tool evenly, pushing it gently in the cutting
direction. Applying too much pressure to the power tool
when moving it in the cutting direction significantly reduces
the service life of the application tools and can damage the
power tool.
English |
17
Bosch Power Tools
1 609 92A 4BS | (12.09.2018)
Содержание
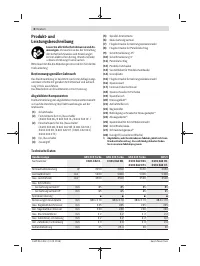
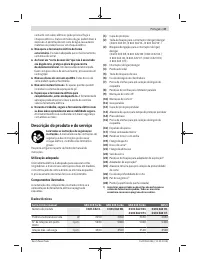
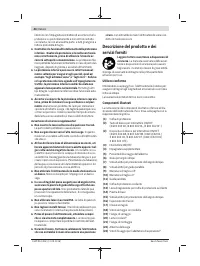
- 127 Описание продукта и услуг; Применение по назначению
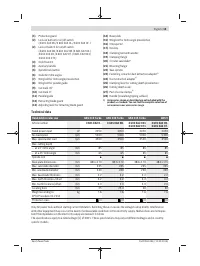
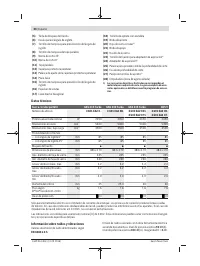
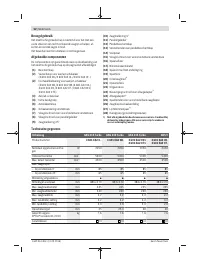
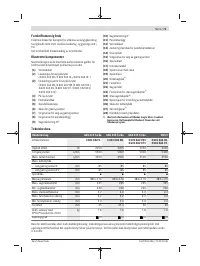
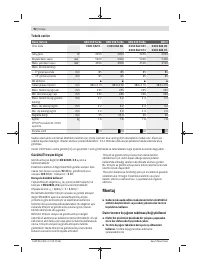
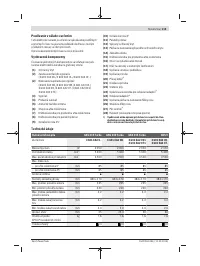
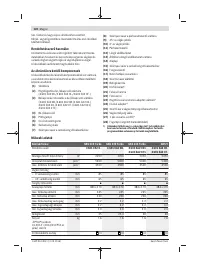
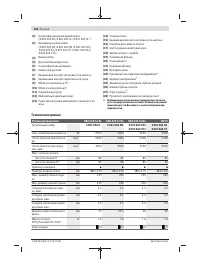
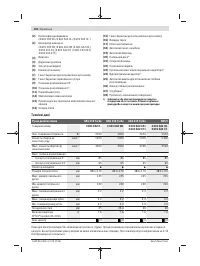
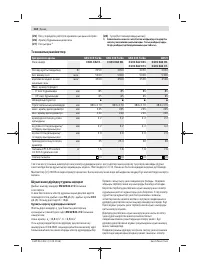
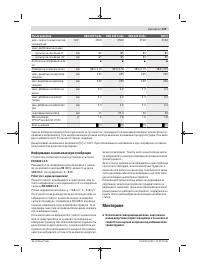
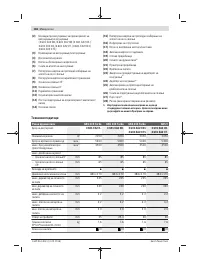
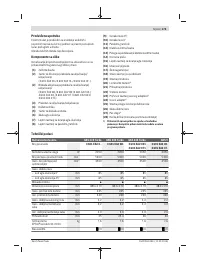
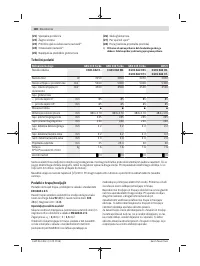
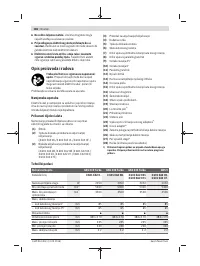
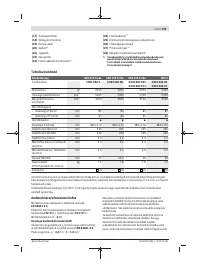
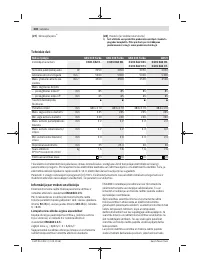
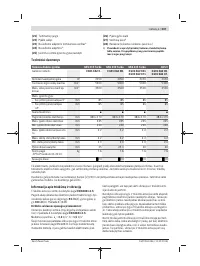
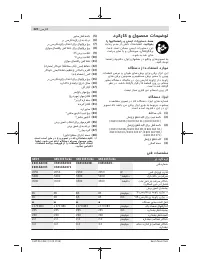
- 128 Технические данные
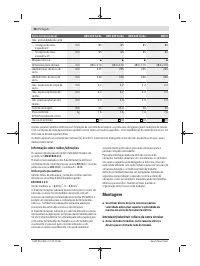
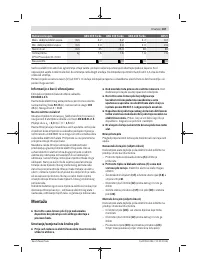
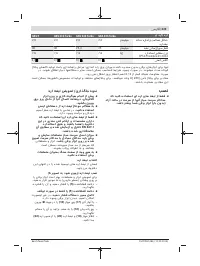
- 129 Данные по шуму и вибрации; Сборка; Установка/смена пильного диска
- 130 Удаление пыли и стружки; Работа с инструментом; Режимы работы
- 131 Техобслуживание и сервис; Техобслуживание и очистка
- 132 Утилизация; Українська; Вказівки з техніки безпеки; ДЖЕННЯ
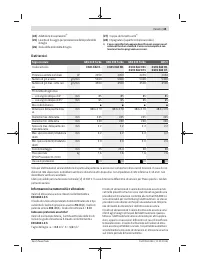
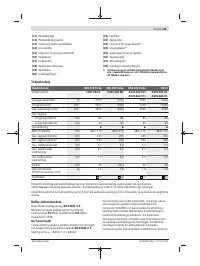
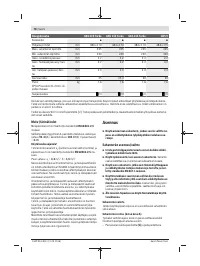
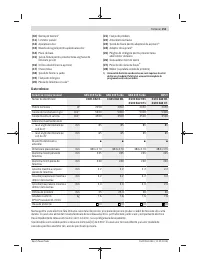
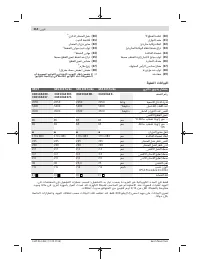
Характеристики

Остались вопросы?Не нашли свой ответ в руководстве или возникли другие проблемы? Задайте свой вопрос в форме ниже с подробным описанием вашей ситуации, чтобы другие люди и специалисты смогли дать на него ответ. Если вы знаете как решить проблему другого человека, пожалуйста, подскажите ему :)


