
Обогреватели FRICO PFE12 - инструкция пользователя по применению, эксплуатации и установке на русском языке. Мы надеемся, она поможет вам решить возникшие у вас вопросы при эксплуатации техники.
Если остались вопросы, задайте их в комментариях после инструкции.
"Загружаем инструкцию", означает, что нужно подождать пока файл загрузится и можно будет его читать онлайн. Некоторые инструкции очень большие и время их появления зависит от вашей скорости интернета.


PFE/PFD
8
GB
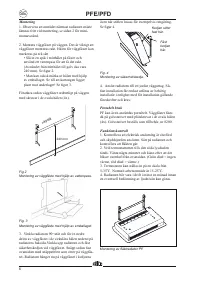
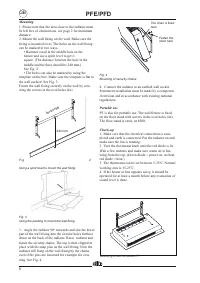
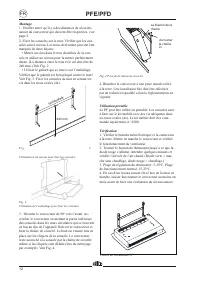
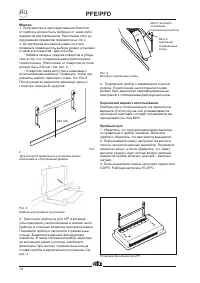
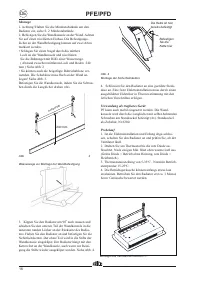
Mounting
1. Please note that the area close to the radiator must
be left free of obstructions, see page 2 for minimum
distance.
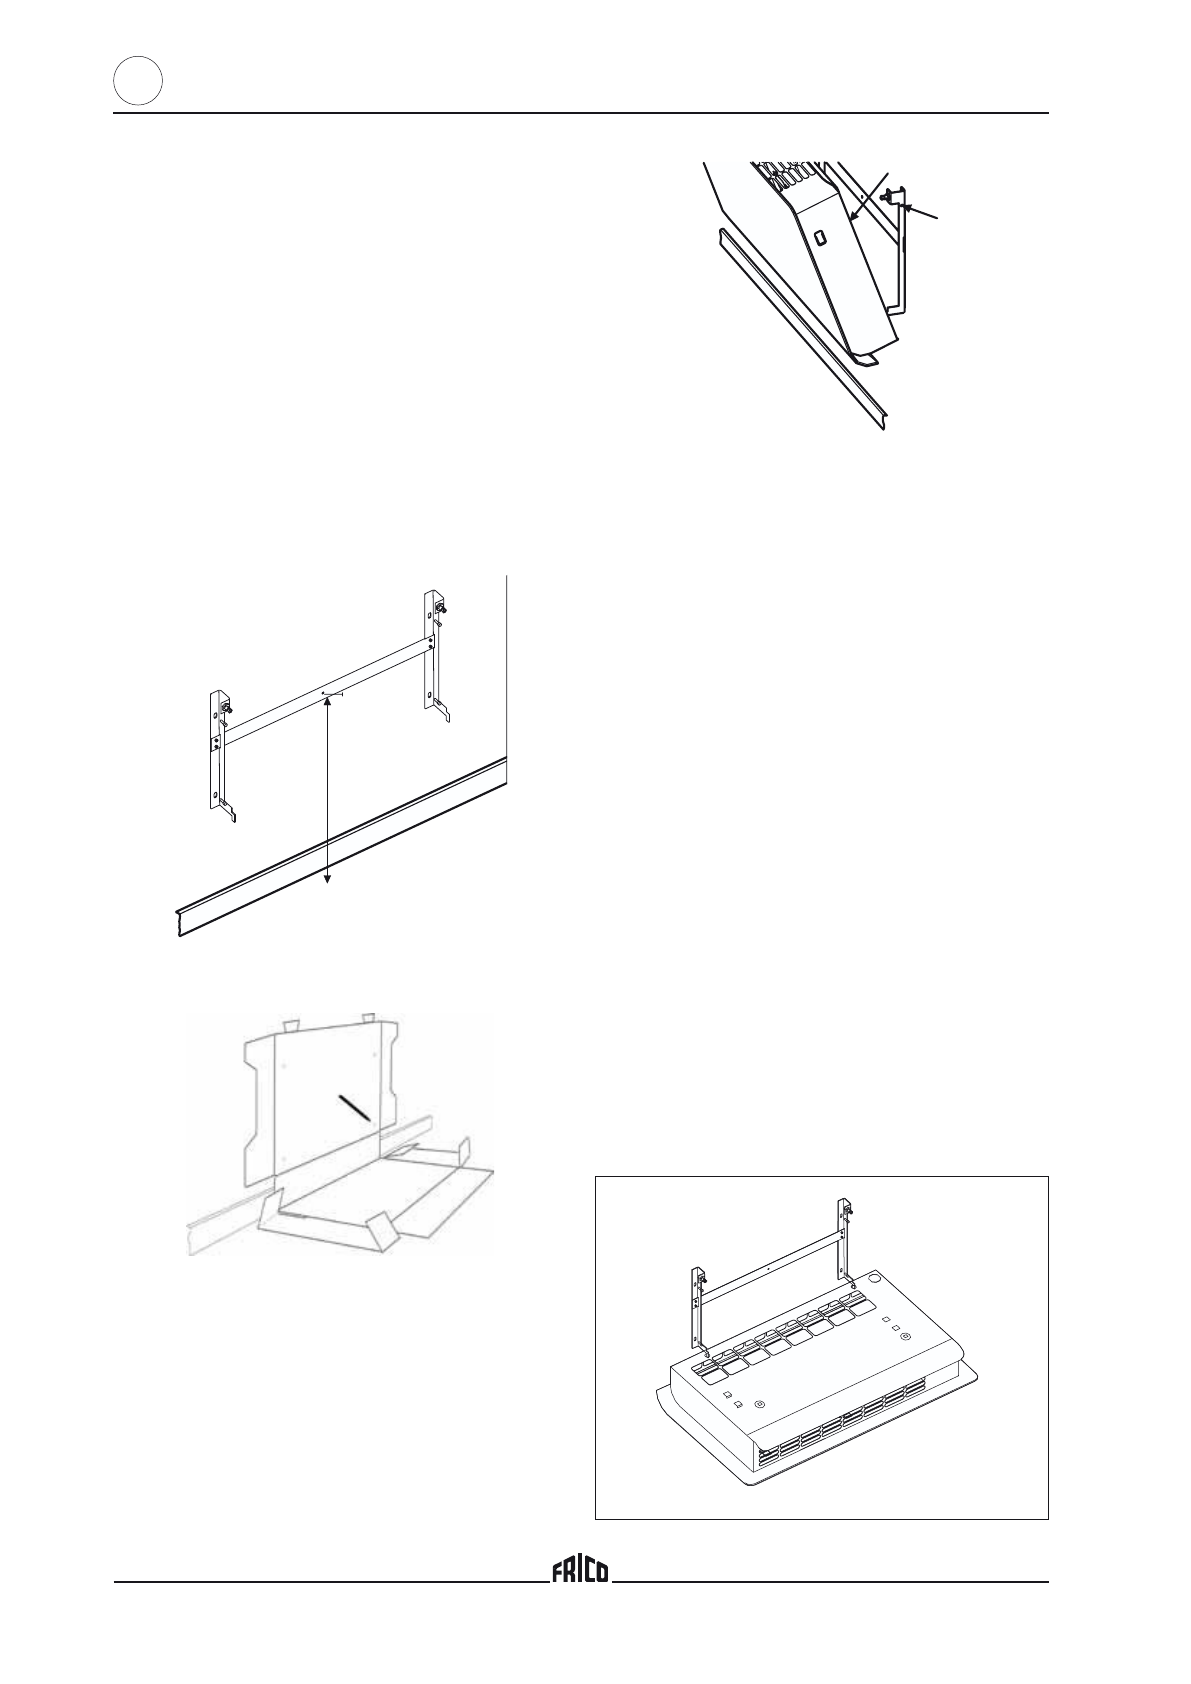
2. Mount the wall ixing on the wall. Make sure the
ixing is mounted level. The holes on the wall ixing
can be marked in two ways.
• Hammer a nail in the middle hole on the
ixture and use a spirit level to get it
square. (The distance between the hole in the
middle and the loor should be 240 mm.)
See Fig. 2.
• The holes can also be marked by using the
template on the box. Make sure the template is lat to
the wall surface! See Fig. 3.
Fasten the wall ixing securely on the wall by scre-
wing the screws in the oval holes (4x).
240 mm
F i g .
2
Usingaspiritleveltomountthewallixing.
Fig.3
Usingthepackingtomountthewallixing.
3. Angle the radiator 90
o
outwards and slot the lower
part of the wall ixing into the circular holes furthest
down on the back of the radiator. Raise radiator and
fasten the security chains. The top is then clipped in
place with the snap pins on the wall ixing. Now the
radiator will hang on the wall ixing by the chains
even if the pins are loosened for example for clea-
ning. See Fig. 4.
Fig.4
Mountingofsecuritychains.
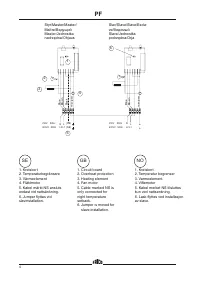
4. Connect the radiator to an earthed wall socket.
Permanent installation must be made by a competent
electrician and in accordance with existing national
regulations.
Portable use
PF is also for portable use. The wall ixture is ixed
on the loor stand with screws in the oval holes (4x).
The loor stand is extra, nr 8200.
Check-up
1. Make sure that the electrical connection is com-
pleted and earth is connected. Put the radiator on and
make sure the fan is running.
2. Turn the thermostat knob until the red diode is lit.
Wait a few minutes and make sure warm air is blo-
wing from the top. (Green diode = power on, no heat,
red diode = heat.)
3. The thermostat can be set between 5-35
o
C. Normal
working area is 15-25
o
C.
4. If the heater at irst appears noisy, it should be
operated for at least a month before any evaluation of
sound level is done.
MountingoffanconvectorPF.
horizontal
Thechainisixed
here
Fastenthe
chainhere
Содержание
- 4 wony – włączone elementy grzewcze
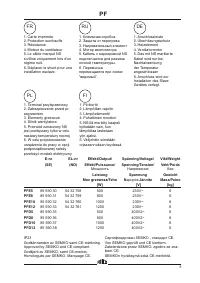
- 6 orjaasennuksen teydessä.; FI; Мощность; Leistung; apięcie; Jännite
- 15 Монтаж; • Забейте гвоздь в средние отверстия и убеди-; Переносной вариант использования
- 16 Приборы с напряжением 230В~ имеют 3х; Режим ночного снижения температуры; Провод помеченный NS подключается к; Замена или удаление передней панели


