
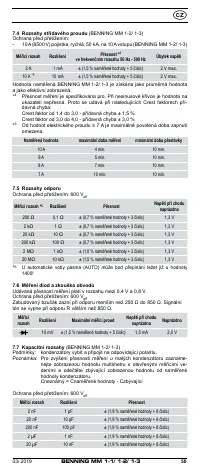
Мультиметры BENNING MM 1-3 044083 - инструкция пользователя по применению, эксплуатации и установке на русском языке. Мы надеемся, она поможет вам решить возникшие у вас вопросы при эксплуатации техники.
Если остались вопросы, задайте их в комментариях после инструкции.
"Загружаем инструкцию", означает, что нужно подождать пока файл загрузится и можно будет его читать онлайн. Некоторые инструкции очень большие и время их появления зависит от вашей скорости интернета.


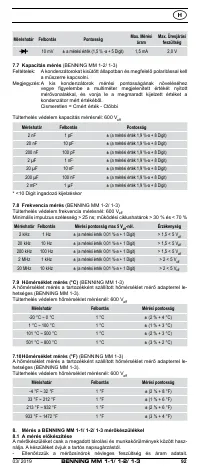
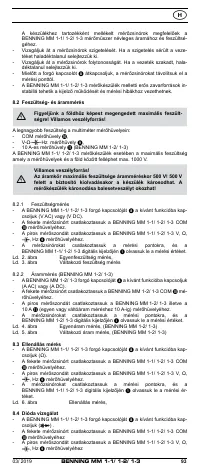
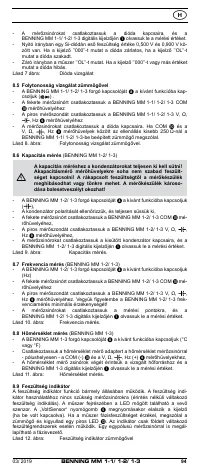
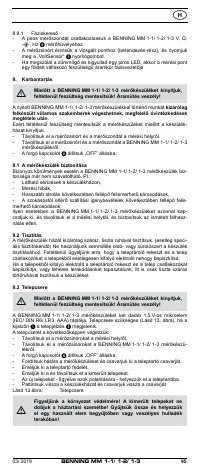


21
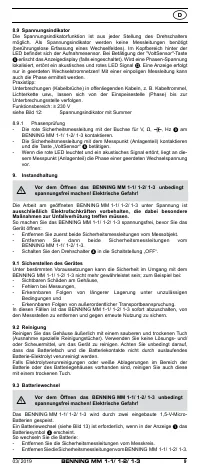
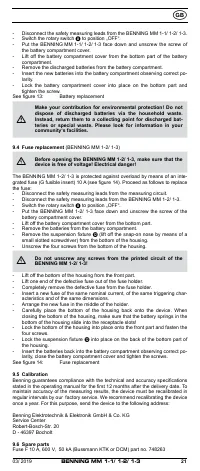
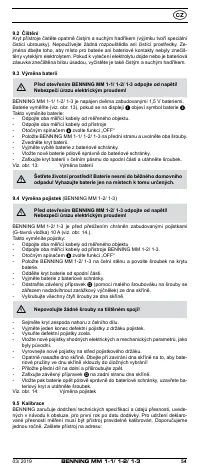
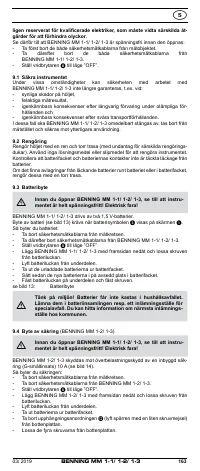
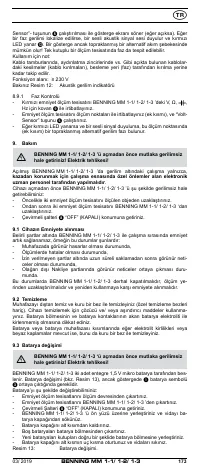
- Disconnect the safety measuring leads from the BENNING MM 1-1/ 1-2/ 1-3.
- Switch the rotary switch
8
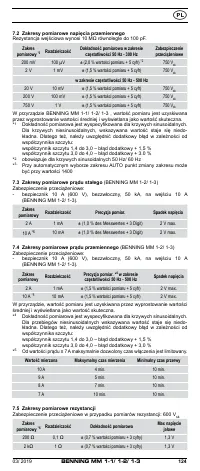
to position „OFF“.
- Put the BENNING MM 1-1/ 1-2/ 1-3 face down and unscrew the screw of
the battery compartment cover.
- Lift off the battery compartment cover from the bottom part of the battery
compartment.
- Remove the discharged batteries from the battery compartment.
- Insert the new batteries into the battery compartment observing correct po-
larity.
- Lock the battery compartment cover into place on the bottom part and
tighten the screw.
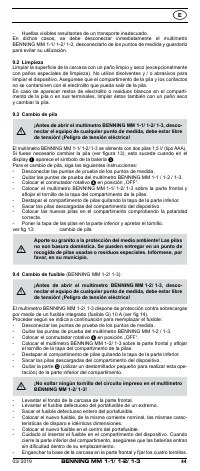
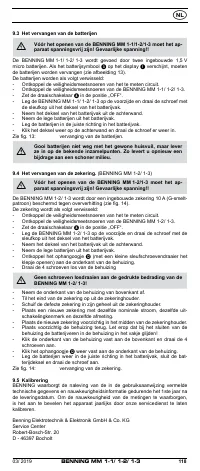
See figure 13:
Battery replacement
Make your contribution for environmental protection! Do not
dispose of discharged batteries via the household waste.
Instead, return them to a collecting point for discharged bat
‑
teries or special waste. Please look for information in your
community‘s facilities.
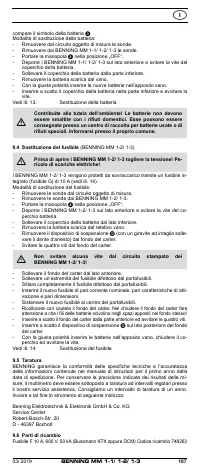
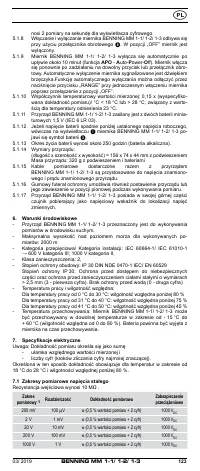
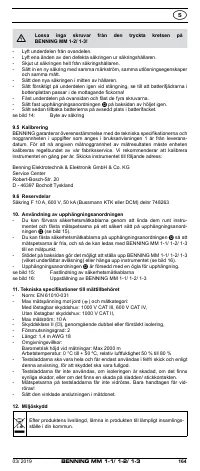
9.4 Fuse replacement
(BENNING MM 1-2/ 1-3)
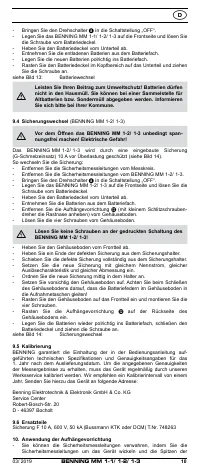
Before opening the BENNING MM 1-2/ 1-3, make sure that the
device is free of voltage! Electrical danger!
The BENNING MM 1-2/ 1-3 is protected against overload by means of an inte-
grated fuse (G fusible insert) 10 A (see figure 14). Proceed as follows to replace
the fuse:
- Disconnect the safety measuring leads from the measuring circuit.
- Disconnect the safety measuring leads from the BENNING MM 1-2/ 1-3.
- Switch the rotary switch
8
to position „OFF“.
- Put the BENNING MM 1-2/ 1-3 face down and unscrew the screw of the
battery compartment cover.
- Lift off the battery compartment cover from the bottom part.
- Remove the batteries from the battery compartment.
- Remove the suspension fixture
L
(lift off the snap-on nose by means of a
small slotted screwdriver) from the bottom of the housing.
- Unscrew the four screws from the bottom of the housing.
Do not unscrew any screws from the printed circuit of the
BENNING MM 1‑2/ 1‑3!
- Lift off the bottom of the housing from the front part.
- Lift one end of the defective fuse out of the fuse holder.
- Completely remove the defective fuse from the fuse holder.
- Insert a new fuse of the same nominal current, of the same triggering char-
acteristics and of the same dimensions.
- Arrange the new fuse in the middle of the holder.
- Carefully place the bottom of the housing back onto the device. When
closing the bottom of the housing, make sure that the battery springs in the
bottom of the housing slide into the receptacle slots!
- Lock the bottom of the housing into place onto the front part and fasten the
four screws.
- Lock the suspension fixture
L
into place on the back of the bottom part of
the housing.
- Insert the batteries back into the battery compartment observing correct po-
larity, close the battery compartment cover and tighten the screws.
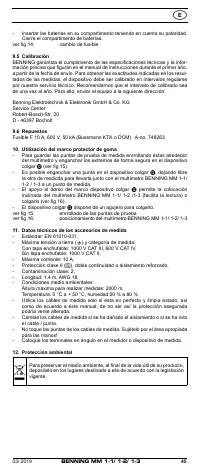
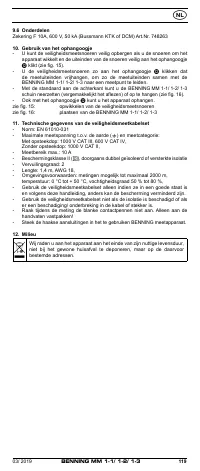
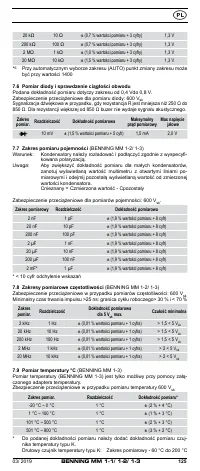
See figure 14:
Fuse replacement
9.5 Calibration
Benning guarantees compliance with the technical and accuracy specifications
stated in the operating manual for the first 12 months after the delivery date. To
maintain accuracy of the measuring results, the device must be recalibrated in
regular intervals by our factory service. We recommend recalibrating the device
once a year. For this purpose, send the device to the following address:
Benning Elektrotechnik & Elektronik GmbH & Co. KG
Service Center
Robert-Bosch-Str. 20
D - 46397 Bocholt
9.6 Spare parts
Fuse F 10 A, 600 V, 50 kA (Bussmann KTK or DCM) part no. 748263
03/ 2019
BENNING MM 1-1/ 1-2/ 1-3


