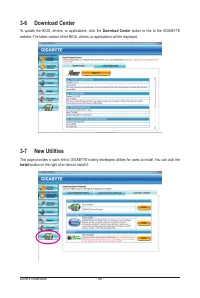
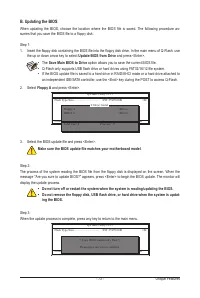
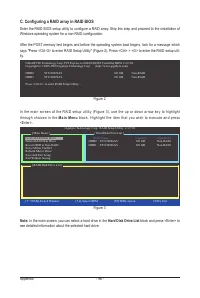
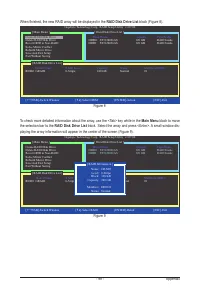
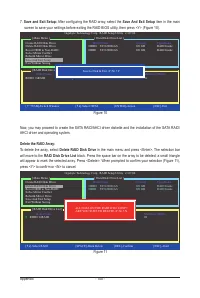
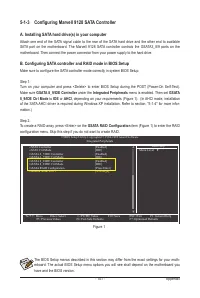
Материнские платы GIGABYTE GA P55 USB3 rev 1 0 - инструкция пользователя по применению, эксплуатации и установке на русском языке. Мы надеемся, она поможет вам решить возникшие у вас вопросы при эксплуатации техники.
Если остались вопросы, задайте их в комментариях после инструкции.
"Загружаем инструкцию", означает, что нужно подождать пока файл загрузится и можно будет его читать онлайн. Некоторые инструкции очень большие и время их появления зависит от вашей скорости интернета.


- 20 -
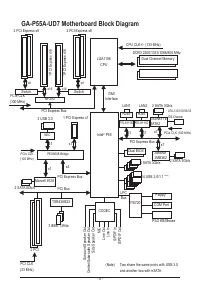
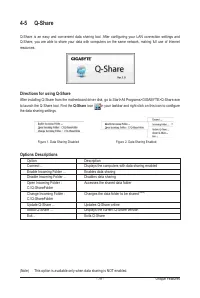
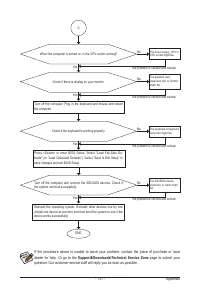
Hardware Installation
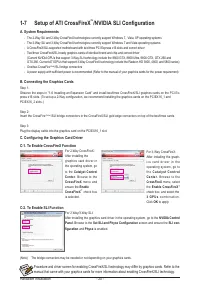
1-7 Setup of ATI CrossFireX
™
/NVIDIA SLI Configuration
A. System Requirements
- The 2-Way SLI and 2-Way CrossFireX technologies currently support Windows 7, Vista, XP operating systems
- The 3-Way SLI and 3-Way CrossFireX technologies currently support Windows 7 and Vista operating systems
- A CrossFireX/SLI-supported motherboard with two/three PCI Express x16 slots and correct driver
- Two/three CrossFireX/SLI-ready graphics cards of identical brand and chip and correct driver
(Current NVIDIA GPUs that support 3-Way SLI technology include the 8800 GTX, 8800 Ultra, 9800 GTX, GTX 260 and
GTX 280. Current ATI GPUs that support 3-Way CrossFireX technology include the Radeon HD 3800, 4800, and 5800 series)
- One/two CrossFire
(Note)
/SLI bridge connectors
- A power supply with sufficient power is recommended (Refer to the manual of your graphics cards for the power requirement)
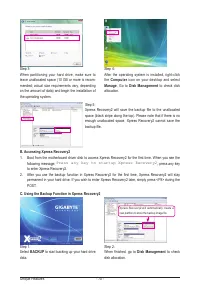
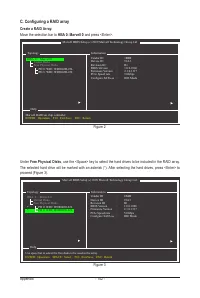
B. Connecting the Graphics Cards
Step 1:
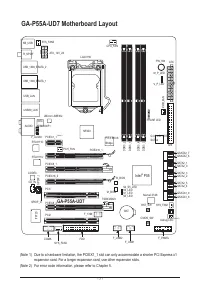
Observe the steps in "1-6 Installing an Expansion Card" and install two/three CrossFireX/SLI graphics cards on the PCI Ex-
press x16 slots. (To set up a 2-Way configuration, we recommend installing the graphics cards on the PCIEX16_1 and
PCIEX16_2 slots. )
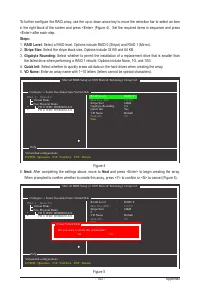
Step 2:
Insert the CrossFire
(Note )
/SLI bridge connectors in the CrossFireX/SLI gold edge connectors on top of the two/three cards.
Step 3:
Plug the display cable into the graphics card on the PCIEX16_1 slot.
(Note) The bridge connectors may be needed or not depending on your graphics cards.
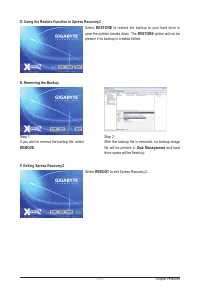
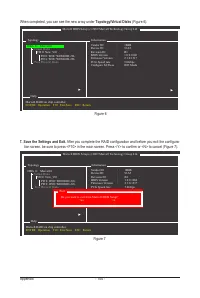
C. Configuring the Graphics Card Driver
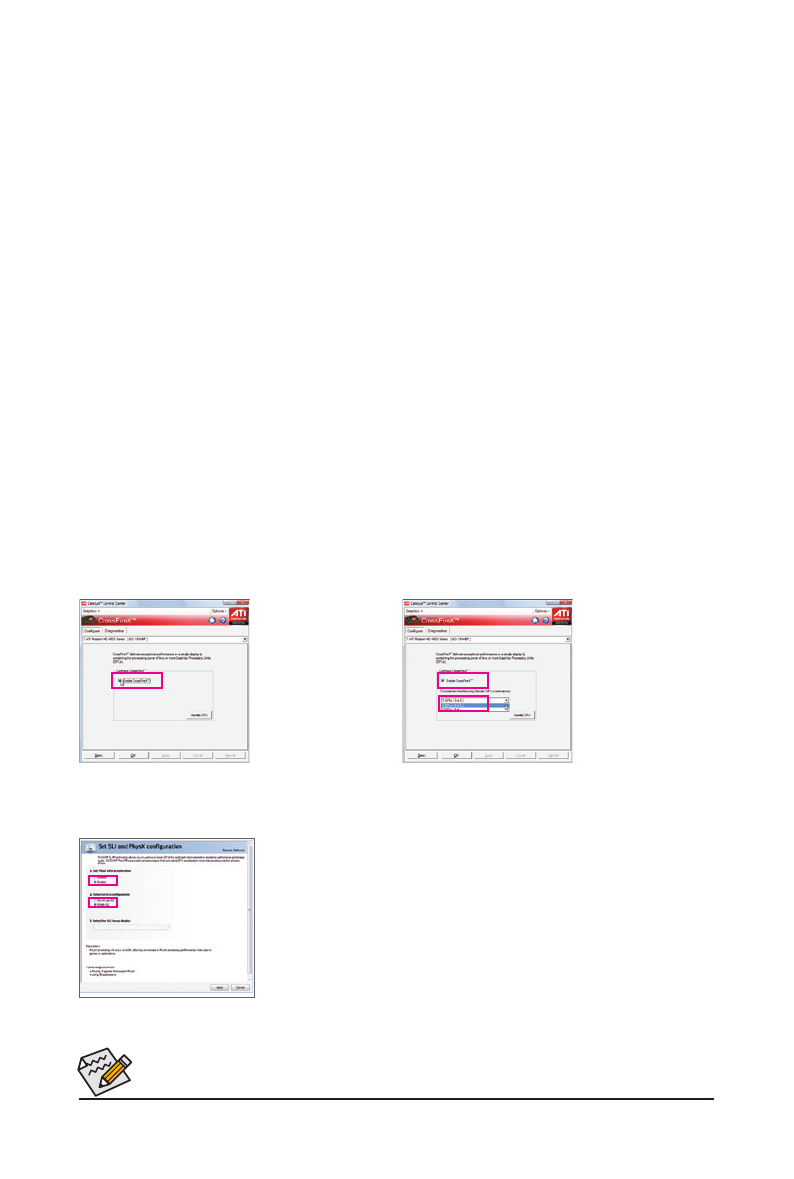
C-1. To Enable CrossFireX Function
For 2-Way CrossFireX:
After installing the
graphics card driver in
the operating system, go
to the
Catalyst Control
Center
. Browse to the
CrossFireX
menu and
ensure the
Enable
CrossFireX
™
check box
is selected.
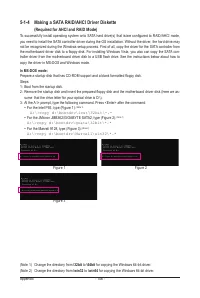
For 3-Way CrossFireX:
After installing the graph-
i c s c a r d d r i v e r i n t h e
operating system, go to
t h e
C a t a l y s t C o n t r o l
C e n t e r
. B r o w s e t o t h e
CrossFireX
menu, select
the
Enable CrossFireX
™
check box, and select the
3 G P U s
c o m b i n a t i o n .
Click
OK
to apply.
For 2-Way/3-Way SLI:
After installing the graphics card driver in the operating system, go to the
NVIDIA Control
Panel
. Browse to the
Set SLI and Physx Configuration
screen and ensure the
SLI con-
figuration
and
Physx
is enabled.
C-2. To Enable SLI Function
Procedure and driver screen for enabling CrossFireX/SLI technology may differ by graphics cards. Refer to the
manual that came with your graphics cards for more information about enabling CrossFireX/SLI technology.


