Магнитолы Pioneer MVH-09UB - инструкция пользователя по применению, эксплуатации и установке на русском языке. Мы надеемся, она поможет вам решить возникшие у вас вопросы при эксплуатации техники.
Если остались вопросы, задайте их в комментариях после инструкции.
"Загружаем инструкцию", означает, что нужно подождать пока файл загрузится и можно будет его читать онлайн. Некоторые инструкции очень большие и время их появления зависит от вашей скорости интернета.


5
H:\PDF-OUT\127075007251\020Chapter_EN.fm
MVH-09UB/MVH-09UBG
127075007251
En
En
g
lis
h
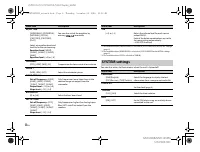
The RDS (radio data system) function only works in areas that broadcast RDS
signals for FM stations.
1
Press
SRC
/
OFF
to select [RADIO].
2
Press
BAND
/
DIMMER
to select the band from [F1], [FM2], [FM3],
[MW] or [LW].
TIP
F1 is for advanced FM band.
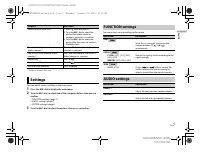
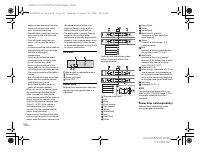
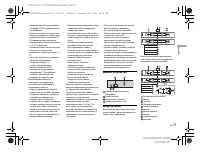
SP-P/O MODE
Select when there is a full-range speaker connected to
the rear speaker output leads and there is a subwoofer
connected to the RCA output.
[REAR/SUB.W ]
[SUB.W/SUB.W ]
Select when there is a passive subwoofer connected
directly to the rear speaker output leads and there is a
subwoofer connected to the RCA output.
[REAR/REAR]
Select when there are full-range speakers connected to
the rear speaker output leads and RCA output. If there is
a full-range speaker connected to the rear speaker
output leads, and the RCA output is not used, you may
select either [REAR/SUB.W ] or [REAR/REAR].
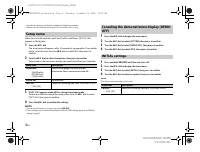
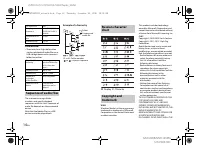
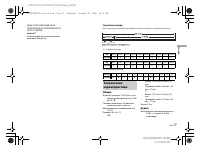
DIM SETTING
Change the display brightness.
[SYNC CLOCK],
[MANUAL]
SYSTEM RESET
Select [ YES] to initialize the unit settings. The unit will be
restarted automatically.
(Some of the settings may be retained even after
resetting the unit.)
[YES], [CANCEL]
Radio
Receiving preset stations
Menu Item
Description
3
Press a number button (
1
/
to
6
/
).
TIP
The
/
buttons can be also used to select a preset station when [SEEK] is set to
[PCH] in the FUNCTION settings (page 7).
The six strongest stations are stored on the number buttons (
1
/
to
6
/
).
1
After selecting the band, press the
M.C.
dial to display the main menu.
2
Turn the
M.C.
dial to select [FUNCTION], then press to confirm.
3
Turn the
M.C.
dial to select [BSM], then press to confirm.
To seek a station manually
1
After selecting the band, press
/
to select a station.
Press and hold
/
then release to seek an available station.
Scanning stops when the unit receives a station. To cancel seek tuning,
press /
.
NOTE
[SEEK] needs to be set to [MAN] in the FUNCTION settings (page 7).
To store stations manually
1
While receiving the station you want to store, press and hold one of the
number buttons (
1
/
to
6
/
) until it stops flashing.
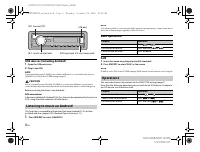
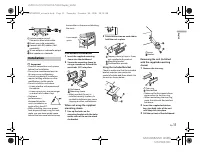
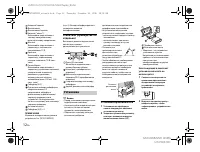
Disconnect headphones from the device before connecting it to the unit.
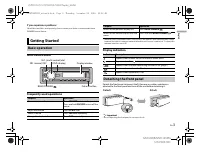
Best stations memory (BSM)
USB/AUX
Playing back
_127075007251_artwork.book Page 5 Thursday, November 24, 2016 10:34 AM
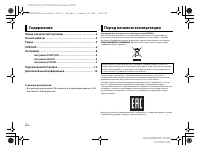
Содержание
- 18 О данном руководстве:; Содержание; Перед началом эксплуатации
- 19 ПРЕДУПРЕЖДЕНИЕ; Часто используемые операции; Начало работы; Основные операции
- 20 Индикация на дисплее; Снятие передней панели; Снятие; Установочное меню
- 21 Настройки INITIAL; Радио
- 22 Поиск станции вручную; Сохранение станций вручную; Воспроизведение
- 23 ВНИМАНИЕ; Прослушивание музыки на Android; AUX; Операции
- 24 Настройки; Настройки FUNCTION
- 25 Настройки SYSTEM
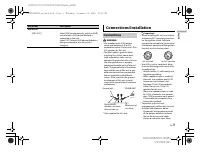
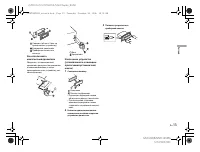
- 26 Подключения/Установка; Подключения
- 27 Данное устройство
- 28 Установка; Установка крепления DIN
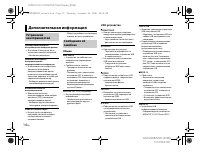
- 30 Общие; Дополнительная информация
- 31 Файлы WMA; Файлы MP3
- 32 Пример иерархии
- 33 Серийный номер


