Магнитолы Pioneer DEH-200MP - инструкция пользователя по применению, эксплуатации и установке на русском языке. Мы надеемся, она поможет вам решить возникшие у вас вопросы при эксплуатации техники.
Если остались вопросы, задайте их в комментариях после инструкции.
"Загружаем инструкцию", означает, что нужно подождать пока файл загрузится и можно будет его читать онлайн. Некоторые инструкции очень большие и время их появления зависит от вашей скорости интернета.

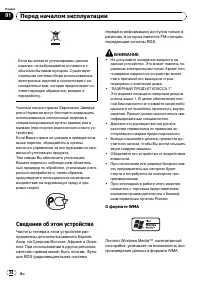


!
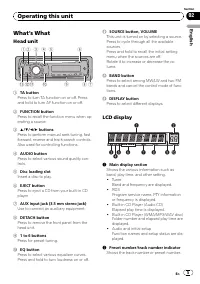
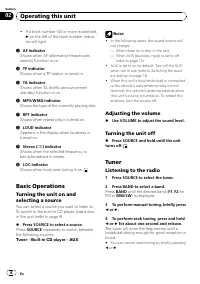
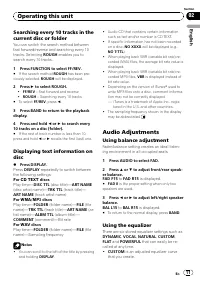
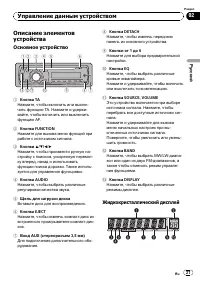
If a track number 100 or more is selected,
d
on the left of the track number indica-
tor will light.
3
AF indicator
Shows when AF (alternative frequencies
search) function is on.
4
TP indicator
Shows when a TP station is tuned in.
5
TA indicator
Shows when TA (traffic announcement
standby) function is on.
6
MP3/WMA indicator
Shows the type of the currently playing disc.
7
RPT indicator
Shows when repeat play is turned on.
8
LOUD indicator
Appears in the display when loudness is
turned on.
9
Stereo (
5
) indicator
Shows when the selected frequency is
being broadcast in stereo.
a
LOC indicator
Shows when local seek tuning is on.
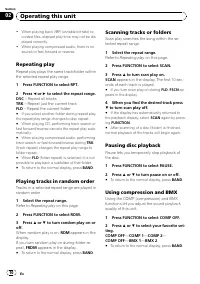
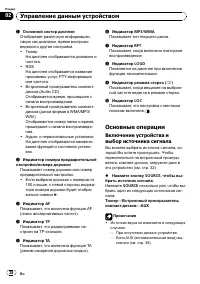
Basic Operations
Turning the unit on and
selecting a source
You can select a source you want to listen to.
To switch to the built-in CD player, load a disc
in the unit (refer to page 9).
%
Press SOURCE to select a source.
Press
SOURCE
repeatedly to switch between
the following sources:
Tuner
—
Built-in CD player
—
AUX
Notes
!
In the following cases, the sound source will
not change:
—
When there is no disc in the unit.
—
When AUX (auxiliary input) is set to off
(refer to page 13).
!
AUX is set to on by default. Turn off the AUX
when not in use (refer to
!
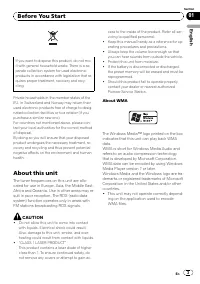
When this unit
’
s blue/white lead is connected
to the vehicle
’
s auto-antenna relay control
terminal, the vehicle
’
s antenna extends when
this unit
’
s source is turned on. To retract the
antenna, turn the source off.
Adjusting the volume
%
Use VOLUME to adjust the sound level.
Turning the unit off
%
Press SOURCE and hold until the unit
turns off.
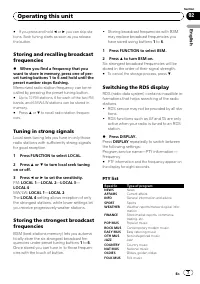
Tuner
Listening to the radio
1
Press SOURCE to select the tuner.
2
Press BAND to select a band.
Press
BAND
until the desired band (
F1
,
F2
for
FM or
MW/LW
) is displayed.
3
To perform manual tuning, briefly press
c
or
d
.
4
To perform seek tuning, press and hold
c
or
d
for about one second and release.
The tuner will scan the frequencies until a
broadcast strong enough for good reception is
found.
#
You can cancel seek tuning by briefly pressing
c
or
d
.
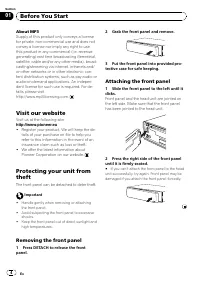
Operating this unit
En
6
Section
02
Содержание
- 24 Сведения об этом устройстве; ВНИМАНИЕ; О формате
- 25 Посетите наш сайт; Снятие передней панели; DETACH
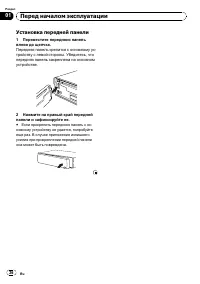
- 26 Установка передней панели; Переместите переднюю панель
- 27 Основное устройство; Жидкокристаллический дисплей; Управление данным устройством
- 28 Основные операции; AUX
- 29 Регулировка громкости; Тюнер; Прослушивание радиоприемника; FM; Настройка на мощные сигналы
- 30 Переключение режима; AF; Список
- 31 Выбор альтернативных частот; PI; PI SEEK; Включение автоматического поиска
- 32 Прием дорожных сводок; TP; Встроенный проигрыватель; Воспроизведение диска
- 33 Повторное воспроизведение; FUNCTION
- 34 Сканирование дорожек и папок; Использование компрессии и; BMX
- 35 CD TEXT
- 36 Использование эквалайзера; Регулировка нижних; Регулировка тонкомпенсации
- 37 Другие функции; Изменение начальных настроек; Установка шага настройки в
- 38 Настройка языка
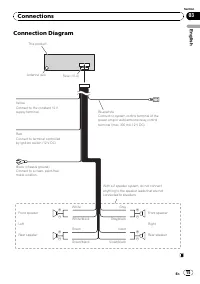
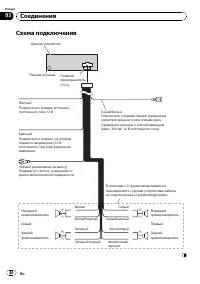
- 39 Соединения
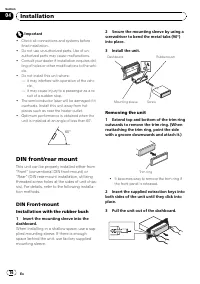
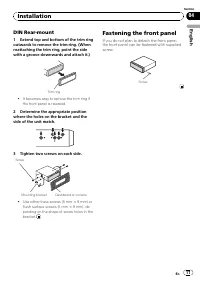
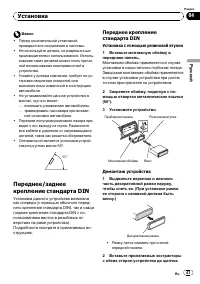
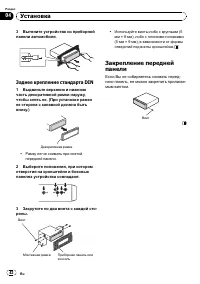
- 41 Переднее; Установка с помощью резиновой втулки; Демонтаж устройства; Установка
- 42 Если Вы не собираетесь снимать перед
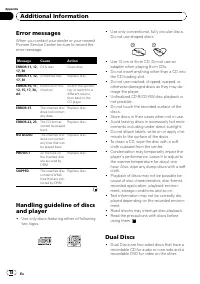
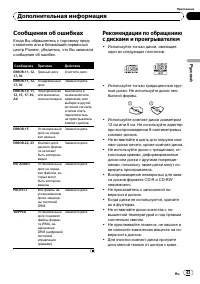
- 43 Сообщения об ошибках
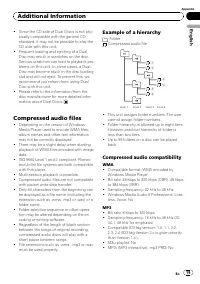
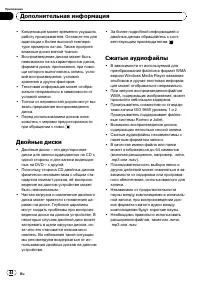
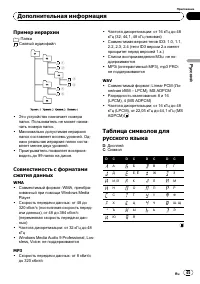
- 45 Пример иерархии
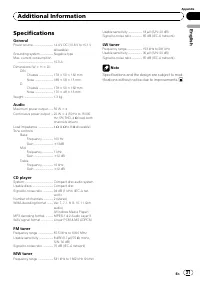
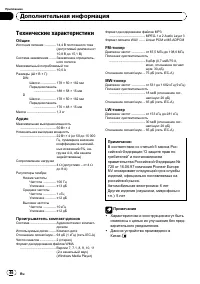
- 46 Технические характеристики


