Магнитолы Pioneer DEH-200MP - инструкция пользователя по применению, эксплуатации и установке на русском языке. Мы надеемся, она поможет вам решить возникшие у вас вопросы при эксплуатации техники.
Если остались вопросы, задайте их в комментариях после инструкции.
"Загружаем инструкцию", означает, что нужно подождать пока файл загрузится и можно будет его читать онлайн. Некоторые инструкции очень большие и время их появления зависит от вашей скорости интернета.

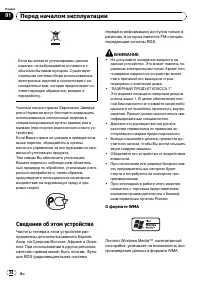


About MP3
Supply of this product only conveys a license
for private, non-commercial use and does not
convey a license nor imply any right to use
this product in any commercial (i.e. revenue-
generating) real time broadcasting (terrestrial,
satellite, cable and/or any other media), broad-
casting/streaming via internet, intranets and/
or other networks or in other electronic con-
tent distribution systems, such as pay-audio or
audio-on-demand applications. An indepen-
dent license for such use is required. For de-
tails, please visit
http://www.mp3licensing.com.
Visit our website
Visit us at the following site:
http://www.pioneer.eu
!
Register your product. We will keep the de-
tails of your purchase on file to help you
refer to this information in the event of an
insurance claim such as loss or theft.
!
We offer the latest information about
Pioneer Corporation on our website.
Protecting your unit from
theft
The front panel can be detached to deter theft.
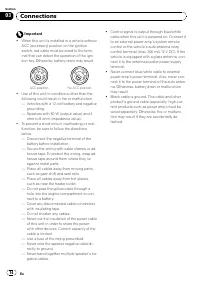
Important
!
Handle gently when removing or attaching
the front panel.
!
Avoid subjecting the front panel to excessive
shocks.
!
Keep the front panel out of direct sunlight and
high temperatures.
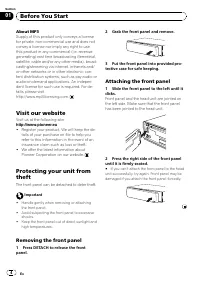
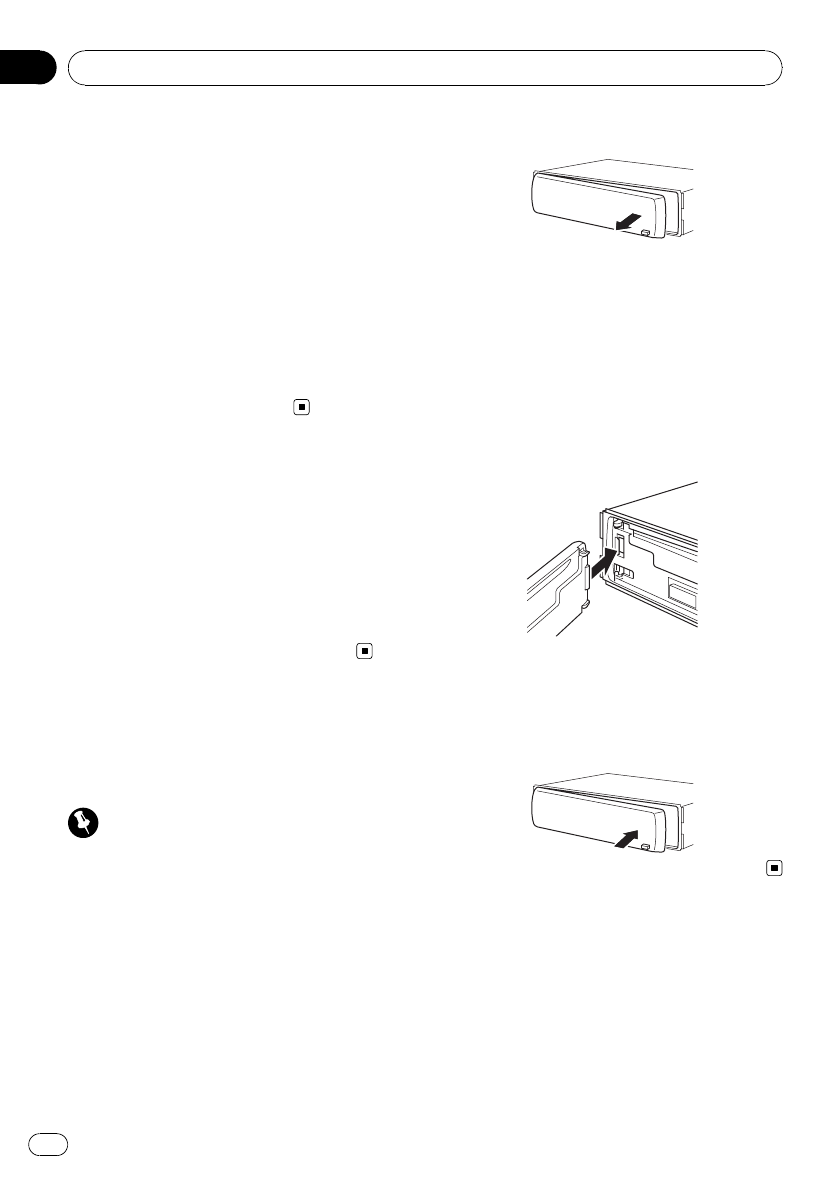
Removing the front panel
1
Press DETACH to release the front
panel.
2
Grab the front panel and remove.
3
Put the front panel into provided pro-
tective case for safe keeping.
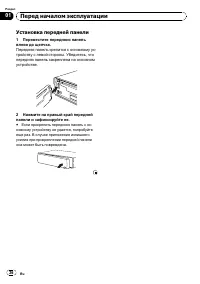
Attaching the front panel
1
Slide the front panel to the left until it
clicks.
Front panel and the head unit are jointed on
the left side. Make sure that the front panel
has been jointed to the head unit.
2
Press the right side of the front panel
until it is firmly seated.
#
If you can
’
t attach the front panel to the head
unit successfully, try again. Front panel may be
damaged if you attach the front panel forcedly.
Before You Start
En
4
Section
01
Содержание
- 24 Сведения об этом устройстве; ВНИМАНИЕ; О формате
- 25 Посетите наш сайт; Снятие передней панели; DETACH
- 26 Установка передней панели; Переместите переднюю панель
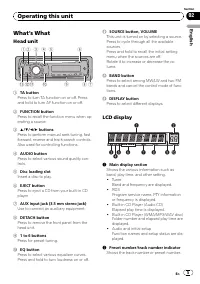
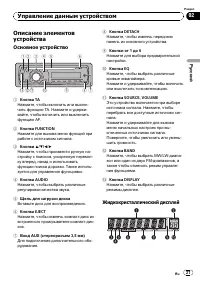
- 27 Основное устройство; Жидкокристаллический дисплей; Управление данным устройством
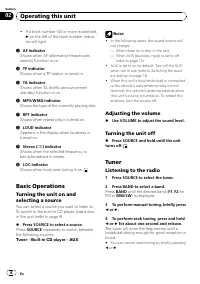
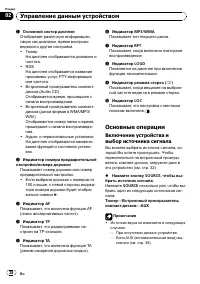
- 28 Основные операции; AUX
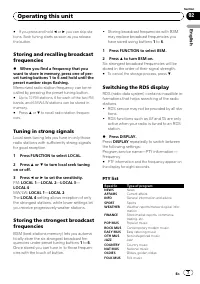
- 29 Регулировка громкости; Тюнер; Прослушивание радиоприемника; FM; Настройка на мощные сигналы
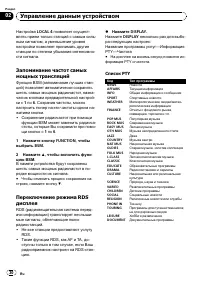
- 30 Переключение режима; AF; Список
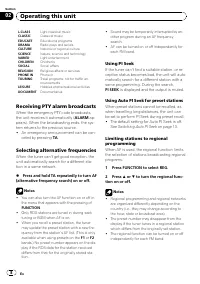
- 31 Выбор альтернативных частот; PI; PI SEEK; Включение автоматического поиска
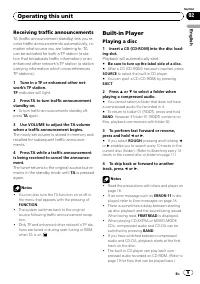
- 32 Прием дорожных сводок; TP; Встроенный проигрыватель; Воспроизведение диска
- 33 Повторное воспроизведение; FUNCTION
- 34 Сканирование дорожек и папок; Использование компрессии и; BMX
- 35 CD TEXT
- 36 Использование эквалайзера; Регулировка нижних; Регулировка тонкомпенсации
- 37 Другие функции; Изменение начальных настроек; Установка шага настройки в
- 38 Настройка языка
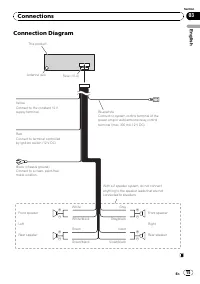
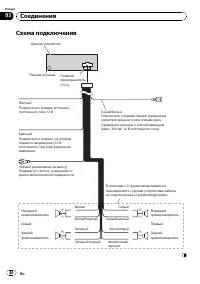
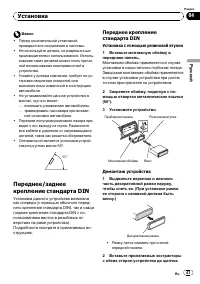
- 39 Соединения
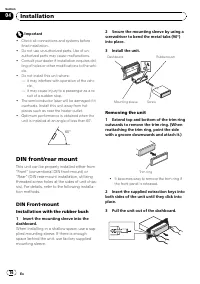
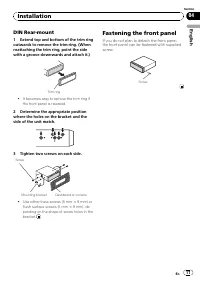
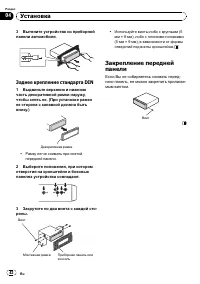
- 41 Переднее; Установка с помощью резиновой втулки; Демонтаж устройства; Установка
- 42 Если Вы не собираетесь снимать перед
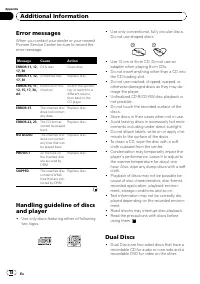
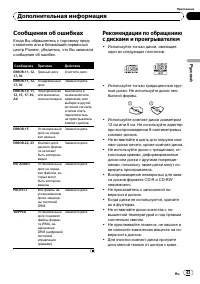
- 43 Сообщения об ошибках
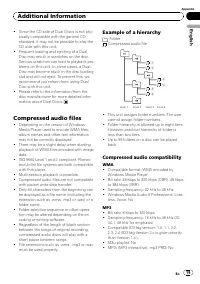
- 45 Пример иерархии
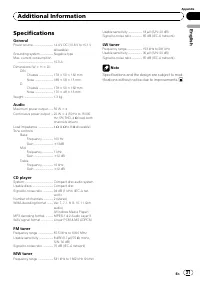
- 46 Технические характеристики


