Магнитолы Hyundai Electronics H-CMD4021 - инструкция пользователя по применению, эксплуатации и установке на русском языке. Мы надеемся, она поможет вам решить возникшие у вас вопросы при эксплуатации техники.
Если остались вопросы, задайте их в комментариях после инструкции.
"Загружаем инструкцию", означает, что нужно подождать пока файл загрузится и можно будет его читать онлайн. Некоторые инструкции очень большие и время их появления зависит от вашей скорости интернета.


6
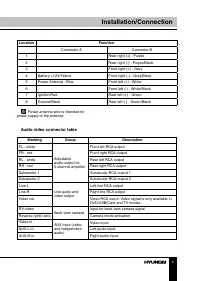
Installation/Connection
c
b
а
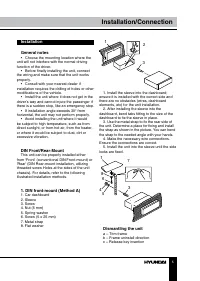
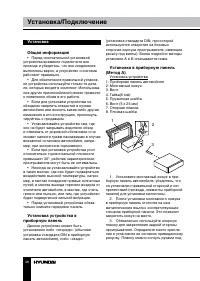
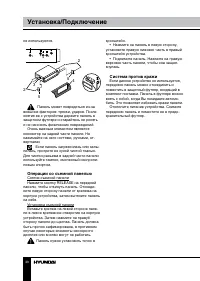
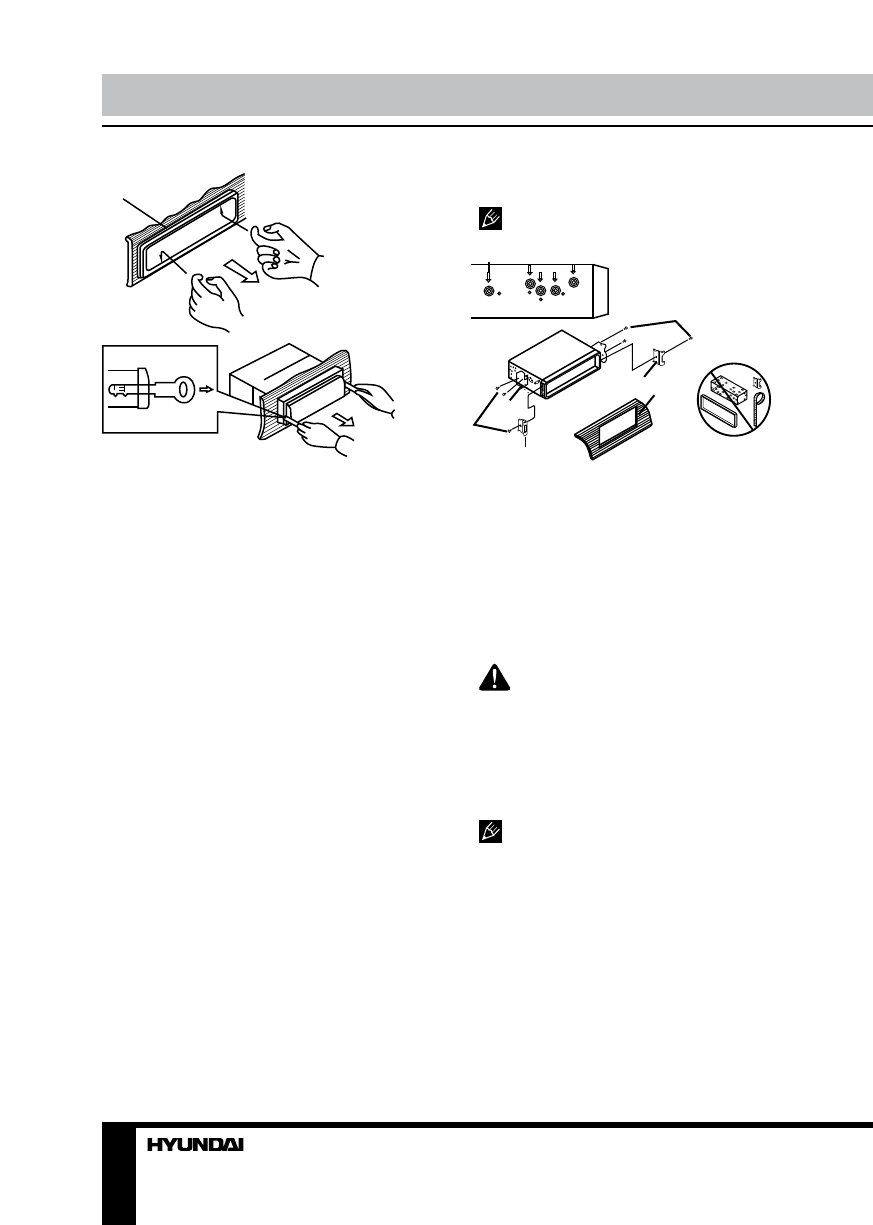
1. Switch off the unit and detach the front
panel.
2. Insert your fingers into the groove in the
front side of the trim frame (apply some effort to
detach the frame). Pull the frame to detach it.
3. Insert the supplied release keys into the
both sides of the unit body to click, as shown
in the picture. To extract the unit from the
dashboard, pull the release keys or the unit
body to pull it out. Before detaching the unit,
ensure it is not fixed with the metal strap.
Trim frame installation
To install the trim frame, press it to the unit
body and push it to fix it in place. This should
be done before installing the front panel;
otherwise you are not able to install the trim
frame. When the trim frame being installed,
the side with the groove should face down and
fixed first.
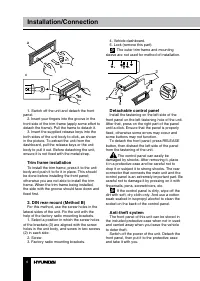
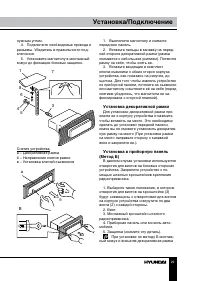
2. DIN rear-mount (Method B)
For this method, use the screw holes in the
lateral sides of the unit. Fix the unit with the
help of the factory radio mounting brackets.
1. Select a position in which the screw holes
of the brackets (3) are aligned with the screw
holes in the unit body, and screw in two screws
(2) in each side.
2. Screw.
3. Factory radio mounting brackets.
4. Vehicle dashboard.
5. Lock (remove this part).
The outer trim frame and mounting
sleeve are not used for method of installation.
2
2
5
5
4
3
Detachable control panel
Install the fastening on the left side of the
front panel on the left fastening hole of the unit.
After that, press on the right part of the panel
until a click. Ensure that the panel is properly
fixed, otherwise some errors may occur and
some buttons may not function.
To detach the front panel, press RELEASE
button, then distract the left side of the panel
from the fastening of the unit.
The control panel can easily be
damaged by shocks. After removing it, place
it in a protective case and be careful not to
drop it or subject it to strong shocks. The rear
connector that connects the main unit and the
control panel is an extremely important part. Be
careful not to damage it by pressing on it with
fingernails, pens, screwdrivers, etc.
If the control panel is dirty, wipe off the
dirt with soft, dry cloth only. And use a cotton
swab soaked in isopropyl alcohol to clean the
socket on the back of the control panel.
Anti-theft system
The front panel of this unit can be stored in
the included protective case when not in used
and carried away when you leave the vehicle
to deter theft.
Switch off the power of the unit. Detach the
front panel, then put it to the protective case
and take it with you.
Содержание
- 24 Уважаемый покупатель!; Содержание
- 25 Операции с iPod; Общая информация; Обращение с компакт-дисками
- 26 Утилизация изделия
- 27 • Убедитесь, что источник питания и
- 28 Установка
- 29 Установка декоративной рамки
- 30 Операции со съемной панелью
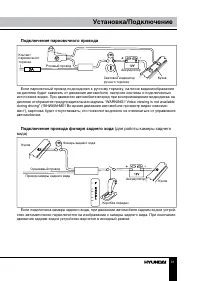
- 31 Подключение парковочного провода; (для работы камеры заднего
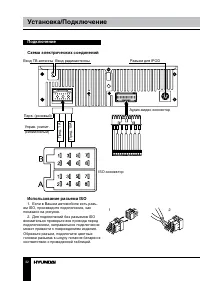
- 32 Подключение; Разъем для IPOD; Использование разъема ISO; Для подключений без разъемов ISO
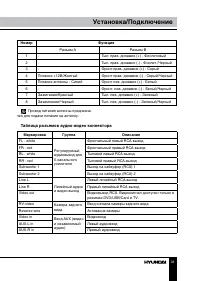
- 33 Номер; Таблица разъемов аудио-видео коннектора; Маркировка
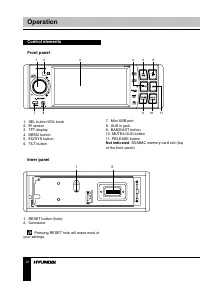
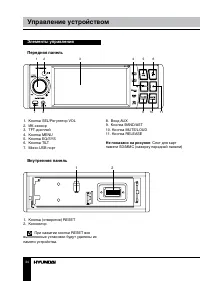
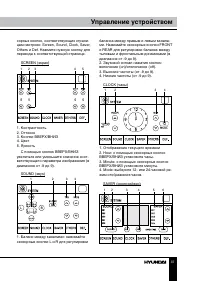
- 34 Элементы управления; Не показано на рисунке; Внутренняя панель; При нажатии кнопки RESET все
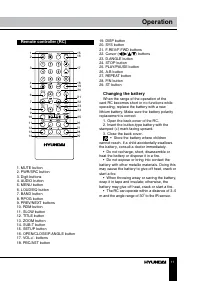
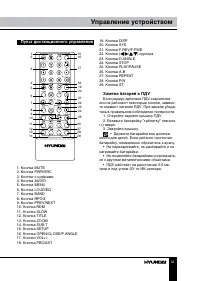
- 35 Пульт дистанционного управления
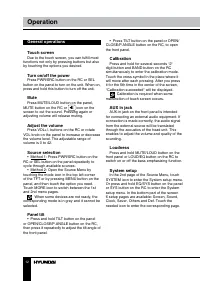
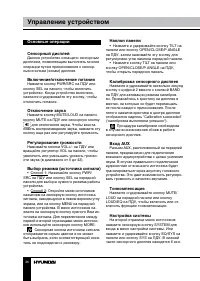
- 36 Основные операции
- 37 С помощью кнопок ВВЕРХ/ВНИЗ
- 38 настроек к исходным заводским значениям.; Операции с радио; Нажмите для выполнения нужной опера-; Выбор диапазона; В режиме радио нажимайте кнопку; Автоматический/ручной поиск; После выбора диапазона нажмите и
- 40 Функция REG
- 41 Меню режима DVD
- 44 Настройка DVD
- 45 Настройки изображения; На этой странице Вы можете отрегули-; Установки динамиков; динамиков; Цифровые установки; Низкий уровень громкости.
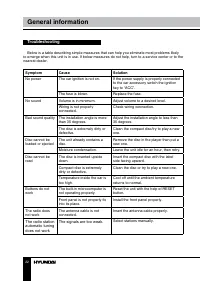
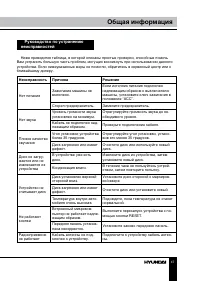
- 47 Руководство по устранению; Неисправность
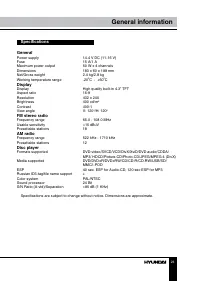
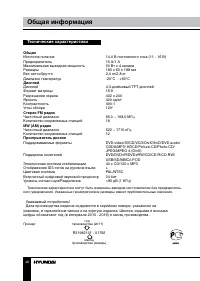
- 48 Технические характеристики; Общие

