Магнитолы Hyundai Electronics H-CCR4701M - инструкция пользователя по применению, эксплуатации и установке на русском языке. Мы надеемся, она поможет вам решить возникшие у вас вопросы при эксплуатации техники.
Если остались вопросы, задайте их в комментариях после инструкции.
"Загружаем инструкцию", означает, что нужно подождать пока файл загрузится и можно будет его читать онлайн. Некоторые инструкции очень большие и время их появления зависит от вашей скорости интернета.


7
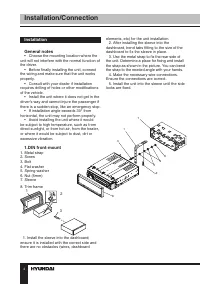
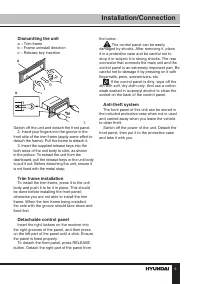
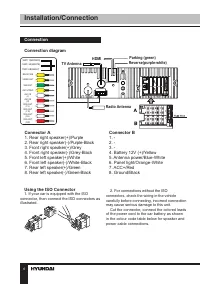
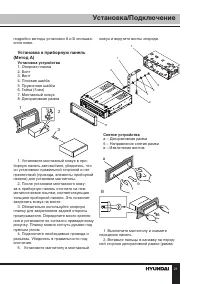
Installation/Connection
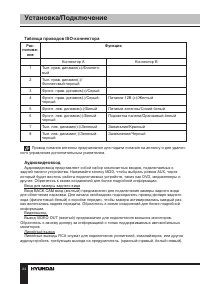
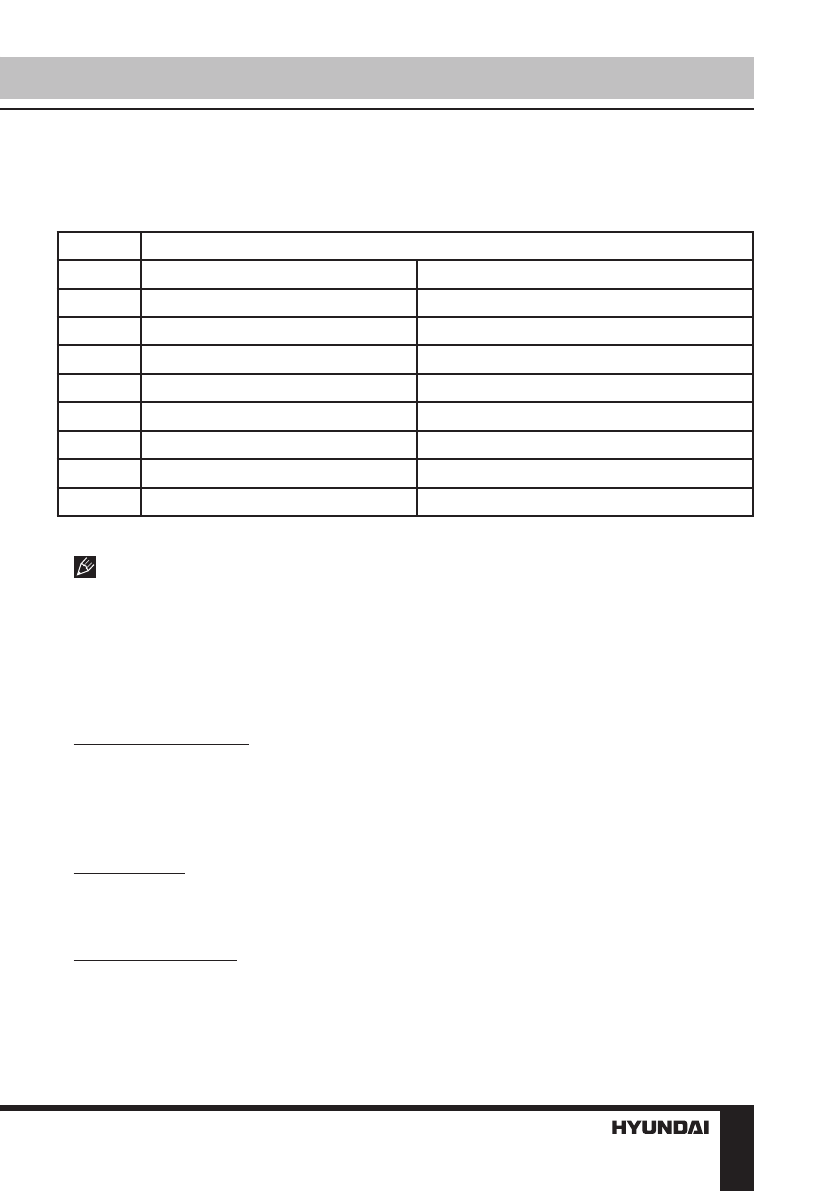
ISO connection table
Location
Function
Connector B
Connector A
1
Rear right (+) - Purple
-
2
Rear right (-) - Purple/Black
-
3
Front right (+) - Grey
-
4
Front right (-) - Grey/Black
Battery +12V/Yellow
5
Front left (+) - White
Antenna power/Blue-White
6
Front left (-) - White/Black
Panel light/Orange-White
7
Rear left (+) - Green
Ignition/Red
8
Rear left (-) - Green/Black
Ground/Black
Power antenna wire is intended for power supply of the antenna and for remote control of
an additional amplifier.
AV Input
The AV Input jack is a set of composite inputs on the rear of the unit. Press the MOD
button to choose AUX. You can use it to connect any portable audio/video devices
such as a DVD player or VCD player to the unit. Refer to the Connection diagram for
more details.
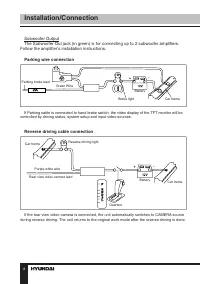
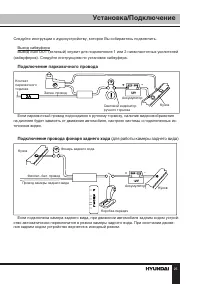
Backup Camera Input
The backup camera input is on the back of the unit. (refer to wiring diagram). This
input (in yellow) is for connecting backup camera for parking. You must connect the
VCC wire (purple-white) to the reverse gear switch in order to activate this video input
mode when you switch the reverse gear of your car. Please refer to the wiring diagram
for more details.
Video Output
The Video out jack (in yellow) is for connecting monitor(s). You must connect a car
monitor in order to operate this unit in another monitor. Consult your dealer for any
kinds of monitors that are suitable to use in car.
RCA Output (2 sets)
The RCA out jacks are for connecting amplifiers, equalizers, or other audio
components that require a pre-amp out connection. (Red=Right, White=Left) Follow
the manufacturer’s instructions for the audio component that you are connecting.
Содержание
- 18 Содержание; Уважаемый покупатель!
- 19 Перед началом эксплуатации; Утилизация изделия
- 20 Установка
- 21 Установка в приборную панель
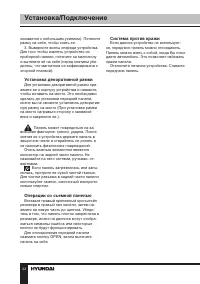
- 22 Установка декоративной рамки
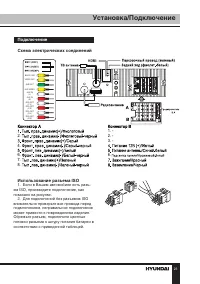
- 23 Подключение; Использование разъема ISO
- 24 Таблица проводов ISO-коннектора; Аудиовидеовход
- 25 Подключение парковочного провода
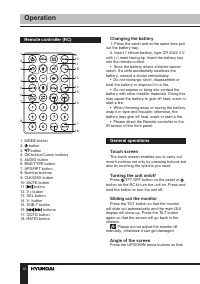
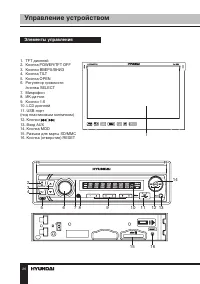
- 26 Управление устройством; Элементы управления
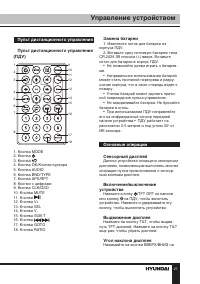
- 27 Пульт дистанционного управления
- 29 Операции с радио
- 30 Операции с TВ-тюнером
- 31 Операции при воспроизведении
- 32 Передача данных через HDMI
- 33 Общая информация; Чистка корпуса устройства
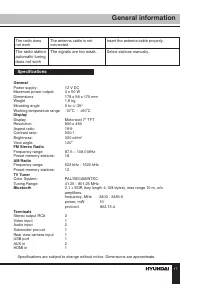
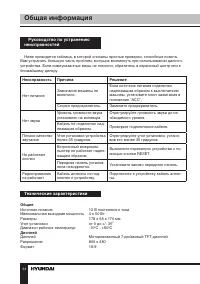
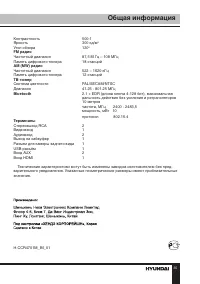
- 34 Руководство по устранению; Технические характеристики

