Магнитолы Clarion CZ202E(EG)(ER) - инструкция пользователя по применению, эксплуатации и установке на русском языке. Мы надеемся, она поможет вам решить возникшие у вас вопросы при эксплуатации техники.
Если остались вопросы, задайте их в комментариях после инструкции.
"Загружаем инструкцию", означает, что нужно подождать пока файл загрузится и можно будет его читать онлайн. Некоторые инструкции очень большие и время их появления зависит от вашей скорости интернета.


12
En
g
lish
CZ202E/CZ202ER/CZ202EG
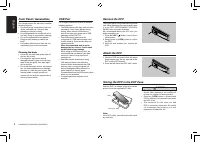
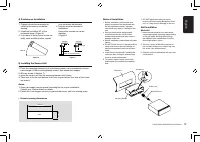
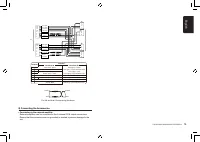
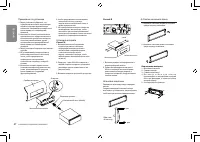
4) Cautions on Installation
1. Prepare all articles necessary for
installing the source unit before
starting.
2. Install the unit within 30° of the
horizontal plane. (Figure 2)
3. If you have to do any work on the car
body, such as drilling holes, consult
your car dealer beforehand.
4. Use the enclosed screws for
installation.
Using other screws can cause
damage.
(Figure 3)
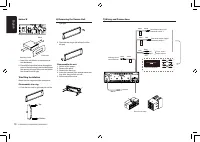
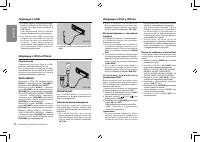
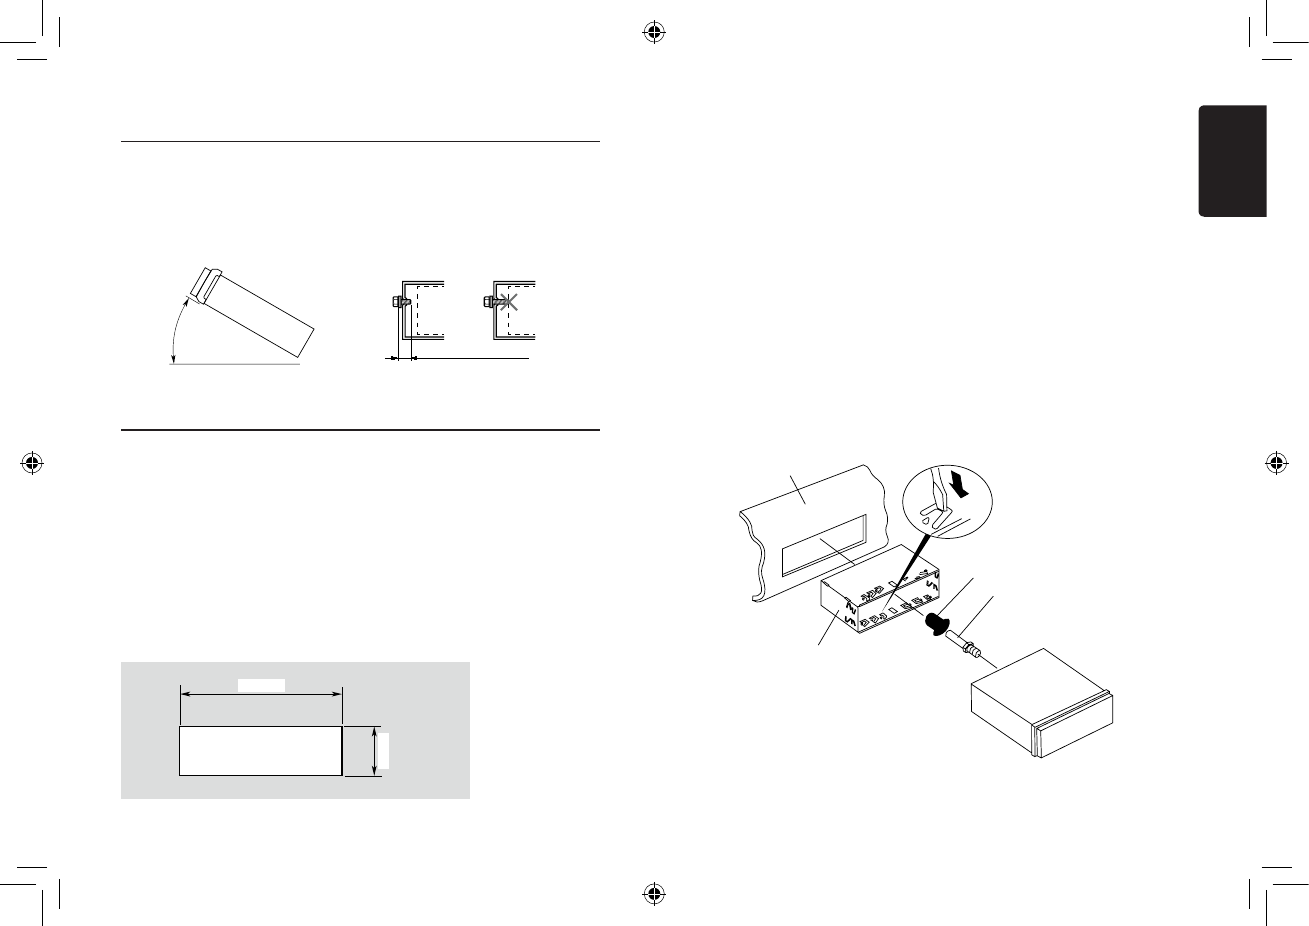
5) Installing the Source Unit
1. Place the mounting bracket into the instrument panel, use a screwdriver to bend
each stopper of the mounting bracket inward, then secure the stopper.
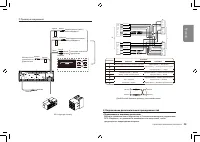
2. Wire as shown in Section 7) .
3. Insert the source unit into the mounting bracket until it locks.
4. Take care of the top and bottom of the trim ring and mount it so that all the hooks
are locked.
Notes:
1. Some car models require special mounting kits for proper installation.
Consult your Clarion dealer for details.
2. Fasten the front stopper securely to prevent the source unit from coming loose.
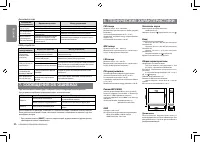
• Console opening dimensions
Max 30
˚
Chassis
Chassis
Damage
Max. 6 mm (M5 screw)
Figure 2
Figure 3
(182 mm)
5
3
mm
Hole
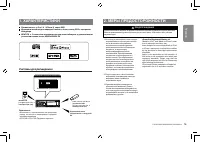
Notes of installation
1. Before installation, please make sure
proper connections are conducted and
the unit operates normally. Improper
connection may result in damage to the
unit.
2. Use only accessories designed and
manufactured for this unit and other
unauthorized accessories may result in
damage to the unit.
3. Before installation, please fasten all power
cables.
4. DO NOT install the unit in the place where
close to hot area to prevent damage to
electrical components such as the laser
head.
5. Install the unit horizontally. Installing the
unit more than 30 degree vertically may
result in worse performance.
6. To prevent electric spark, connect the
positive pole irst and then the negative
pole.
7. DO NOT block the cooling fan exit to
ensure suficient heating dissipation of this
unit, or it may result in damage to this unit.
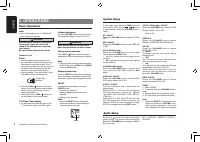
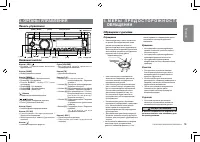
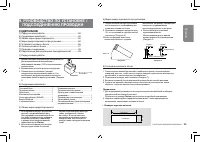
Unit Installation
Method A
1. Insert mounting bracket into dash board,
choose appropriate mounting tab according
to the gap width, bending the mounting
tab outwards with a screwdriver to ix the
mounting bracket in place.
2. Screw in 1 piece of M4×42 to the hole of
the unit back and put on a rubber cap over
the screw. (see picture below)
3. Slide the unit into the bracket until you hear
a click sound.
Dashboard
Mounting Bracket
Screwdriver
Rubber Cap
Special Screw
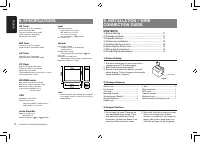
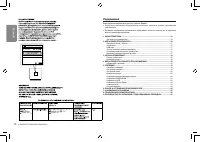
Содержание
- 17 -канальный усилитель; Системы для расширения; МЕРЫ ПРЕДОСТОРОЖНОСТИ; ПРЕДУПРЕЖДЕНИЕ
- 18 Очистка корпуса; В случае потери или повреждения; Хранение съемной панели в футляре; ПРЕДОСТЕРЕЖЕНИЕ
- 19 CD; ОРГАНЫ УПРАВЛЕНИЯ; Панель управления; Обращение; В целях безопасности водитель не; М Е Р Ы П Р Е Д О С Т О Р О Ж Н О С Т И П Р И; Обращение с дисками
- 20 ОПЕРАЦИИ; Основные операции; Регулировка громкости; Выбор воспроизводимого; Настройка системы
- 21 Настройка звука; DX; Операции системы передачи данных; Система передачи данных
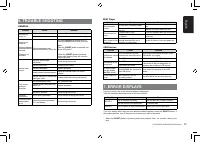
- 23 Повторное
- 24 Операции с USB
- 25 Ус т а н о в к а ч у в с т в и т е л ь н о с т и; Операции AUX; П О И С К И У С Т Р А Н Е Н И Е; НЕИСПРАВНОСТИ ОБЩЕГО ХАРАКТЕРА; HIGH
- 26 СООБЩЕНИЯ ОБ ОШИБКАХ; Дисковый плеер; ТЕХНИЧЕСКИЕ ХАРАКТЕРИСТИКИ; Усилитель звука
- 27 РУКОВОДСТВО ПО УСТАНОВКЕ /; СОДЕРЖАНИЕ
- 28 Примечания по установке; Способ A; Извлечение аппарата; ) Снятие основного блока; Установка окантовки; топ
- 29 ) Провода и соединения; • Подключение к внешнему усилителю.; RCA. Убедитесь, что разъемы не заземлены и не закорочены, чтобы; Подключение дополнительных принадлежностей

