
Кондиционеры Tesla TT27TP61S - инструкция пользователя по применению, эксплуатации и установке на русском языке. Мы надеемся, она поможет вам решить возникшие у вас вопросы при эксплуатации техники.
Если остались вопросы, задайте их в комментариях после инструкции.
"Загружаем инструкцию", означает, что нужно подождать пока файл загрузится и можно будет его читать онлайн. Некоторые инструкции очень большие и время их появления зависит от вашей скорости интернета.


61
ENG
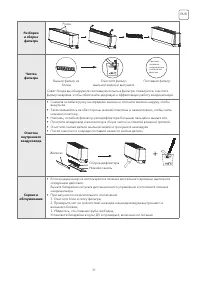
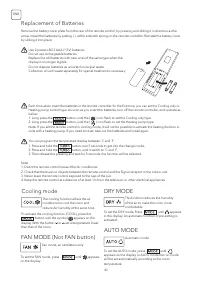
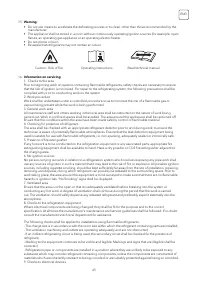
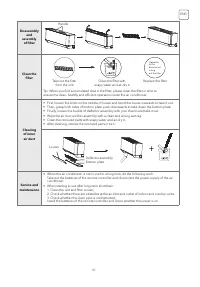
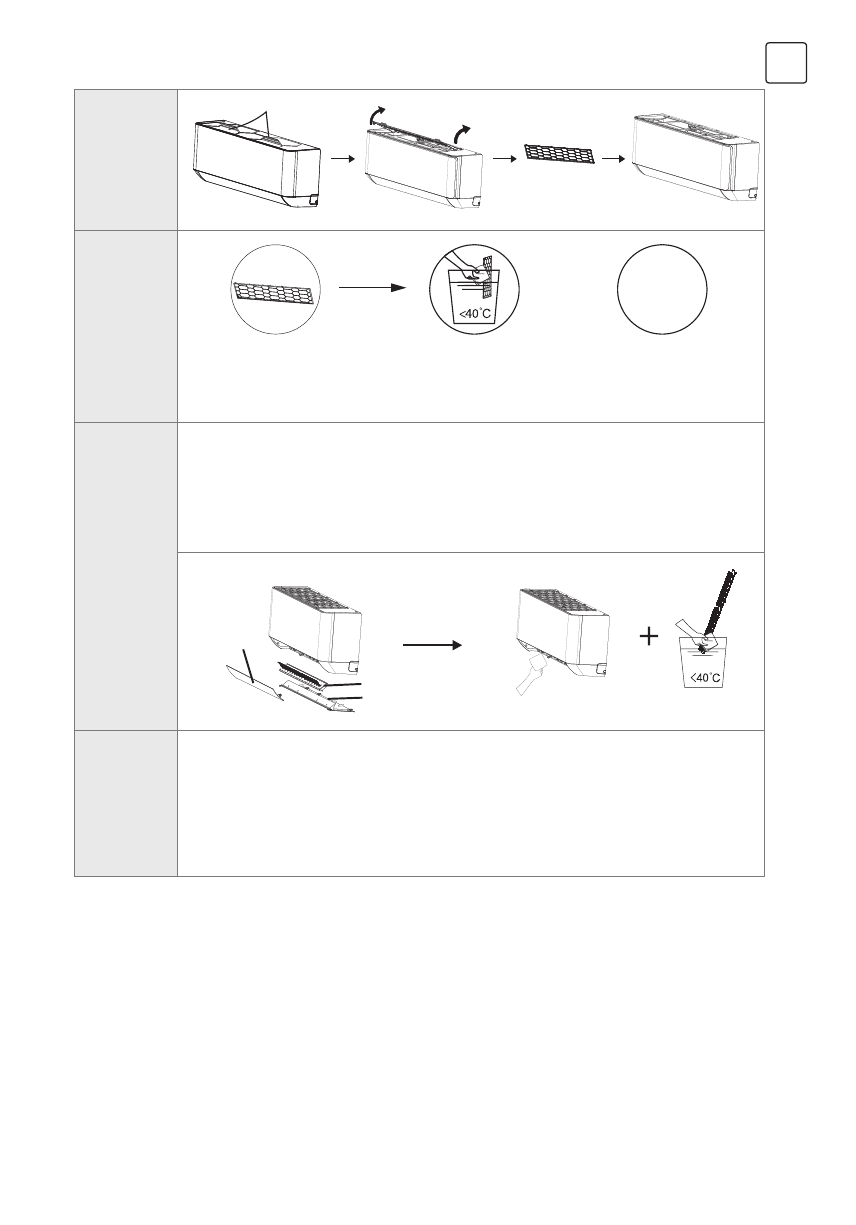
Disassembly
and
assembly
of filter
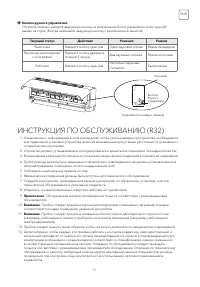
Handle
Clean the
filter
Take out the filter
from the unit
Clean the filter with
soapy water and air dry it
Replace the filter
Opposite
to the
direction of
taking
out the filter
Tip: When you find accumulated dust in the filter, please clean the filter in time to
ensure the clean, healthy and efficient operation inside the air conditioner.
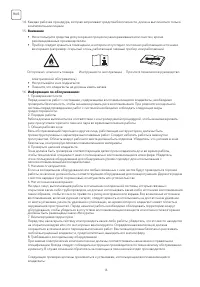
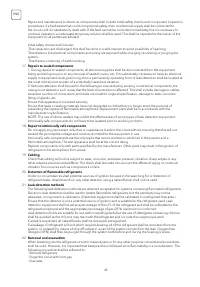
Cleaning
of inner
air duct
• First, loosen the knob on the middle of louver and bend the louver outwards to take it out.
• Then, grasp both sides of bottom plate push downwards to take down the bottom plate.
• Finally, loosen the buckle of deflector assembly with your thumb and take it out.
• Wipe the air duct and fan assembly with a clean and wrung wet rag.
• Clean the removed parts with soapy water and air dry it.
• After cleaning, restore the removed parts in turn.
Louver
Deflector assembly
Bottom plate
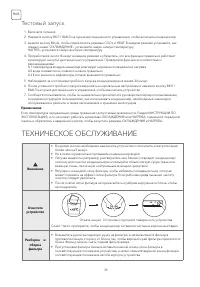
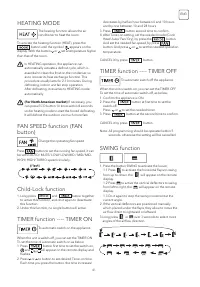
Service and
maintenance
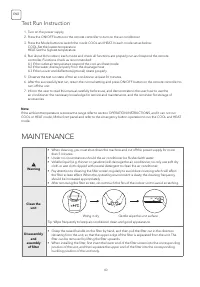
• When the air conditioner is not in use for a long time, do the following work:
Take out the batteries of the remote controller and disconnect the power supply of the air
conditioner.
• When starting to use after long-term shutdown:
1. Clean the unit and filter screen;
2. Check whether there are obstacles at the air inlet and outlet of indoor and outdoor units;
3. Check whether the drain pipe is unobstructed;
Install the batteries of the remote controller and check whether the power is on.
Содержание
- 3 МЕРЫ ПРЕДОСТОРОЖНОСТИ
- 4 ПРАВИЛА БЕЗОПАСНОСТИ
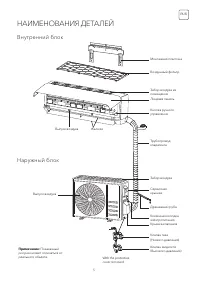
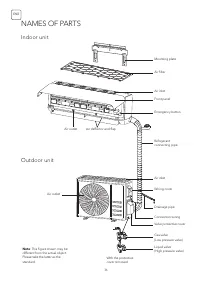
- 5 НАИМЕНОВАНИЯ ДЕТАЛЕЙ; Внутренний блок
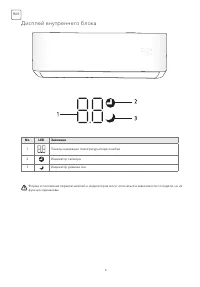
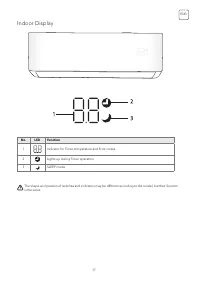
- 6 Дисплей внутреннего блока
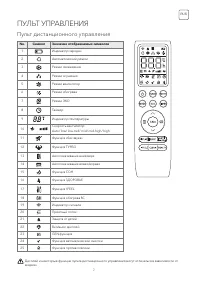
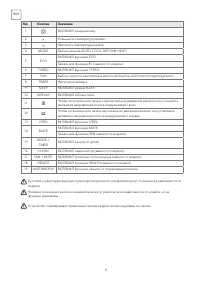
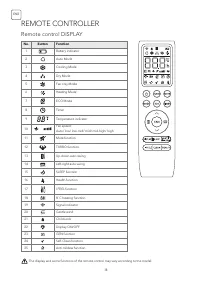
- 7 ПУЛЬТ УПРАВЛЕНИЯ; Пульт дистанционного управления
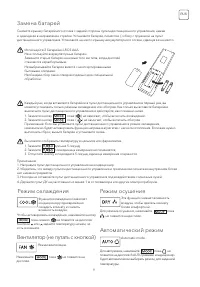
- 9 Замена батарей
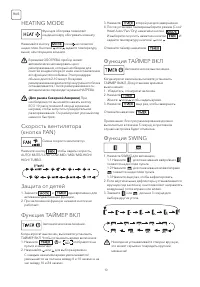
- 10 HEATING MODE
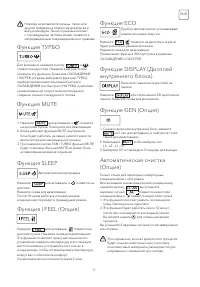
- 11 Функция SLEEP
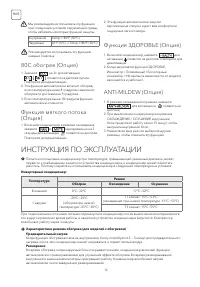
- 12 ИНСТРУКЦИЯ ПО ЭКСПЛУАТАЦИИ
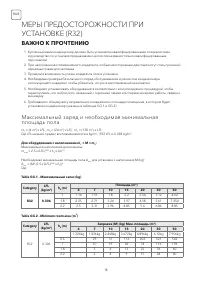
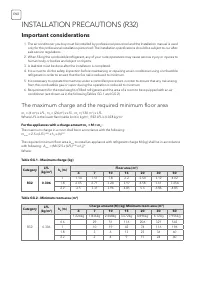
- 18 ВАЖНО К ПРОЧТЕНИЮ; Максимальный заряд и необходимая минимальная
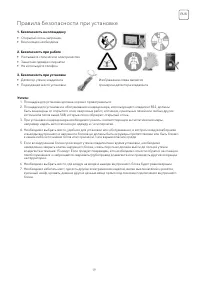
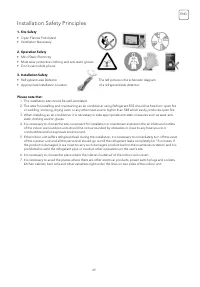
- 19 Правила безопасности при установке
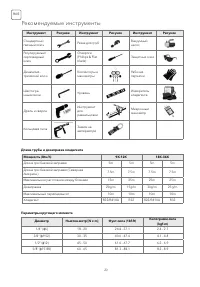
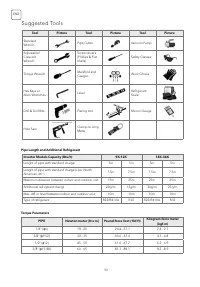
- 20 Рекомендуемые инструменты
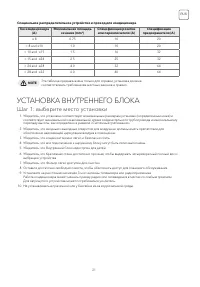
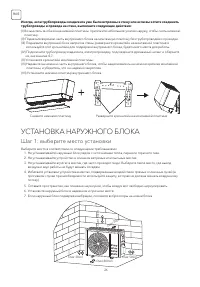
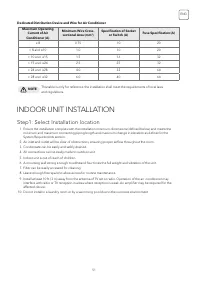
- 21 Шаг 1: выберите место установки; УСТАНОВКА ВНУТРЕННЕГО БЛОКА
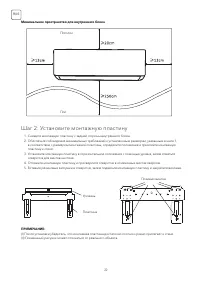
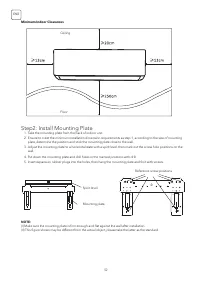
- 22 Шаг 2: Установите монтажную пластину
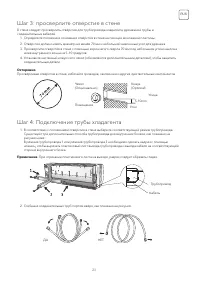
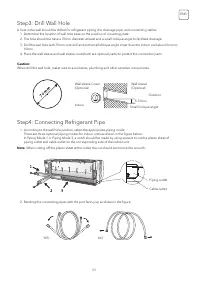
- 23 Шаг 3: просверлите отверстие в стене
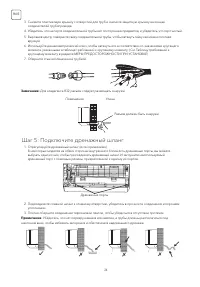
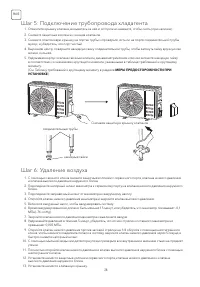
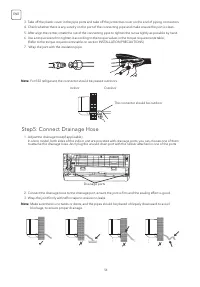
- 24 Шаг 5: Подключите дренажный шланг
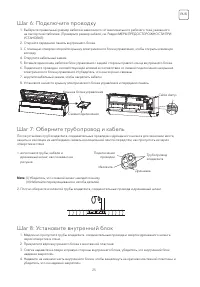
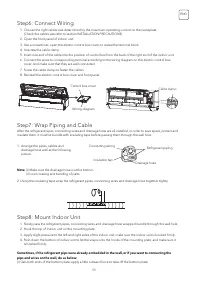
- 25 Шаг 6: Подключите проводку
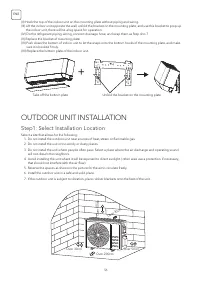
- 26 УСТАНОВКА НАРУЖНОГО БЛОКА
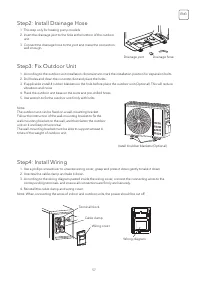
- 27 Шаг 2: Установите дренажный шланг
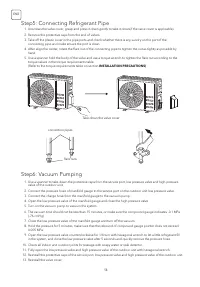
- 28 Шаг 5: Подключение трубопровода хладагента
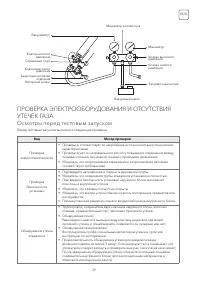
- 29 Осмотры перед тестовым запуском
- 30 Тестовый запуск; ТЕХНИЧЕСКОЕ ОБСЛУЖИВАНИЕ
- 32 УСТРАНЕНИЕ НЕПОЛАДОК
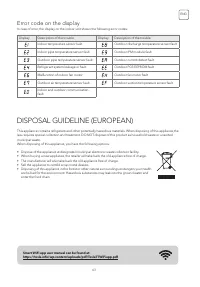
- 33 Код ошибки на дисплее
Характеристики

Остались вопросы?Не нашли свой ответ в руководстве или возникли другие проблемы? Задайте свой вопрос в форме ниже с подробным описанием вашей ситуации, чтобы другие люди и специалисты смогли дать на него ответ. Если вы знаете как решить проблему другого человека, пожалуйста, подскажите ему :)


