
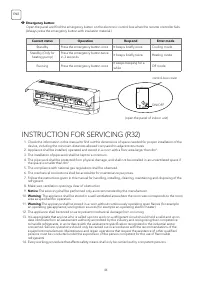
Кондиционеры Tesla TT27TP61S - инструкция пользователя по применению, эксплуатации и установке на русском языке. Мы надеемся, она поможет вам решить возникшие у вас вопросы при эксплуатации техники.
Если остались вопросы, задайте их в комментариях после инструкции.
"Загружаем инструкцию", означает, что нужно подождать пока файл загрузится и можно будет его читать онлайн. Некоторые инструкции очень большие и время их появления зависит от вашей скорости интернета.


56
ENG
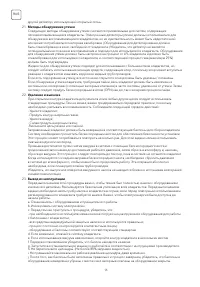
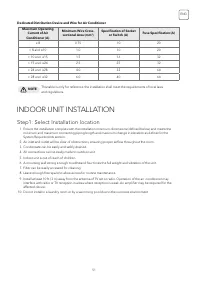
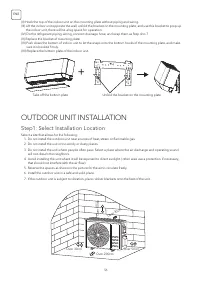
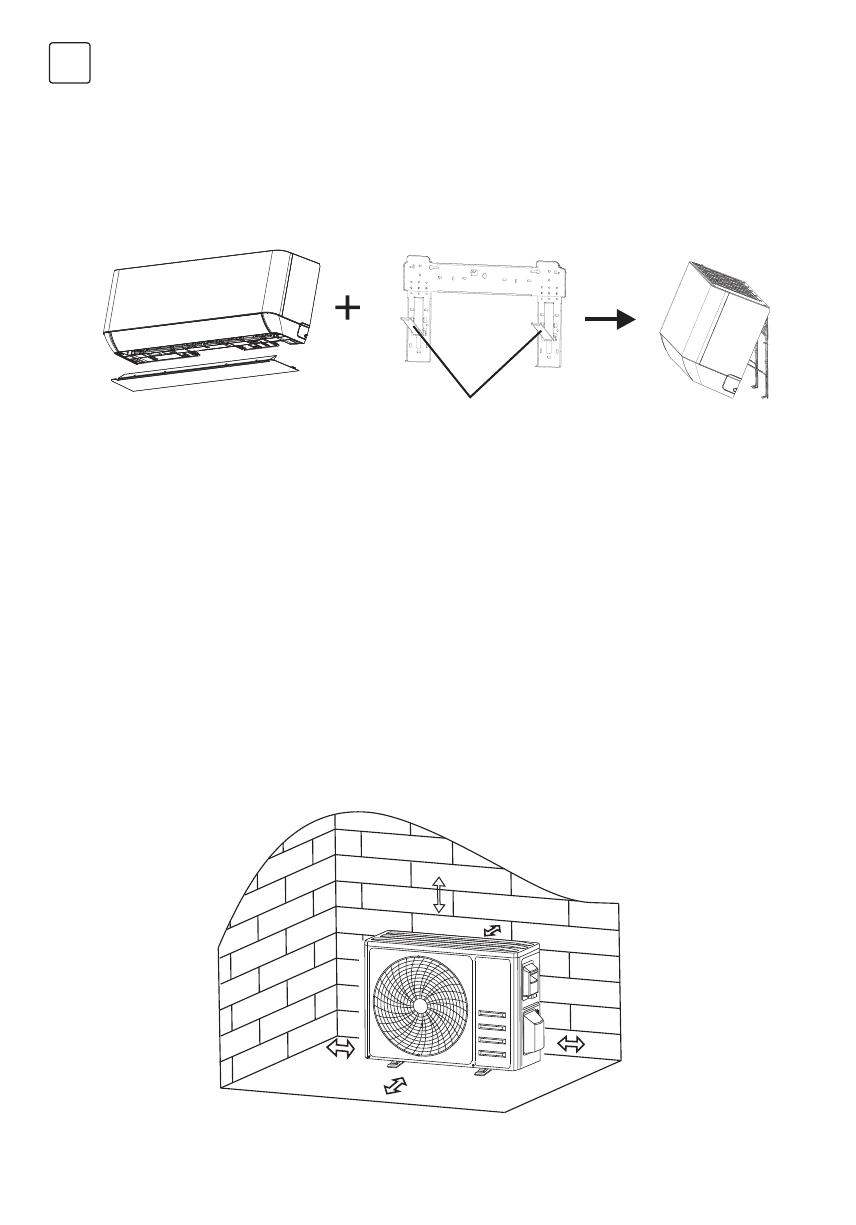
Step1: Select Installation Location
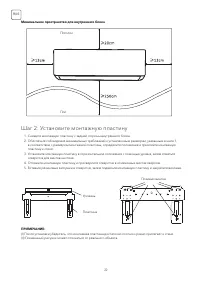
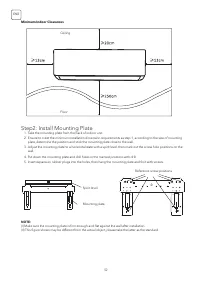
(II) Hook the top of the indoor unit on the mounting plate without piping and wiring.
(III) Lift the indoor unit opposite the wall, unfold the bracket on the mounting plate, and use this bracket to prop up
the indoor unit, there will be a big space for operation.
(IV) Do the refrigerant piping, wiring, connect drainage hose, and wrap them as Step 4 to 7.
(V) Replace the bracket of mounting plate.
(VI) Push down the bottom of indoor unit to let the snaps onto the bottom hooks of the mounting plate, and make
sure it is hooked firmly.
(VII) Replace the bottom plate of the indoor unit.
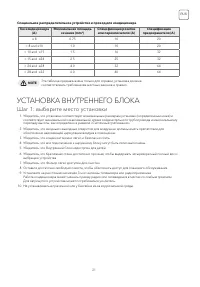
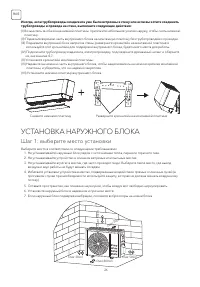
Select a site that allows for the following:
1. Do not install the outdoor unit near sources of heat, steam or flammable gas.
2. Do not install the unit in too windy or dusty places.
3. Do not install the unit where people often pass. Select a place where the air discharge and operating sound
will not disturb the neighbors.
4. Avoid installing the unit where it will be exposed to direct sunlight ( other wise use a protection, if necessary,
that should not interfere with the air flow).
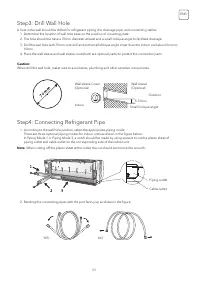
5. Reserve the spaces as shown in the picture for the air to circulate freely.
6. Install the outdoor unit in a safe and solid place.
7. If the outdoor unit is subject to vibration, place rubber blankets onto the feet of the unit.
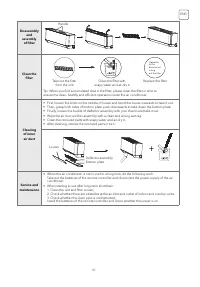
Take off the bottom plate
Unfold the bracket on the mounting plate
OUTDOOR UNIT INSTALLATION
Over 30cm
Over 30cm
Over 200cm
Over 50cm
Over 50cm
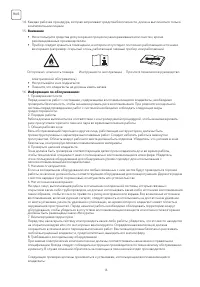
Содержание
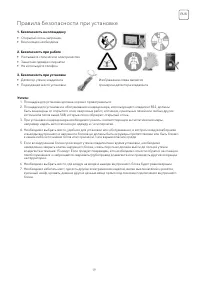
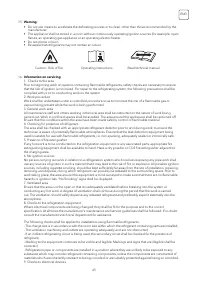
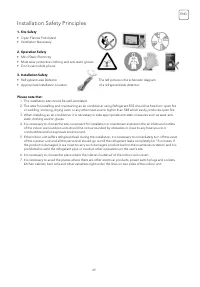
- 3 МЕРЫ ПРЕДОСТОРОЖНОСТИ
- 4 ПРАВИЛА БЕЗОПАСНОСТИ
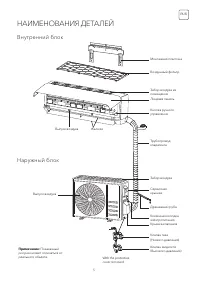
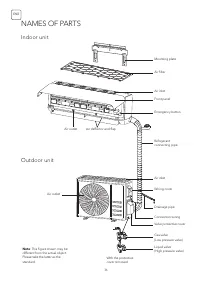
- 5 НАИМЕНОВАНИЯ ДЕТАЛЕЙ; Внутренний блок
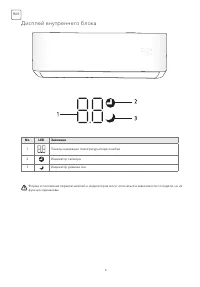
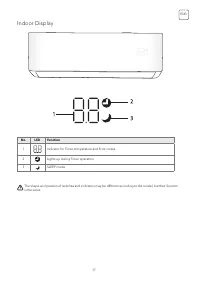
- 6 Дисплей внутреннего блока
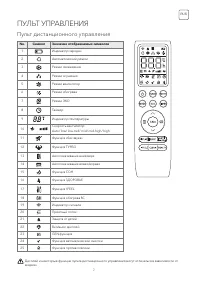
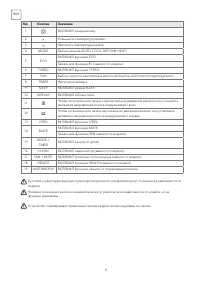
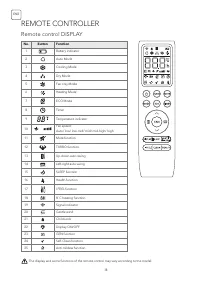
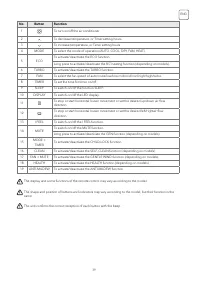
- 7 ПУЛЬТ УПРАВЛЕНИЯ; Пульт дистанционного управления
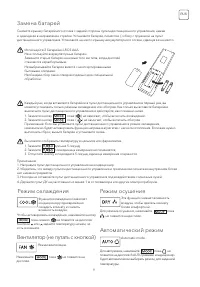
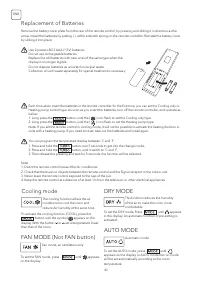
- 9 Замена батарей
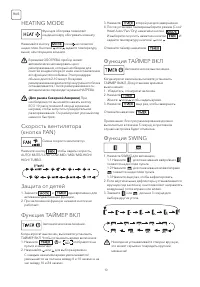
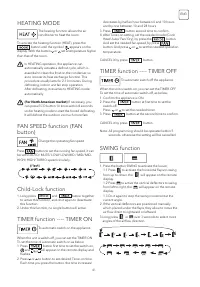
- 10 HEATING MODE
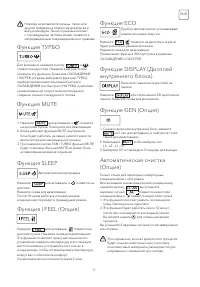
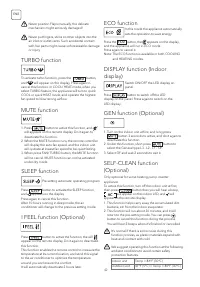
- 11 Функция SLEEP
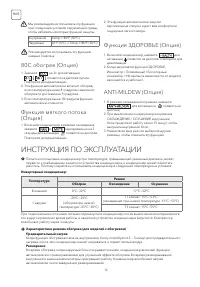
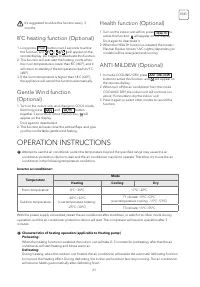
- 12 ИНСТРУКЦИЯ ПО ЭКСПЛУАТАЦИИ
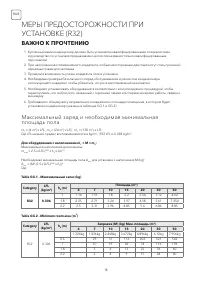
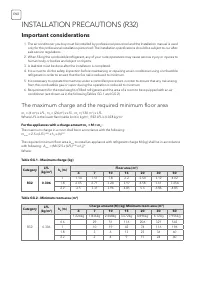
- 18 ВАЖНО К ПРОЧТЕНИЮ; Максимальный заряд и необходимая минимальная
- 19 Правила безопасности при установке
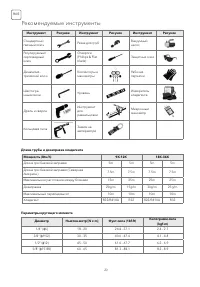
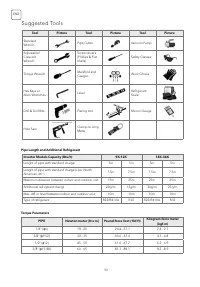
- 20 Рекомендуемые инструменты
- 21 Шаг 1: выберите место установки; УСТАНОВКА ВНУТРЕННЕГО БЛОКА
- 22 Шаг 2: Установите монтажную пластину
- 23 Шаг 3: просверлите отверстие в стене
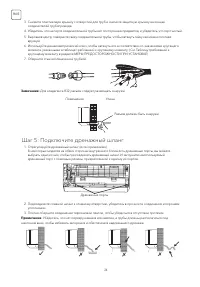
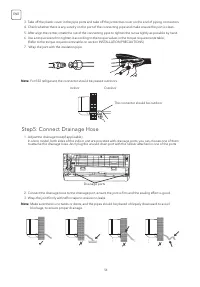
- 24 Шаг 5: Подключите дренажный шланг
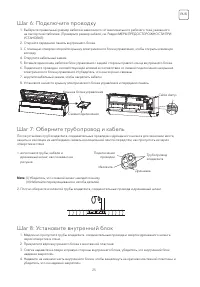
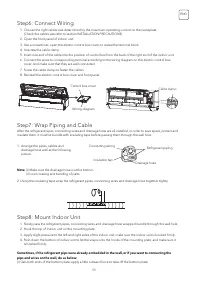
- 25 Шаг 6: Подключите проводку
- 26 УСТАНОВКА НАРУЖНОГО БЛОКА
- 27 Шаг 2: Установите дренажный шланг
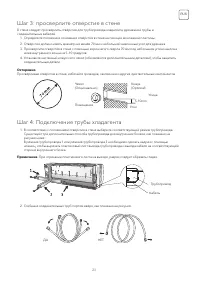
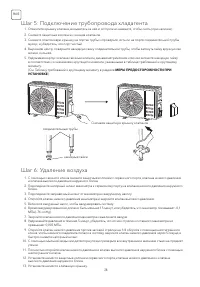
- 28 Шаг 5: Подключение трубопровода хладагента
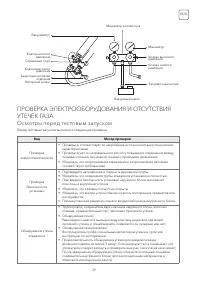
- 29 Осмотры перед тестовым запуском
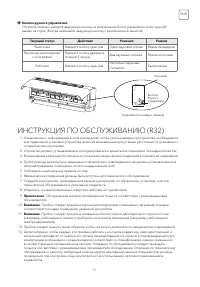
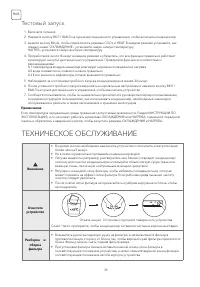
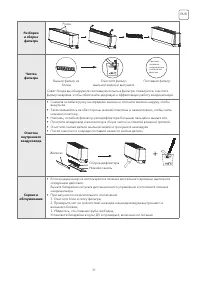
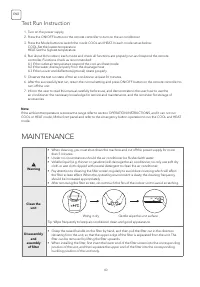
- 30 Тестовый запуск; ТЕХНИЧЕСКОЕ ОБСЛУЖИВАНИЕ
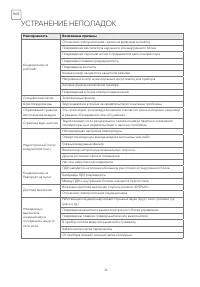
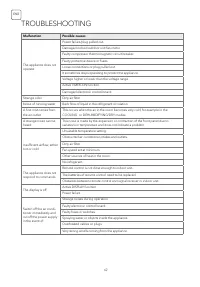
- 32 УСТРАНЕНИЕ НЕПОЛАДОК
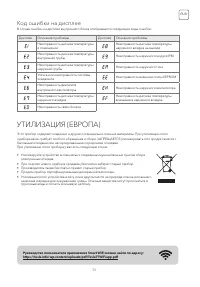
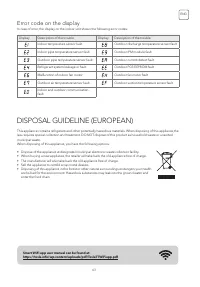
- 33 Код ошибки на дисплее
Характеристики

Остались вопросы?Не нашли свой ответ в руководстве или возникли другие проблемы? Задайте свой вопрос в форме ниже с подробным описанием вашей ситуации, чтобы другие люди и специалисты смогли дать на него ответ. Если вы знаете как решить проблему другого человека, пожалуйста, подскажите ему :)


