
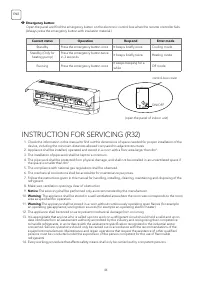
Кондиционеры Tesla TT27TP61S - инструкция пользователя по применению, эксплуатации и установке на русском языке. Мы надеемся, она поможет вам решить возникшие у вас вопросы при эксплуатации техники.
Если остались вопросы, задайте их в комментариях после инструкции.
"Загружаем инструкцию", означает, что нужно подождать пока файл загрузится и можно будет его читать онлайн. Некоторые инструкции очень большие и время их появления зависит от вашей скорости интернета.


57
ENG
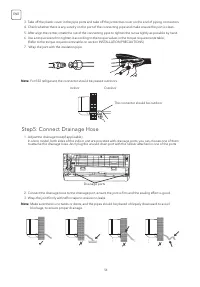
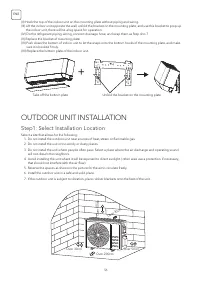
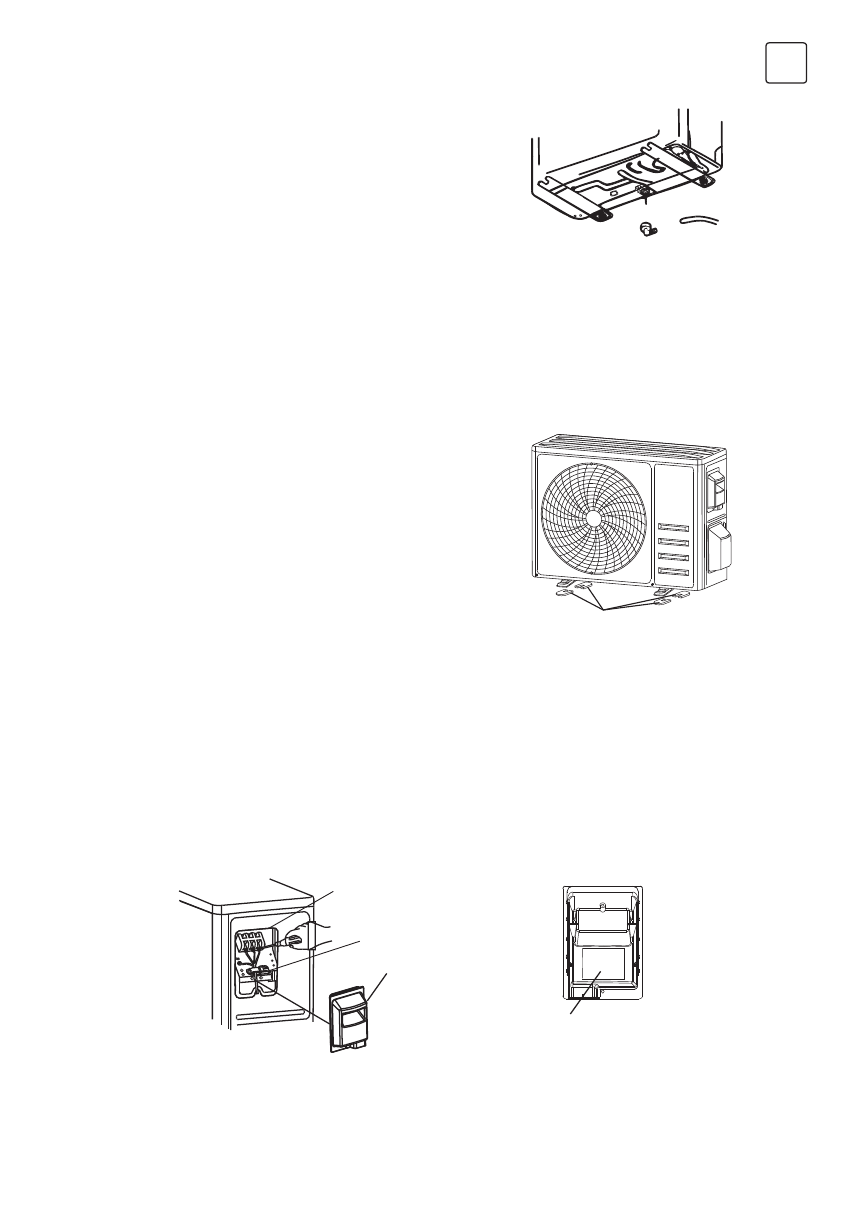
Step2: Install Drainage Hose
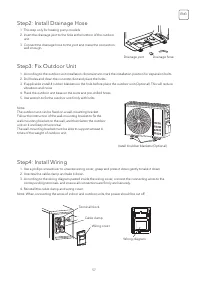
Step3: Fix Outdoor Unit
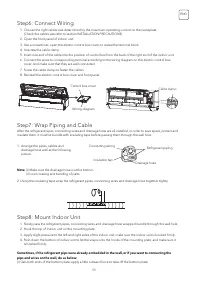
Step4: Install Wiring
1. This step only for heating pump models.
2. Insert the drainage joint to the hole at the bottom of the outdoor
unit.
3. Connect the drainage hose to the joint and make the connection
well enough.
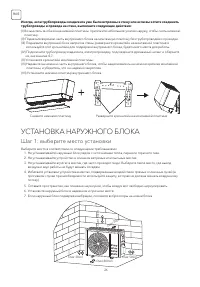
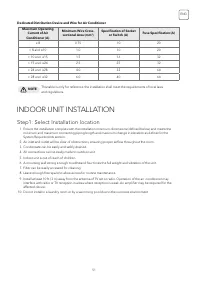
1. According to the outdoor unit installation dimensions to mark the installation position for expansion bolts .
2. Drill holes and clean the concrete dust and place the bolts .
3. If applicable install 4 rubber blankets on the hole before place the outdoor unit (Optional). This will reduce
vibrations and noise.
4. Place the outdoor unit base on the bolts and pre-drilled holes.
5. Use wrench to fix the outdoor unit firmly with bolts
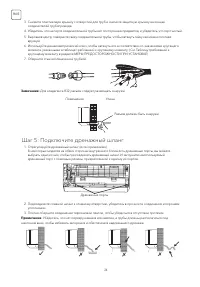
1. Use a phillips screwdriver to unscrew wiring cover, grasp and press it down gently to take it down.
2. Unscrew the cable clamp and take it down.
3. According to the wiring diagram pasted inside the wiring cover, connect the connecting wires to the
corresponding terminals, and ensure all connections are firmly and securely.
4. Reinstall the cable clamp and wiring cover.
Note: When connecting the wires of indoor and outdoor units, the power should be cut off.
Note:
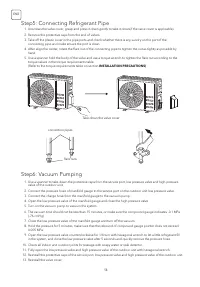
The outdoor unit can be fixed on a wall-mounting bracket.
Follow the instruction of the wall-mounting bracket to fix the
wall-mounting bracket on the wall, and then fasten the outdoor
unit on it and keep it horizontal.
The wall-mounting bracket must be able to support at least 4
times of the weight of outdoor unit.
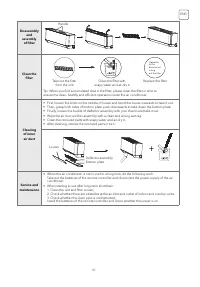
Drainage hose
Drainage joint
Install 4 rubber blankets (Optional)
Terminal block
Cable clamp
Wiring cover
Wiring diagram
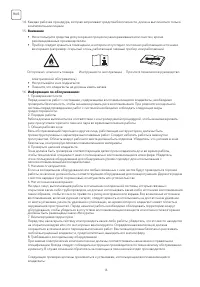
Содержание
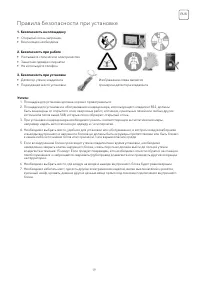
- 3 МЕРЫ ПРЕДОСТОРОЖНОСТИ
- 4 ПРАВИЛА БЕЗОПАСНОСТИ
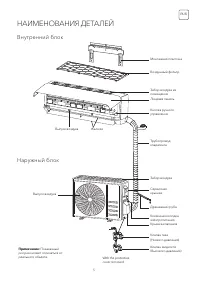
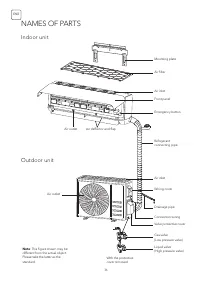
- 5 НАИМЕНОВАНИЯ ДЕТАЛЕЙ; Внутренний блок
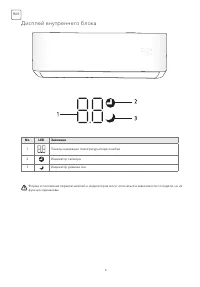
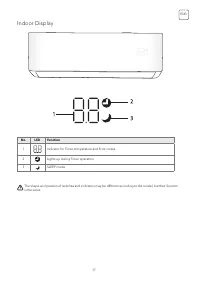
- 6 Дисплей внутреннего блока
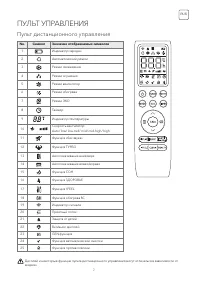
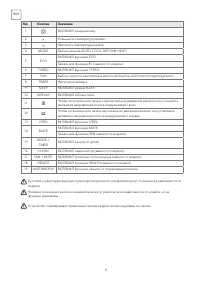
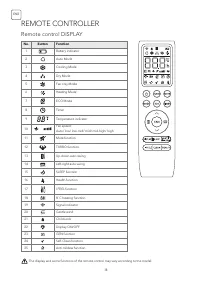
- 7 ПУЛЬТ УПРАВЛЕНИЯ; Пульт дистанционного управления
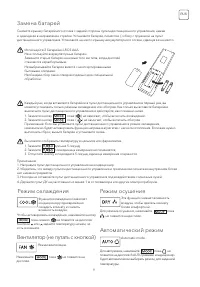
- 9 Замена батарей
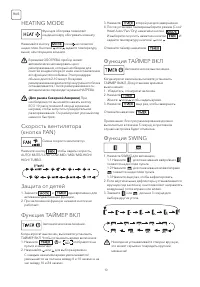
- 10 HEATING MODE
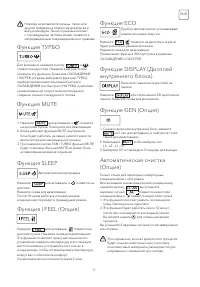
- 11 Функция SLEEP
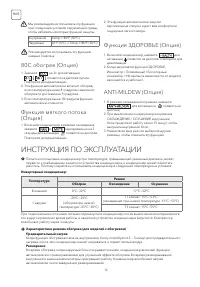
- 12 ИНСТРУКЦИЯ ПО ЭКСПЛУАТАЦИИ
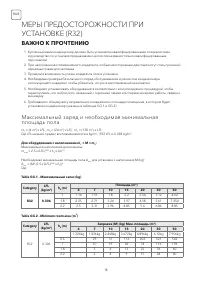
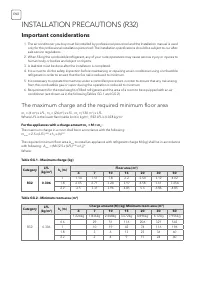
- 18 ВАЖНО К ПРОЧТЕНИЮ; Максимальный заряд и необходимая минимальная
- 19 Правила безопасности при установке
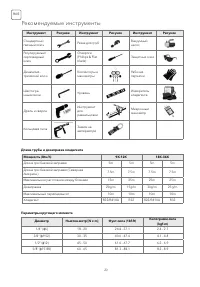
- 20 Рекомендуемые инструменты
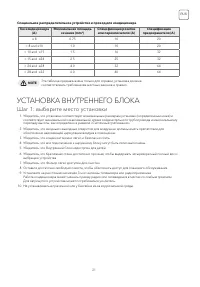
- 21 Шаг 1: выберите место установки; УСТАНОВКА ВНУТРЕННЕГО БЛОКА
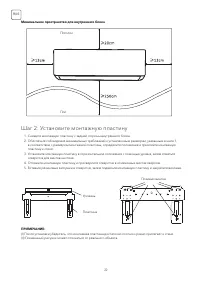
- 22 Шаг 2: Установите монтажную пластину
- 23 Шаг 3: просверлите отверстие в стене
- 24 Шаг 5: Подключите дренажный шланг
- 25 Шаг 6: Подключите проводку
- 26 УСТАНОВКА НАРУЖНОГО БЛОКА
- 27 Шаг 2: Установите дренажный шланг
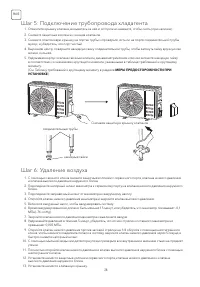
- 28 Шаг 5: Подключение трубопровода хладагента
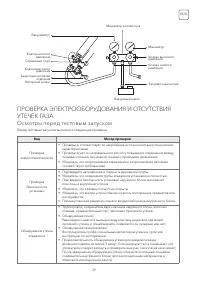
- 29 Осмотры перед тестовым запуском
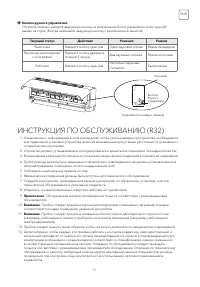
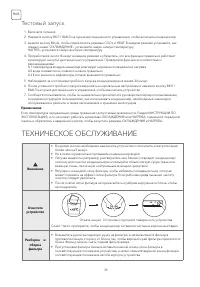
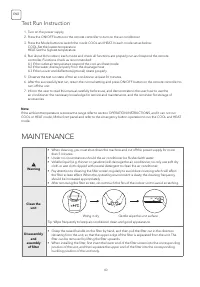
- 30 Тестовый запуск; ТЕХНИЧЕСКОЕ ОБСЛУЖИВАНИЕ
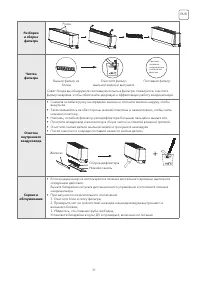
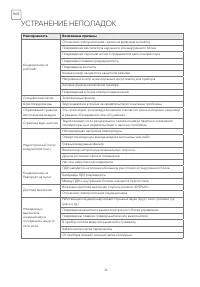
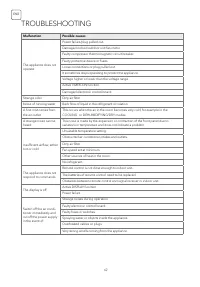
- 32 УСТРАНЕНИЕ НЕПОЛАДОК
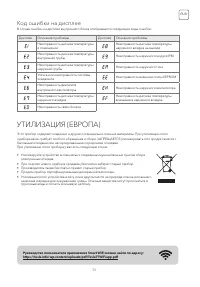
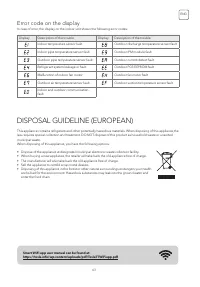
- 33 Код ошибки на дисплее
Характеристики

Остались вопросы?Не нашли свой ответ в руководстве или возникли другие проблемы? Задайте свой вопрос в форме ниже с подробным описанием вашей ситуации, чтобы другие люди и специалисты смогли дать на него ответ. Если вы знаете как решить проблему другого человека, пожалуйста, подскажите ему :)


