
Кондиционеры Tesla TT27TP61S - инструкция пользователя по применению, эксплуатации и установке на русском языке. Мы надеемся, она поможет вам решить возникшие у вас вопросы при эксплуатации техники.
Если остались вопросы, задайте их в комментариях после инструкции.
"Загружаем инструкцию", означает, что нужно подождать пока файл загрузится и можно будет его читать онлайн. Некоторые инструкции очень большие и время их появления зависит от вашей скорости интернета.


49
ENG
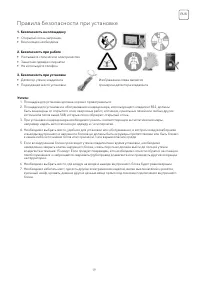
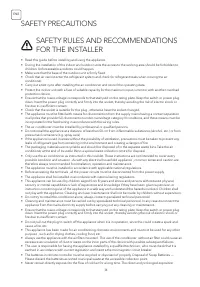
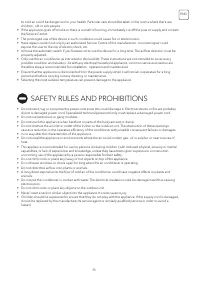
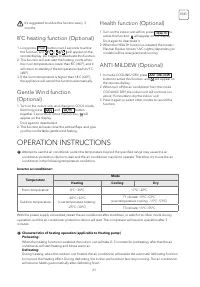
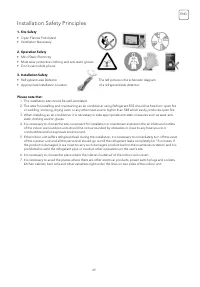
Installation Safety Principles
1. Site Safety
2. Operation Safety
3. Installation Safety
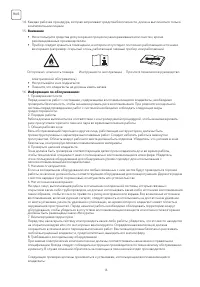
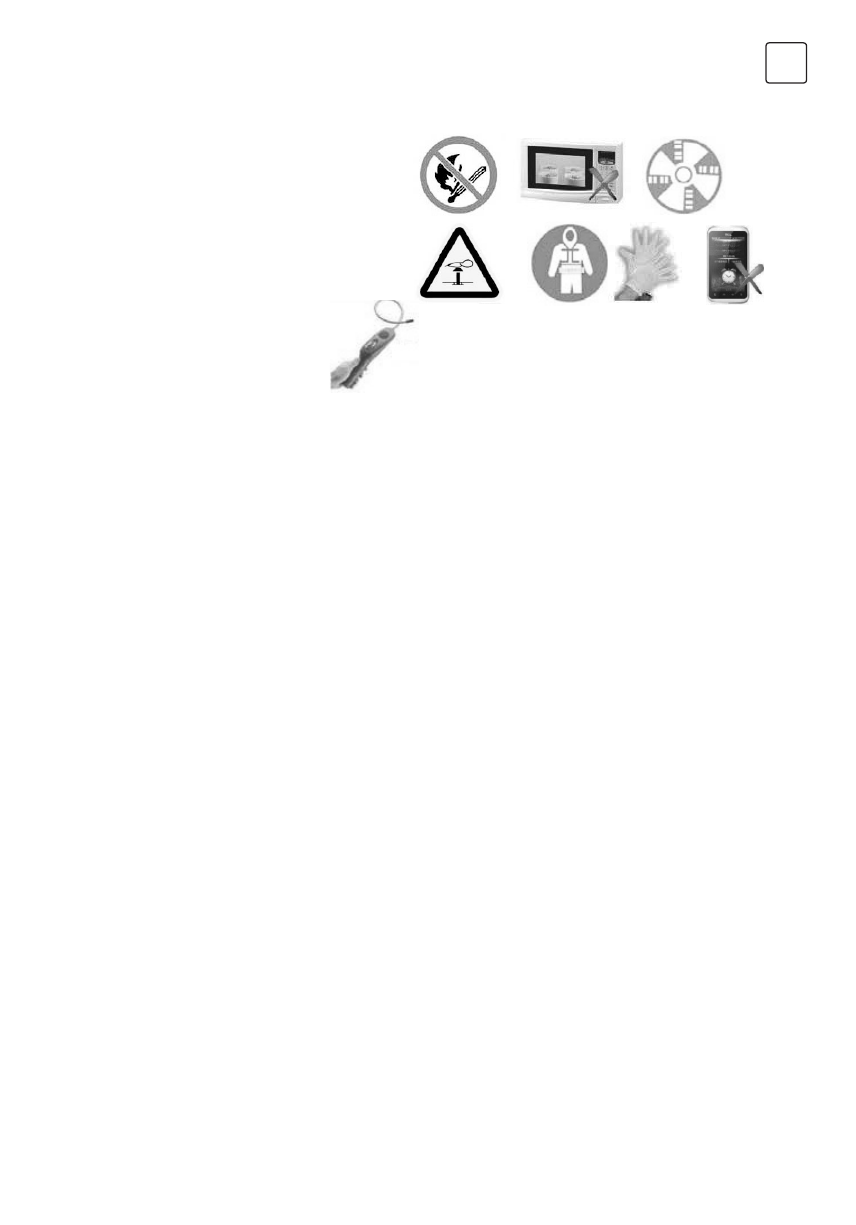
• Open Flames Prohibited
• Ventilation Necessary
• Mind Static Electricity
• Must wear protective clothing and anti-static gloves
• Don`t use mobile phone
• Refrigerant Leak Detector
• Appropriate Installation Location
Please note that:
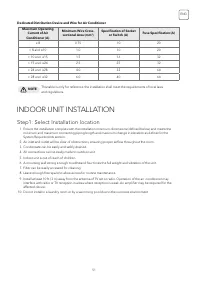
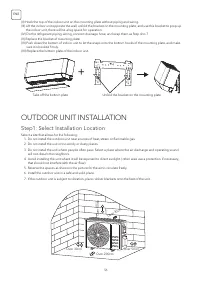
1. The installation site should be well-ventilated.
2. The sites for installing and maintaining an air conditioner using Refrigerant R32 should be free from open fire
or welding, smoking, drying oven or any other heat source higher than 548 which easily produces open fire.
3. When installing an air conditioner, it is necessary to take appropriate anti-static measures such as wear anti-
static clothing and/or gloves.
4. It is necessary to choose the site convenient for installation or maintenance wherein the air inlets and outlets
of the indoor and outdoor units should be not surrounded by obstacles or close to any heat source or
combustible and/or explosive environment.
5. If the indoor unit suffers refrigerant leak during the installation, it is necessary to immediately turn off the valve
of the outdoor unit and all the personnel should go out till the refrigerant leaks completely for 15 minutes. If
the product is damaged, it is a must to carry such damaged product back to the maintenance station and it is
prohibited to weld the refrigerant pipe or conduct other operations on the user’s site.
6. It is necessary to choose the place where the inlet and outlet air of the indoor unit is even.
7. It is necessary to avoid the places where there are other electrical products, power switch plugs and sockets,
kitchen cabinet, bed, sofa and other valuables right under the lines on two sides of the indoor unit.
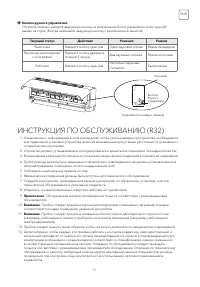
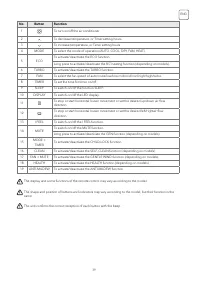
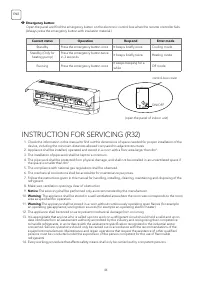
The left picture is the schematic diagram
of a refrigerant leak detector.
Содержание
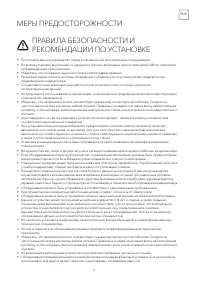
- 3 МЕРЫ ПРЕДОСТОРОЖНОСТИ
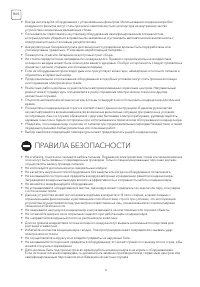
- 4 ПРАВИЛА БЕЗОПАСНОСТИ
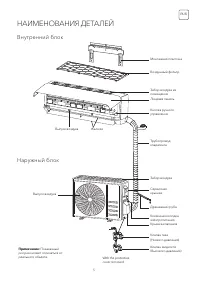
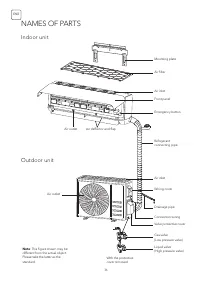
- 5 НАИМЕНОВАНИЯ ДЕТАЛЕЙ; Внутренний блок
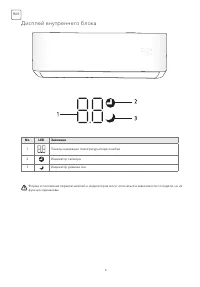
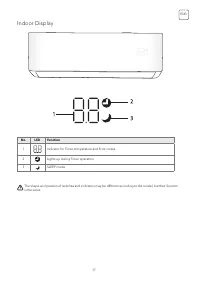
- 6 Дисплей внутреннего блока
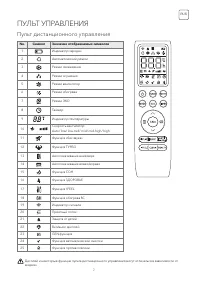
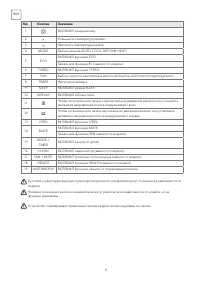
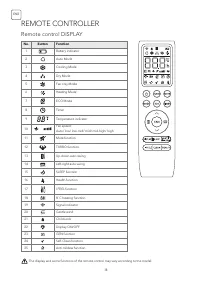
- 7 ПУЛЬТ УПРАВЛЕНИЯ; Пульт дистанционного управления
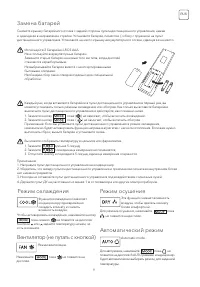
- 9 Замена батарей
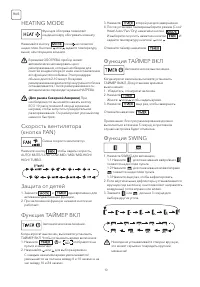
- 10 HEATING MODE
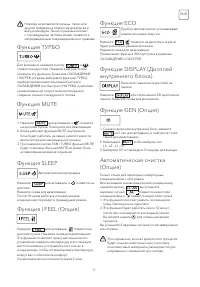
- 11 Функция SLEEP
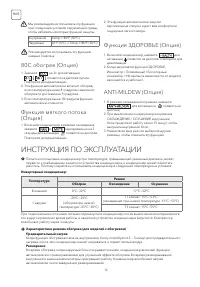
- 12 ИНСТРУКЦИЯ ПО ЭКСПЛУАТАЦИИ
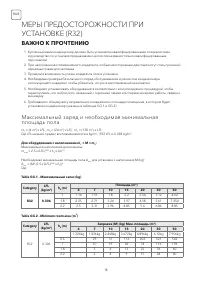
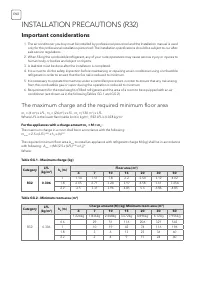
- 18 ВАЖНО К ПРОЧТЕНИЮ; Максимальный заряд и необходимая минимальная
- 19 Правила безопасности при установке
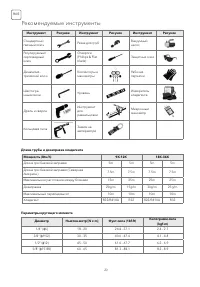
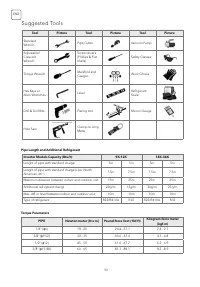
- 20 Рекомендуемые инструменты
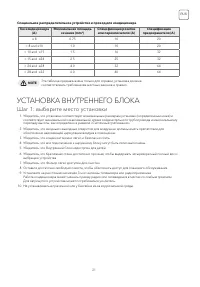
- 21 Шаг 1: выберите место установки; УСТАНОВКА ВНУТРЕННЕГО БЛОКА
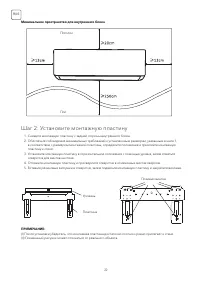
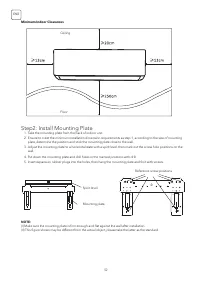
- 22 Шаг 2: Установите монтажную пластину
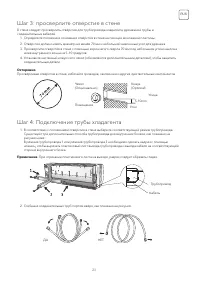
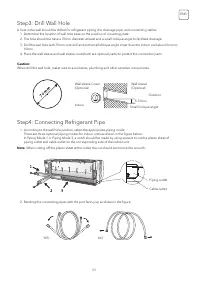
- 23 Шаг 3: просверлите отверстие в стене
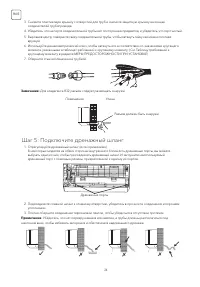
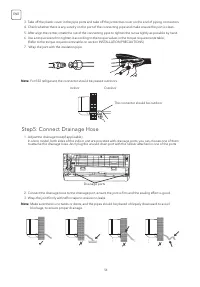
- 24 Шаг 5: Подключите дренажный шланг
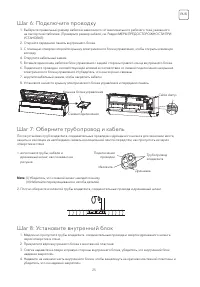
- 25 Шаг 6: Подключите проводку
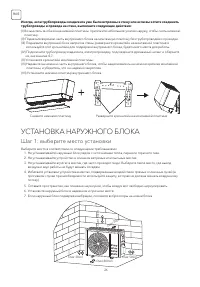
- 26 УСТАНОВКА НАРУЖНОГО БЛОКА
- 27 Шаг 2: Установите дренажный шланг
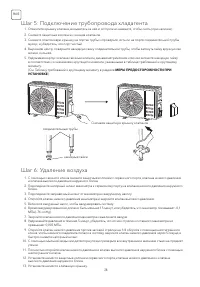
- 28 Шаг 5: Подключение трубопровода хладагента
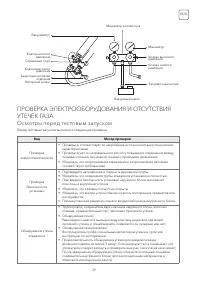
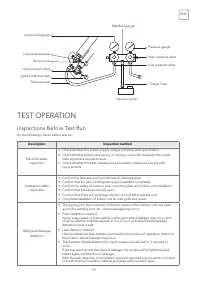
- 29 Осмотры перед тестовым запуском
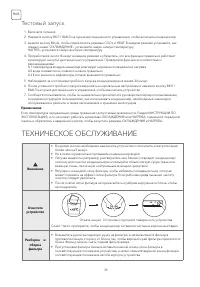
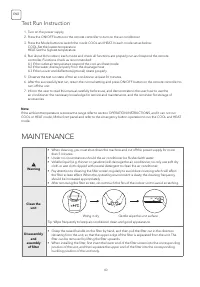
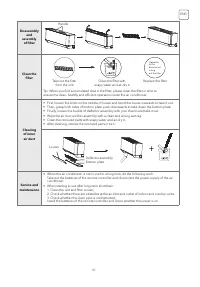
- 30 Тестовый запуск; ТЕХНИЧЕСКОЕ ОБСЛУЖИВАНИЕ
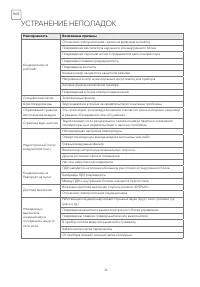
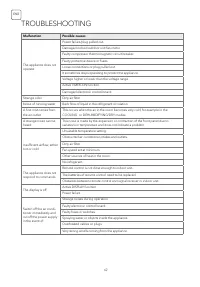
- 32 УСТРАНЕНИЕ НЕПОЛАДОК
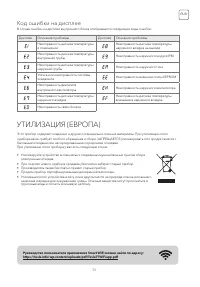
- 33 Код ошибки на дисплее
Характеристики

Остались вопросы?Не нашли свой ответ в руководстве или возникли другие проблемы? Задайте свой вопрос в форме ниже с подробным описанием вашей ситуации, чтобы другие люди и специалисты смогли дать на него ответ. Если вы знаете как решить проблему другого человека, пожалуйста, подскажите ему :)


