Кондиционеры Ardesto ACM-09CRN7 - инструкция пользователя по применению, эксплуатации и установке на русском языке. Мы надеемся, она поможет вам решить возникшие у вас вопросы при эксплуатации техники.
Если остались вопросы, задайте их в комментариях после инструкции.
"Загружаем инструкцию", означает, что нужно подождать пока файл загрузится и можно будет его читать онлайн. Некоторые инструкции очень большие и время их появления зависит от вашей скорости интернета.


37
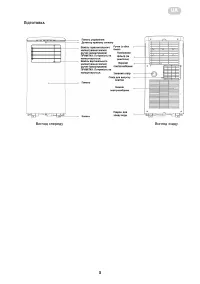
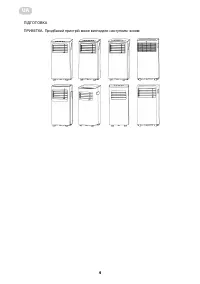
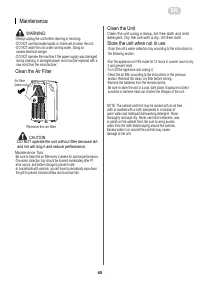
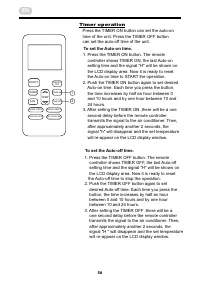
Preparation
8
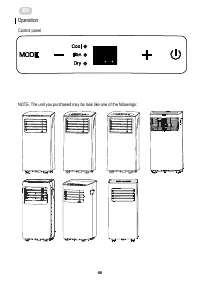
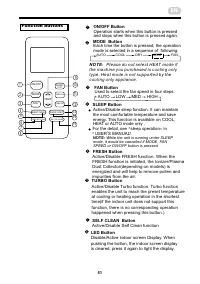
control panel
handle
(both sides)
horizontal louver control
lever(adjust manually)
vertical louver control
lever(adjust manually)
panel
Caster
bottom tray
drain outlet
air filter
(behind the grille)
upper air intake
air outlet
lower air intake
drain outlet
NOTE: PHA can not be
adjusted.
NOTE: PHA can not be
adjusted.
r e a r
f r o n t
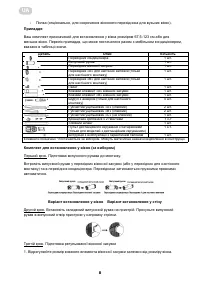
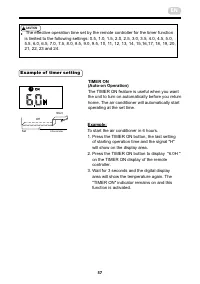
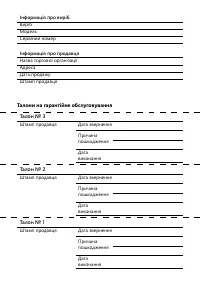
Accessories
North America
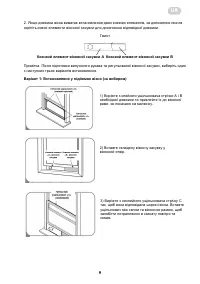
Check your window size and choose the fit window slider.
Part
Description
1 pc
1 pc
1 pc
1 pc
1 pc
2 pc
2 pc
1 pc
2 pc
1 pc
1 pc
1 pc
1 pc
1 set
1 set
Unit Adaptor
Window Slider Adaptor
Window Slider A
Window Slider B
Window Slider C(optional)
Exhaust Hose
Bolt
Foam Seal A (Adhesive)
Foam Seal B (Adhesive)
Foam Seal C (Non-adhesive)
Security Bracket and Screw
Drain Hose
Quantity
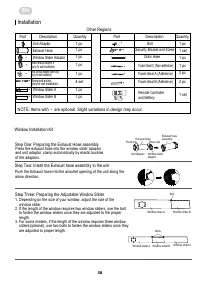
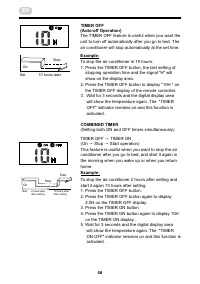
Part
Description
Quantity
2 pc
1 pc
Bolt(optional)
Remote Controller
and Battery
O
N
/O
FF
TE
M
P
SH
O
RT
CU
T
TI
M
ER
O
N
TI
M
ER
O
FF
M
O
DE
FA
N
SL
EE
P
SW
IN
G
LE
D
NOTE: Items with are optional. Slight variations in design may occur.
*
Foam Seal A (Adhesive)(optional)
Foam Seal B (Adhesive)(optional)
Foam Seal C (Non-adhesive)(optional)
*
*
*
*
*
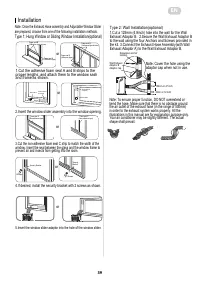
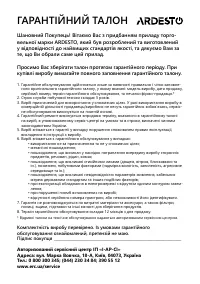
Installation
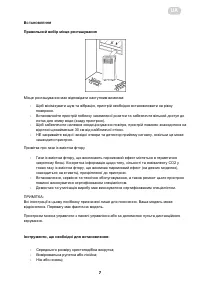
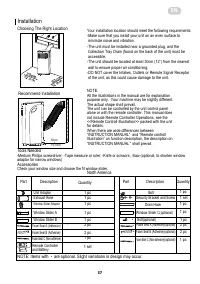
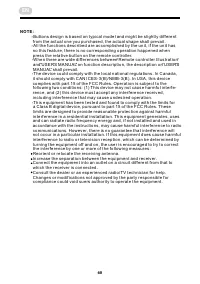
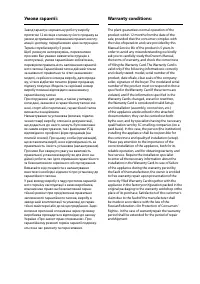
Choosing The Right Location
Recommend Installation
Your installation location should meet the following requirements:
-Make sure that you install your unit on an even surface to
minimize noise and vibration.
-The unit must be installed near a grounded plug, and the
Collection Tray Drain (found on the back of the unit) must be
accessible.
-The unit should be located at least 30cm (12”) from the nearest
wall to ensure proper air conditioning.
-DO NOT cover the Intakes, Outlets or Remote Signal Receptor
of the unit, as this could cause damage to the unit.
NOTE:
All the illustrations in the manual are for explanation
purpose only. Your machine may be slightly different.
The actual shape shall prevail.
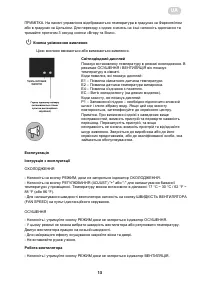
The unit can be controlled by the unit control panel
alone or with the remote controller. This manual does
not include Remote Controller Operations, see the
<<Remote Controll Illustration>> packed with the unit
for details.
When there are wide differences between
“INSTRUCTION MANUAL” and “Remote controll
Illustration” on function description, the description on
“INSTRUCTION MANUAL ” shall prevail.
Tools Needed
-Medium Philips screwdriver; -Tape measure or ruler; -Knife or scissors; -Saw (optional, to shorten window
adaptor for narrow windows)
9
50cm
19.7inch
EN
Характеристики

Остались вопросы?Не нашли свой ответ в руководстве или возникли другие проблемы? Задайте свой вопрос в форме ниже с подробным описанием вашей ситуации, чтобы другие люди и специалисты смогли дать на него ответ. Если вы знаете как решить проблему другого человека, пожалуйста, подскажите ему :)
