
Кондиционеры Hyundai H-PAC-07C1UR7 - инструкция пользователя по применению, эксплуатации и установке на русском языке. Мы надеемся, она поможет вам решить возникшие у вас вопросы при эксплуатации техники.
Если остались вопросы, задайте их в комментариях после инструкции.
"Загружаем инструкцию", означает, что нужно подождать пока файл загрузится и можно будет его читать онлайн. Некоторые инструкции очень большие и время их появления зависит от вашей скорости интернета.


4.
EN
Electric air conditioner
portable type
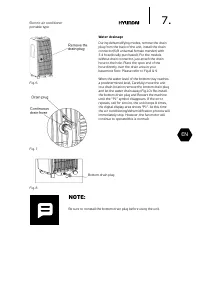
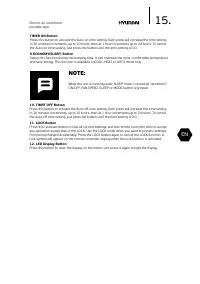
13. To avoid electric shock, a damaged power cord must be replaced only by an authorized
service center and qualified specialists.
14.
Prior to disposal of the device, it is necessary to remove batteries from it, after that they can
be safely disposed.
15. Connect the air conditioner only to 220-240 V 50 Hz mains. If necessary, ask your power
suppliers to give characteristics of your mains.
16. The appliance is not intended for use by children and persons with reduced physical, sensory
or mental capabilities, or a lack of experience and knowledge, unless they have been given
supervision or instruction concerning use of the appliance by an individual responsible for
their safety. Children should be supervised to ensure that they do not play with the appliance.
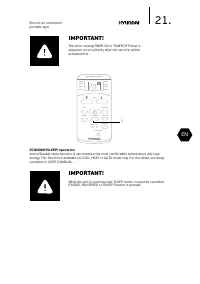
IMPORTANT!
1.
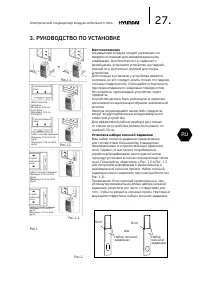
Place the machine on flat and dry ground, and keep it far from
around things at least 50cm.
2. It is forbidden to fold the hose!
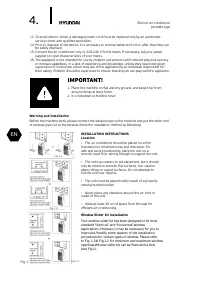
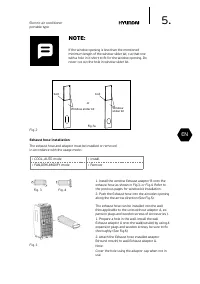
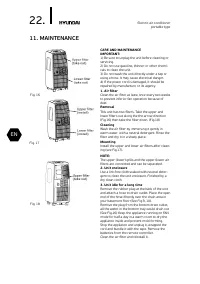
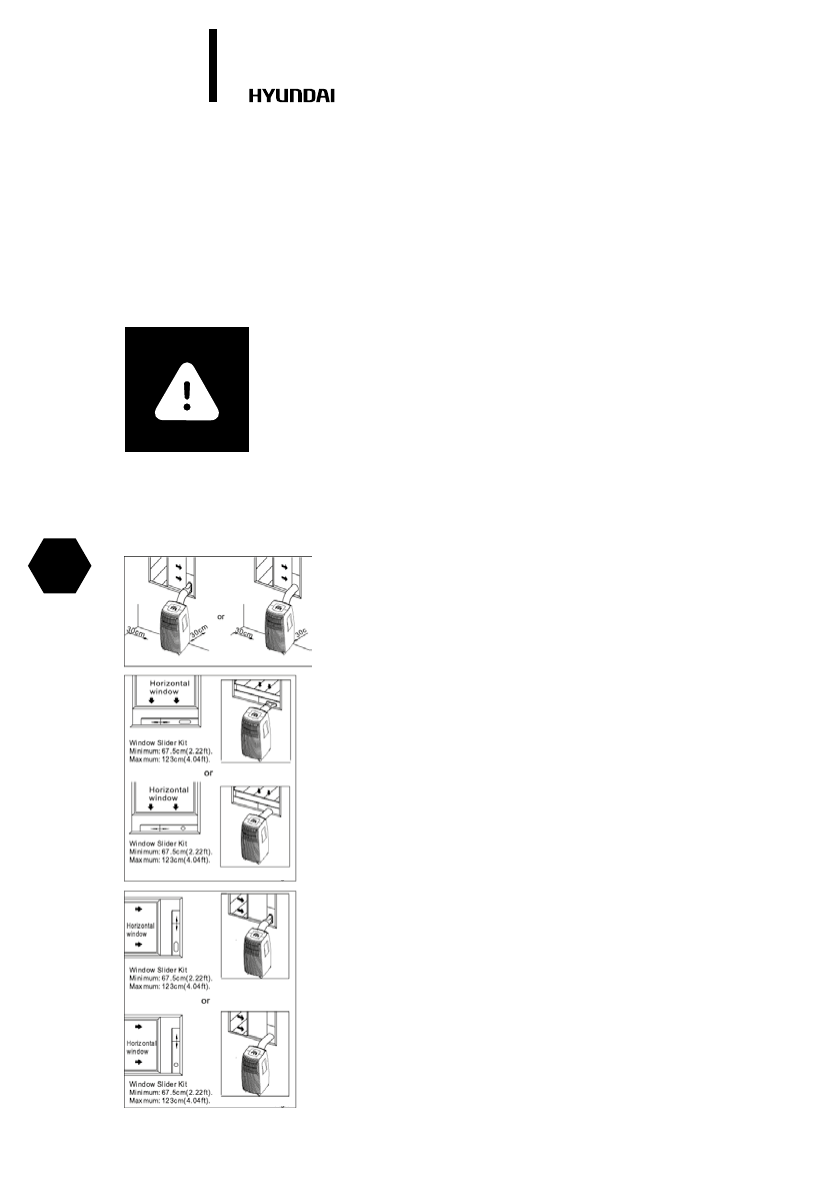
Warning and Installation
Fig. 1
Before the machine work, please connect the exhaust pipe to the machine and put the other end
of exhaust pipe out to the window. (Note the installation method as following)
INSTALLATION INSTRUCTIONS
Location
•
The air conditioner should be placed on a firm
foundation to minimize noise and virbration. For
safe and secure positioning, place the unit on a
smooth, level floor strong enough to support the unit.
• The unit has casters to aid placement, but it should
only be rolled on smooth, flat surfaces. Use caution
when rolling on carpet surfaces. Do not attempt to
roll the unit over objects.
• The unit must be placed within reach of a properly
rated grounded socket.
• Never place any obstacles around the air inlet or
outlet of the unit.
• Allow at least 30 cm of space from the wall for
efficient air-conditioning.
Window Slider kit Installation
Your window slider kit has been designed to fit most
standard “Vertical” and “horizontal”window
applications, However, it may be necessary for you to
improvise/modify some aspects of the installation
procedures for certain types of window. Please refer
to Fig. 1.3& Fig.1.2 for minimum and maximum window
openings.Window slider kit can be fixed with a bolt
(see Fig.1).
Fig. 1.1
Fig. 1.2
Fig. 1.3
Содержание
- 24 Содержание
- 25 Уважаемый покупатель!
- 27 РУКОВОДСТВО ПО УСТАНОВКЕ; Местоположение
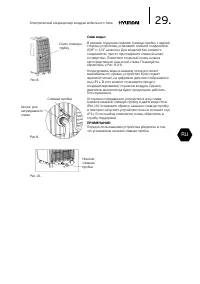
- 28 Установка воздуховода для отработанного
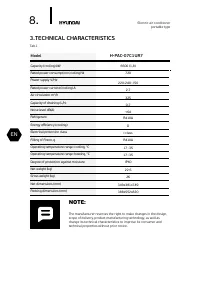
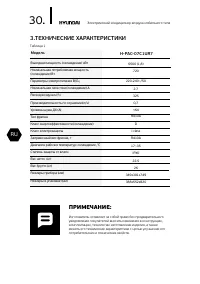
- 30 ТЕХНИЧЕСКИЕ ХАРАКТЕРИСТИКИ; Модель
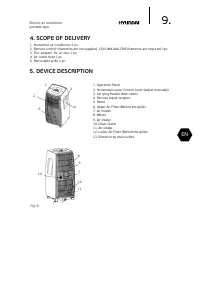
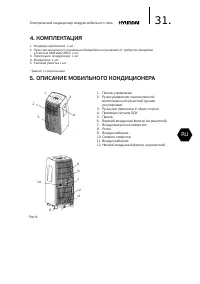
- 31 ОПИСАНИЕ МОБИЛЬНОГО КОНДИЦИОНЕРА
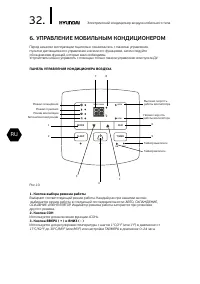
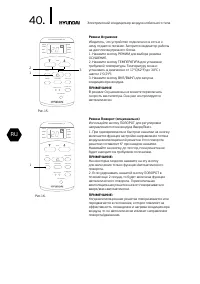
- 32 УПРАВЛЕНИЕ МОБИЛЬНЫМ КОНДИЦИОНЕРОМ; Кнопка выбора режима работы; ПАНЕЛЬ УПРАВЛЕНИЯ КОНДИЦИОНЕРА ВОЗДУХА
- 33 Светодиодный дисплей
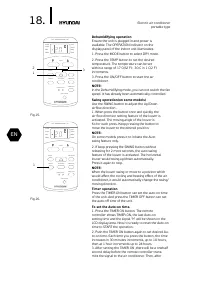
- 34 Режим ОСУШЕНИЕ
- 35 Подождите 3 минуты до возобновления работы устройства
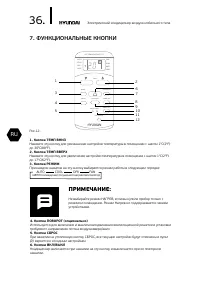
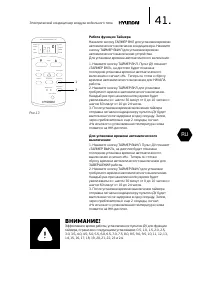
- 36 ФУНКЦИОНАЛЬНЫЕ КНОПКИ
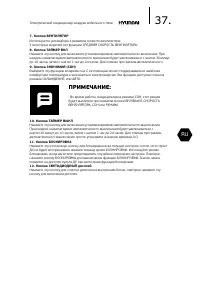
- 37 Кнопка ТАЙМЕР ВЫКЛ
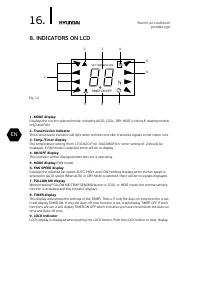
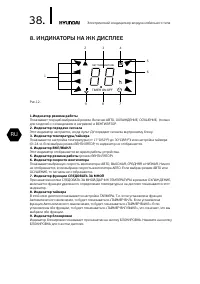
- 38 ИНДИКАТОРЫ НА ЖК ДИСПЛЕЕ
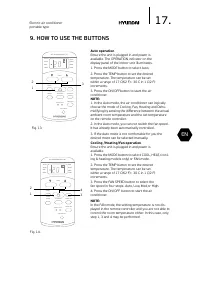
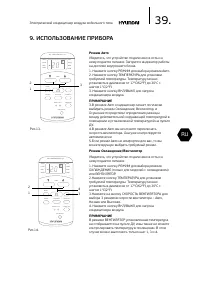
- 39 ИСПОЛЬЗОВАНИЕ ПРИБОРА; Режим Авто
- 40 Режим Осушение
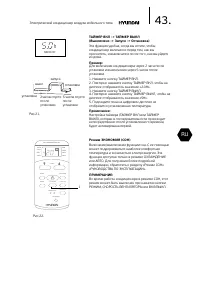
- 41 Работа функции Таймера
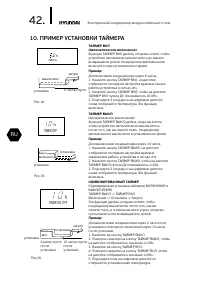
- 42 ТАЙМЕР ВКЛ; ПРИМЕР УСТАНОВКИ ТАЙМЕРА
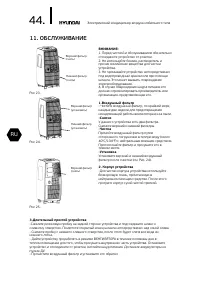
- 44 Длительный простой устройства
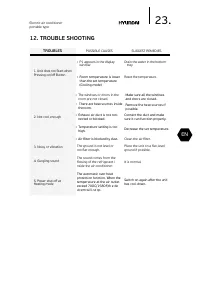
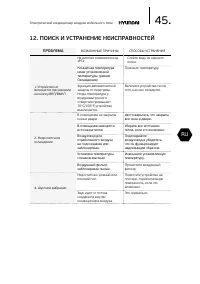
- 45 ПОИСК И УСТРАНЕНИЕ НЕИСПРАВНОСТЕЙ; ПРОБЛЕМА
- 46 УВАЖАЕМЫЙ ПОКУПАТЕЛЬ!
- 49 Гарантийные обязательства
- 51 Изготовитель оставляет за собой право:
- 52 Досрочное прекращение гарантийного обслуживания.; Гарантийные обязательства не распространяются на
- 53 Изготовитель не несет гарантийных обязательств за изделие
- 57 Бланк гарантийного талона; Сведения об установке изделия
- 60 Отрывной талон «A»; Отрывной талон «В»
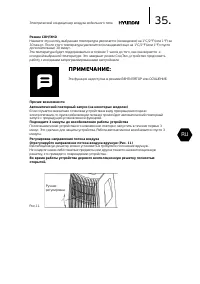
- 61 Профилактическое обслуживание изделия.
- 63 Вниманию покупателей!


