
Кондиционеры Hyundai H-PAC-07C1UR7 - инструкция пользователя по применению, эксплуатации и установке на русском языке. Мы надеемся, она поможет вам решить возникшие у вас вопросы при эксплуатации техники.
Если остались вопросы, задайте их в комментариях после инструкции.
"Загружаем инструкцию", означает, что нужно подождать пока файл загрузится и можно будет его читать онлайн. Некоторые инструкции очень большие и время их появления зависит от вашей скорости интернета.


19.
EN
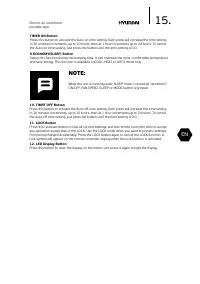
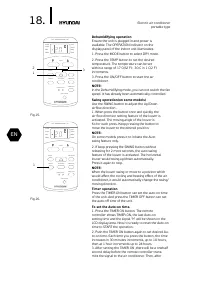
Electric air conditioner
portable type
approximately another 2 seconds, the signal “h” will
disappear and the set temperature will re-appear on
the LCD display window.
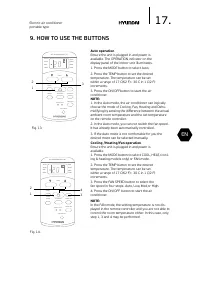
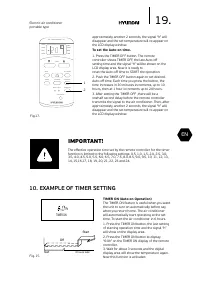
To set the Auto-on time.
1. Press the TIMER OFF button. The remote
controller shows TIMER OFF, the last Auto-off
setting time and the signal “h” will be shown on the
LCD display area. Now it is ready to
reset the Auto-off time to START the operation.
2. Push the TIMER OFF button again to set desired.
Auto-off time. Each time you press the button, the
time increases in 30 minutes increments, up to 10
hours, then at 1 hour increments up to 24 hours.
3. After setting the TIMER OFF ,there will be a
onehalf second delay before the remote controller
transmits the signal to the air conditioner. Then, after
approximately another 2 seconds, the signal “h” will
disappear and the set temperature will re-appear on
the LCD display window.
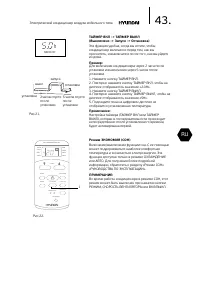
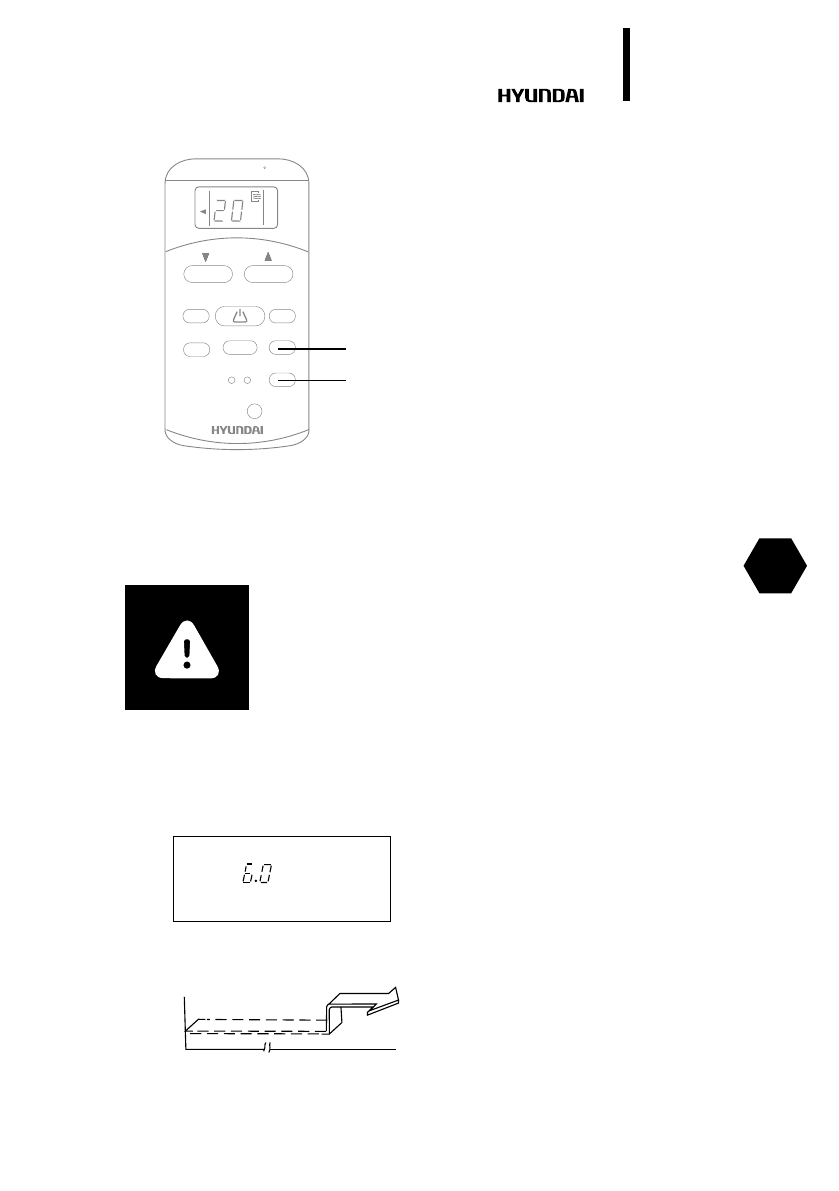
TIMER ON (Auto-on Operation)
The TIMER ON feature is useful when you want
the unit to turn on automatically before say
when you return home. The air conditioner
will automatically start operating at the set
time. To start the air conditioner in 6 hours.
1. Press the TIMER ON button, the last setting
of starting operation time and the signal “h”
will show on the display area.
2. Press the TIMER ON button to display
“6:0h” on the TIMER ON display of the remote
controller.
3. Wait for about 3 seconds and the digital
display area will show the temperature again.
Now this function is activated.
IMPORTANT!
The effective operation time set by the remote controller for the timer
function is limited to the following settings: 0.5, 1.0, 1.5, 2.0, 2.5, 3.0,
3.5, 4.0, 4.5, 5.0, 5.5, 6.0, 6.5, 7.0, 7.5, 8.0, 8.5, 9.0, 9.5, 10, 11, 12, 13,
14, 15,16,17, 18, 19, 20, 21, 22, 23 and 24.
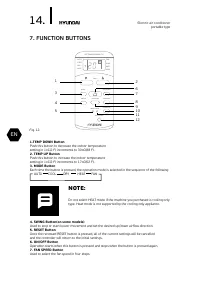
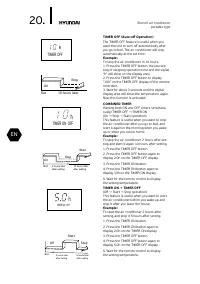
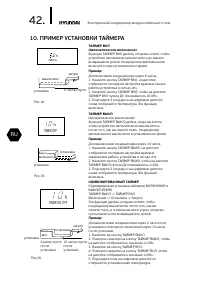
10. EXAMPLE OF TIMER SETTING
TIMER ON
Start
Off
6 hours later
h
Set
Fig. 15
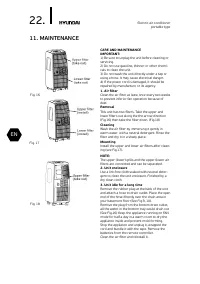
Fig.17.
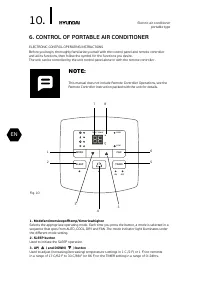
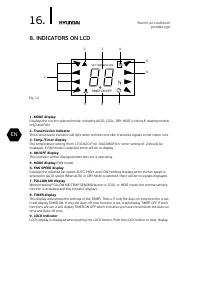
LED DISPlAY
RESET LOCK
TIMER OFF
TIMER ON
FAN SPEED
FAN
HIGH
MED
LOW
AUTO
COOL
DRY
HEAT
TEMP
ECONOMY
SWING
MODE
SET TEMPERATURE ( C)
1
2
Содержание
- 24 Содержание
- 25 Уважаемый покупатель!
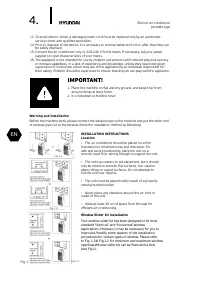
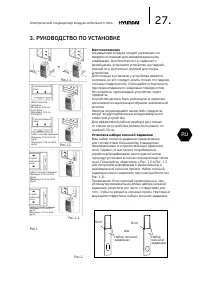
- 27 РУКОВОДСТВО ПО УСТАНОВКЕ; Местоположение
- 28 Установка воздуховода для отработанного
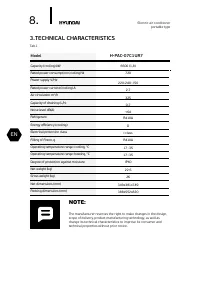
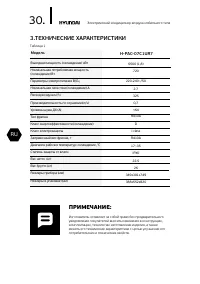
- 30 ТЕХНИЧЕСКИЕ ХАРАКТЕРИСТИКИ; Модель
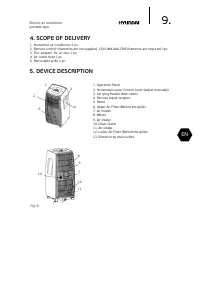
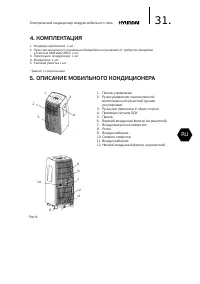
- 31 ОПИСАНИЕ МОБИЛЬНОГО КОНДИЦИОНЕРА
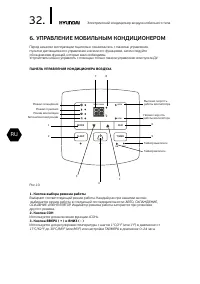
- 32 УПРАВЛЕНИЕ МОБИЛЬНЫМ КОНДИЦИОНЕРОМ; Кнопка выбора режима работы; ПАНЕЛЬ УПРАВЛЕНИЯ КОНДИЦИОНЕРА ВОЗДУХА
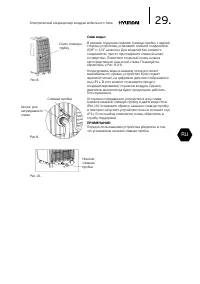
- 33 Светодиодный дисплей
- 34 Режим ОСУШЕНИЕ
- 35 Подождите 3 минуты до возобновления работы устройства
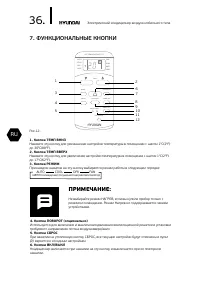
- 36 ФУНКЦИОНАЛЬНЫЕ КНОПКИ
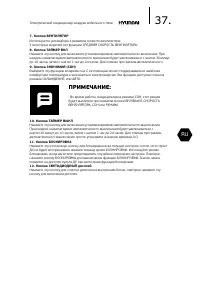
- 37 Кнопка ТАЙМЕР ВЫКЛ
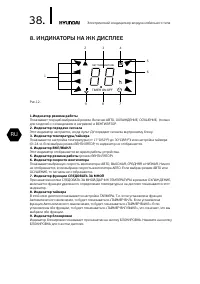
- 38 ИНДИКАТОРЫ НА ЖК ДИСПЛЕЕ
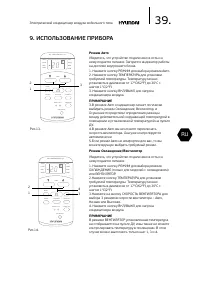
- 39 ИСПОЛЬЗОВАНИЕ ПРИБОРА; Режим Авто
- 40 Режим Осушение
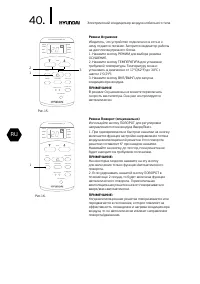
- 41 Работа функции Таймера
- 42 ТАЙМЕР ВКЛ; ПРИМЕР УСТАНОВКИ ТАЙМЕРА
- 44 Длительный простой устройства
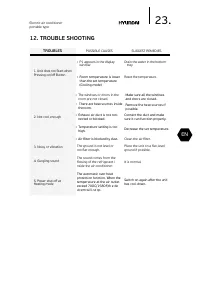
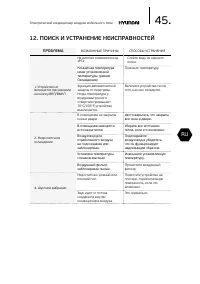
- 45 ПОИСК И УСТРАНЕНИЕ НЕИСПРАВНОСТЕЙ; ПРОБЛЕМА
- 46 УВАЖАЕМЫЙ ПОКУПАТЕЛЬ!
- 49 Гарантийные обязательства
- 51 Изготовитель оставляет за собой право:
- 52 Досрочное прекращение гарантийного обслуживания.; Гарантийные обязательства не распространяются на
- 53 Изготовитель не несет гарантийных обязательств за изделие
- 57 Бланк гарантийного талона; Сведения об установке изделия
- 60 Отрывной талон «A»; Отрывной талон «В»
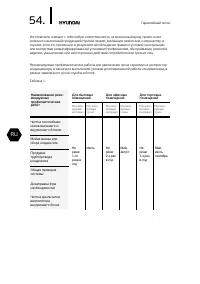
- 61 Профилактическое обслуживание изделия.
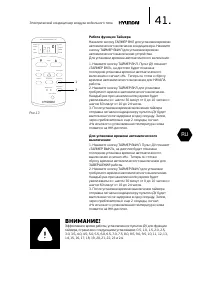
- 63 Вниманию покупателей!


