
Кондиционеры Hyundai H-PAC-07C1UR7 - инструкция пользователя по применению, эксплуатации и установке на русском языке. Мы надеемся, она поможет вам решить возникшие у вас вопросы при эксплуатации техники.
Если остались вопросы, задайте их в комментариях после инструкции.
"Загружаем инструкцию", означает, что нужно подождать пока файл загрузится и можно будет его читать онлайн. Некоторые инструкции очень большие и время их появления зависит от вашей скорости интернета.


22.
EN
Electric air conditioner
portable type
11. MAINTENANCE
Fig. 18
Fig. 16
Fig. 17
CARE AND MAINTENANCE
IMPORTANT:
1) Be sure to unplug the unit before cleaning or
servicing.
2) Do not use gasoline, thinner or other chemi-
cals to clean the unit.
3) Do not wash the unit directly under a tap or
using a hose. It may cause electrical danger.
4) If the power cord is damaged, it should be
repaired by manufacture or its agency.
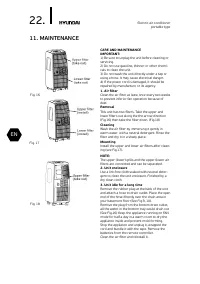
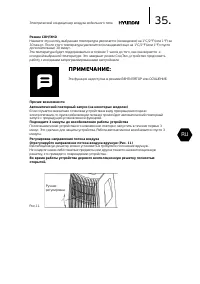
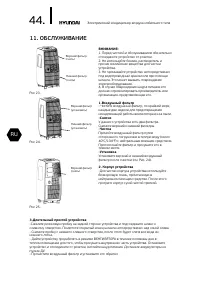
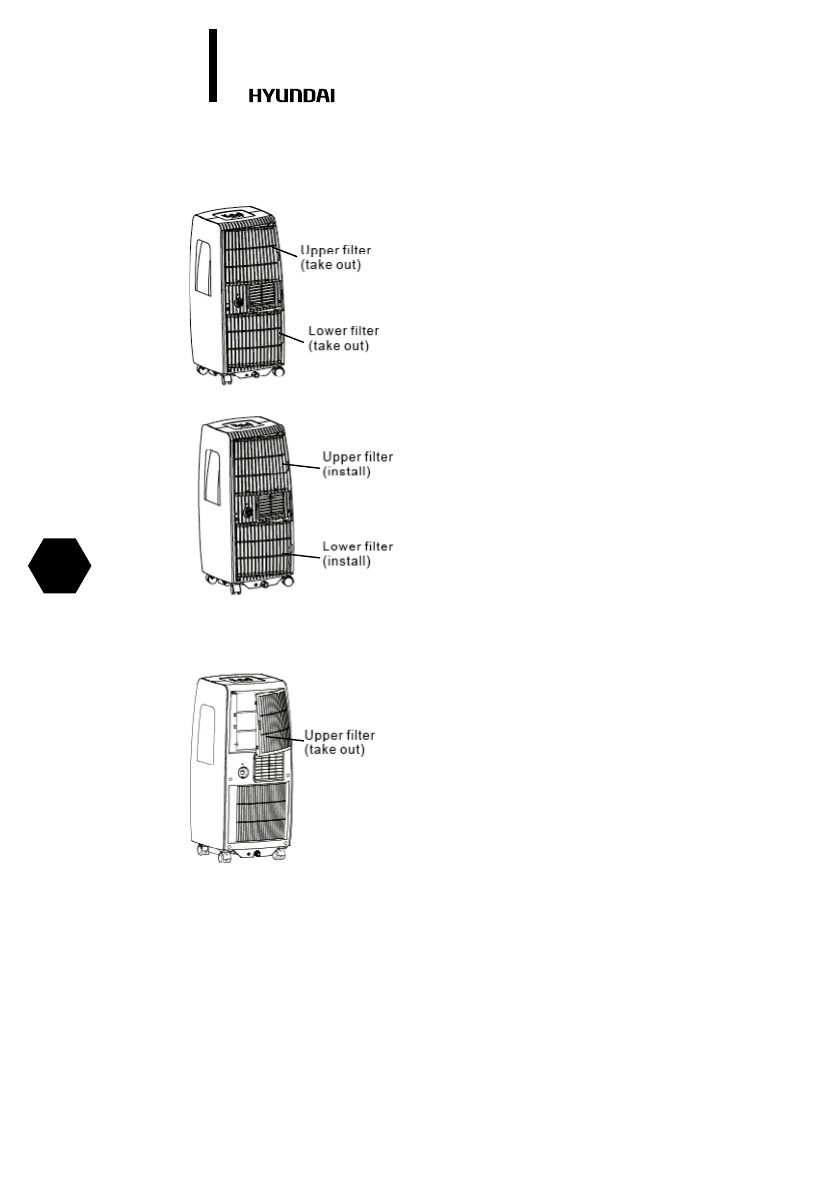
1. Air filter
Clean the air filter at least once every two weeks
to prevent inferior fan operation because of
dust.
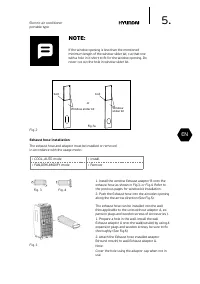
Removal
This unit has two filters. Take the upper and
lower filters out along the the arrow direction
(Fig.16) then take the filter down. (Fig.18)
Cleaning
Wash the air filter by immersing it gently in
warm water with a neutral detergent. Rinse the
filter and dry it in a shady place.
Mounting
Install the upper and lower air filters after clean
-
ing (see Fig.17).
NOTE:
The upper (lower) grills and the upper (lower air
filters are connected and can be separated.
2. Unit enclosure
Use a lint-free cloth soaked with neutral deter-
gent to clean the unit enclosure. Finished by a
dry clean cloth.
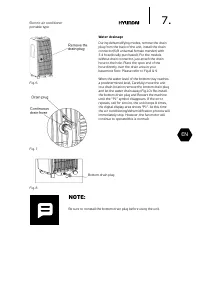
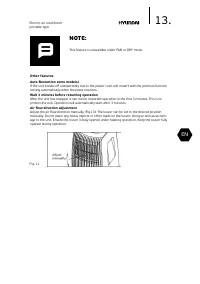
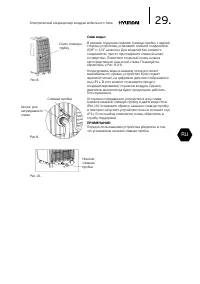
3. Unit idle for a long time
Remove the rubber plug at the back of the unit
and attach a hose to drain outlet. Place the open
end of the hose directly over the drain area in
your basement floor (See Fig.9, 10).
Remove the plug from the bottom drain outlet,
all the water in the bottom tray would drain out
(See Fig.16) Keep the appliance running on FAN
mode for half a day in a warm room to dry the
appliance inside and prevent mold forming.
Stop the appliance and unplug it, wrapped the
cord and bundle it with the tape. Remove the
batteries from the remote controller.
Clean the air filter and reinstall it.
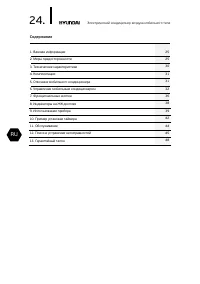
Содержание
- 24 Содержание
- 25 Уважаемый покупатель!
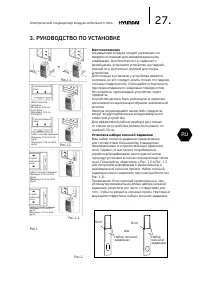
- 27 РУКОВОДСТВО ПО УСТАНОВКЕ; Местоположение
- 28 Установка воздуховода для отработанного
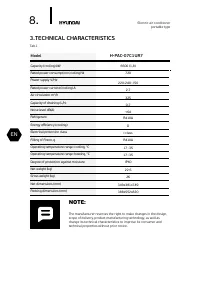
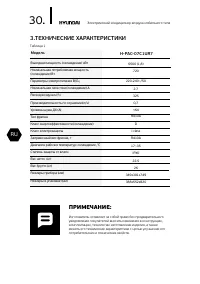
- 30 ТЕХНИЧЕСКИЕ ХАРАКТЕРИСТИКИ; Модель
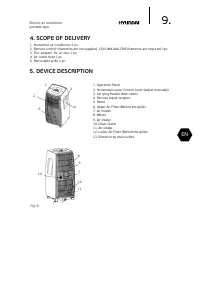
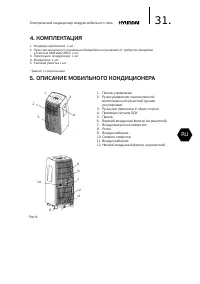
- 31 ОПИСАНИЕ МОБИЛЬНОГО КОНДИЦИОНЕРА
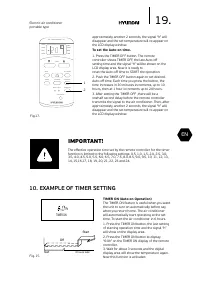
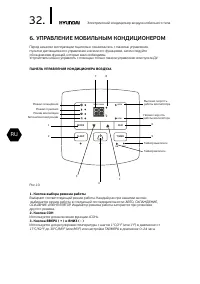
- 32 УПРАВЛЕНИЕ МОБИЛЬНЫМ КОНДИЦИОНЕРОМ; Кнопка выбора режима работы; ПАНЕЛЬ УПРАВЛЕНИЯ КОНДИЦИОНЕРА ВОЗДУХА
- 33 Светодиодный дисплей
- 34 Режим ОСУШЕНИЕ
- 35 Подождите 3 минуты до возобновления работы устройства
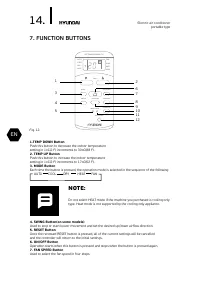
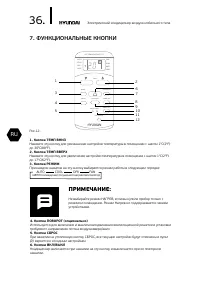
- 36 ФУНКЦИОНАЛЬНЫЕ КНОПКИ
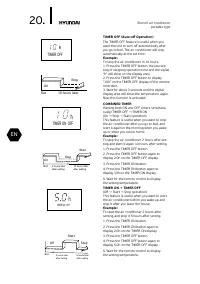
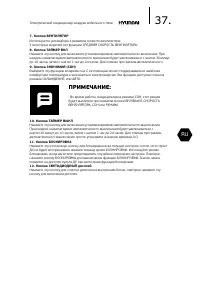
- 37 Кнопка ТАЙМЕР ВЫКЛ
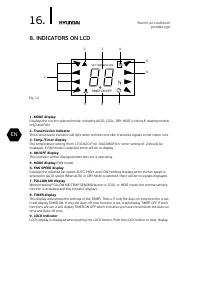
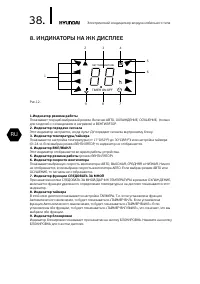
- 38 ИНДИКАТОРЫ НА ЖК ДИСПЛЕЕ
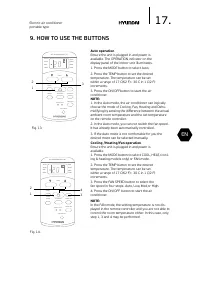
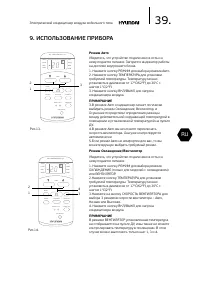
- 39 ИСПОЛЬЗОВАНИЕ ПРИБОРА; Режим Авто
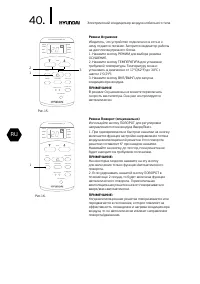
- 40 Режим Осушение
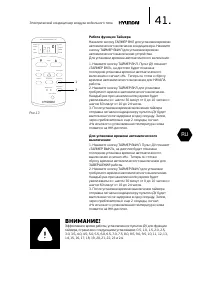
- 41 Работа функции Таймера
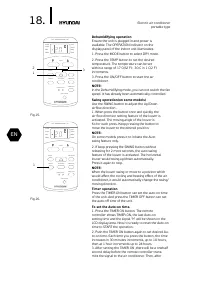
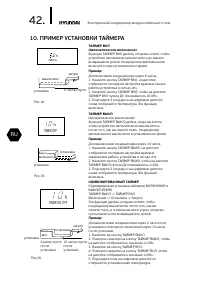
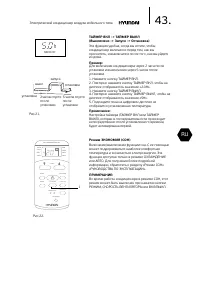
- 42 ТАЙМЕР ВКЛ; ПРИМЕР УСТАНОВКИ ТАЙМЕРА
- 44 Длительный простой устройства
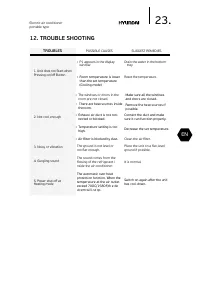
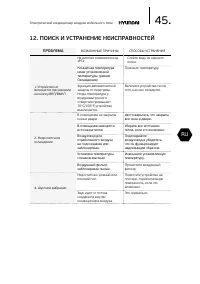
- 45 ПОИСК И УСТРАНЕНИЕ НЕИСПРАВНОСТЕЙ; ПРОБЛЕМА
- 46 УВАЖАЕМЫЙ ПОКУПАТЕЛЬ!
- 49 Гарантийные обязательства
- 51 Изготовитель оставляет за собой право:
- 52 Досрочное прекращение гарантийного обслуживания.; Гарантийные обязательства не распространяются на
- 53 Изготовитель не несет гарантийных обязательств за изделие
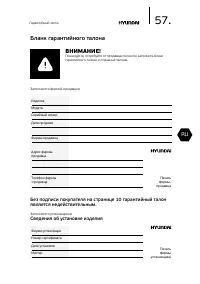
- 57 Бланк гарантийного талона; Сведения об установке изделия
- 60 Отрывной талон «A»; Отрывной талон «В»
- 61 Профилактическое обслуживание изделия.
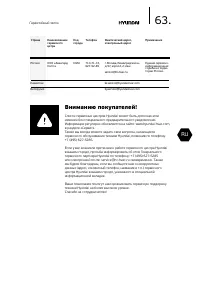
- 63 Вниманию покупателей!


