
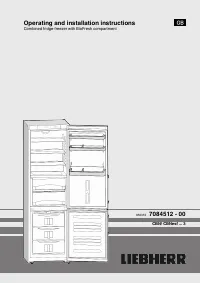
Холодильник Liebherr CBN 3913 Comfort - инструкция пользователя по применению, эксплуатации и установке на русском языке. Мы надеемся, она поможет вам решить возникшие у вас вопросы при эксплуатации техники.
Если остались вопросы, задайте их в комментариях после инструкции.
"Загружаем инструкцию", означает, что нужно подождать пока файл загрузится и можно будет его читать онлайн. Некоторые инструкции очень большие и время их появления зависит от вашей скорости интернета.

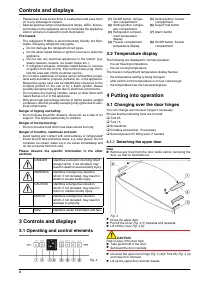
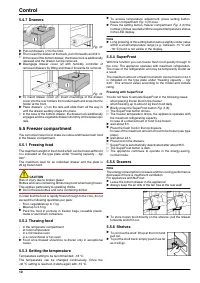

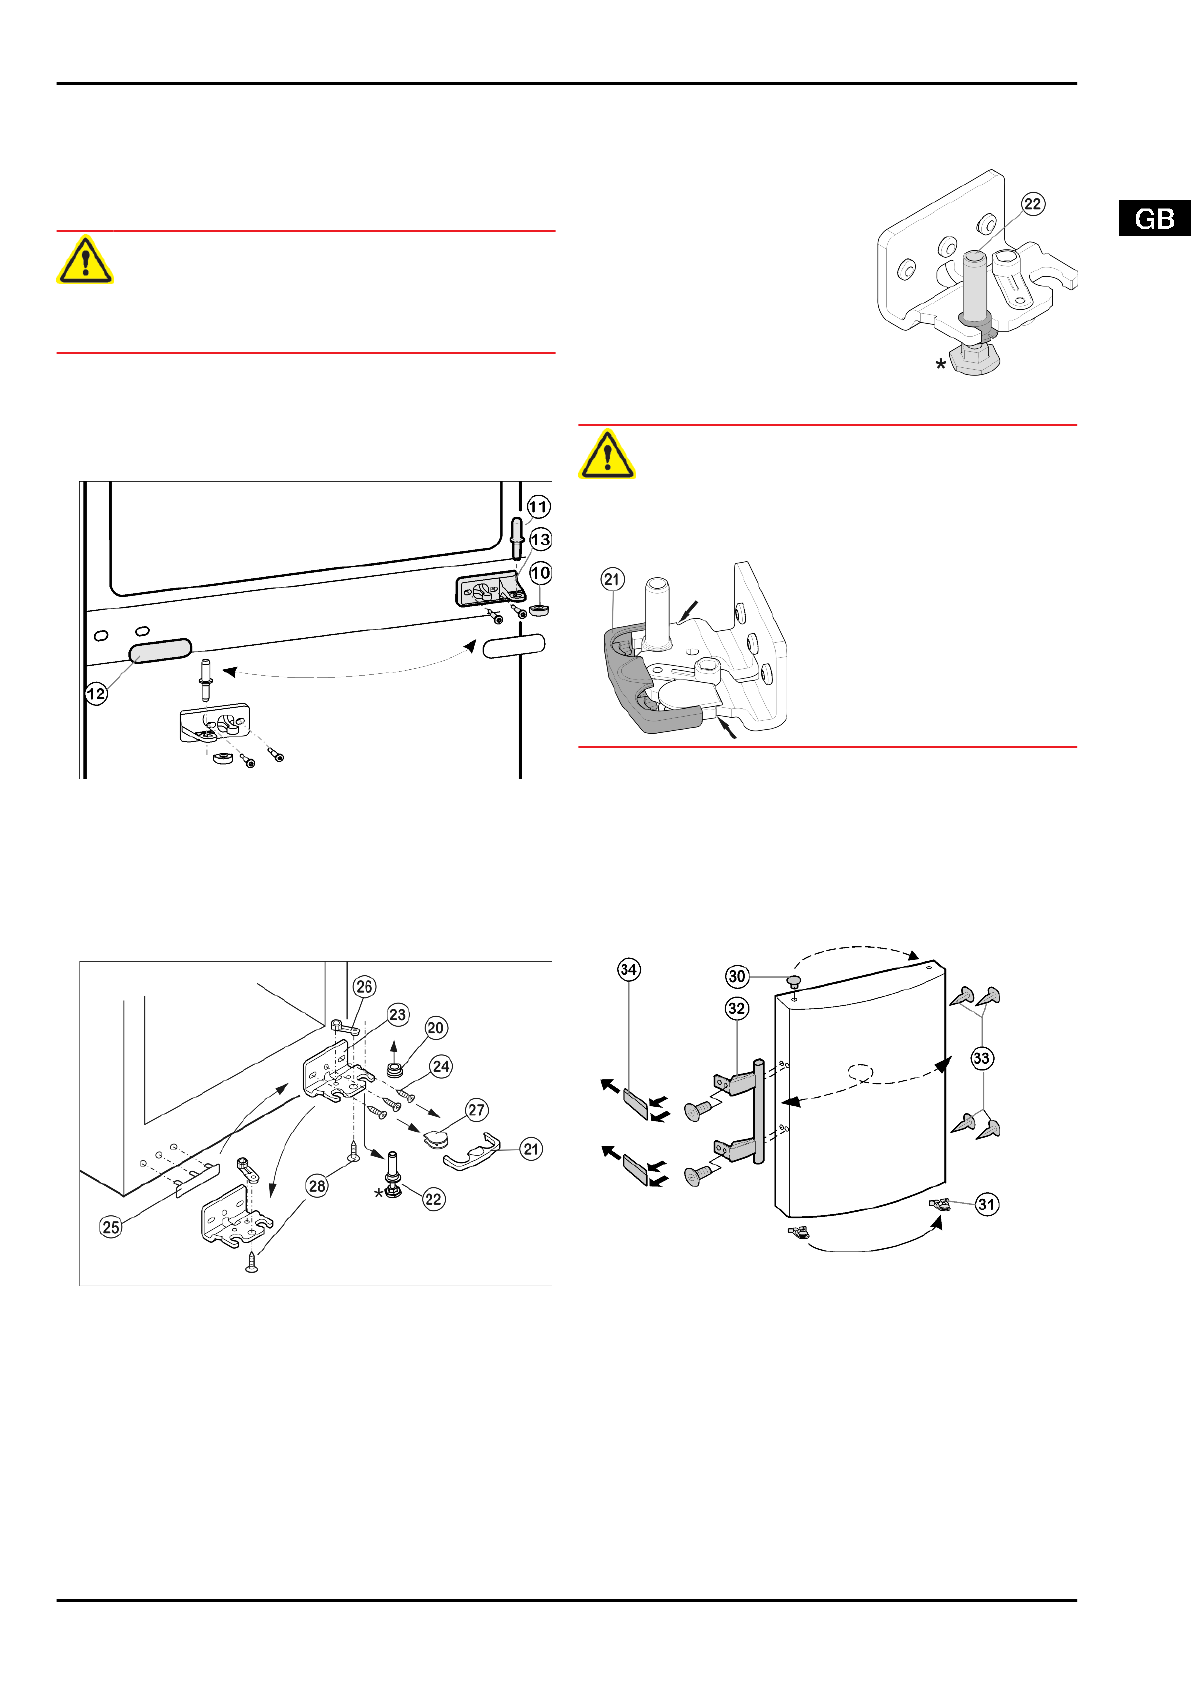
4.1.2 Detaching the lower door
u
Close the lower door.
u
Draw the middle bearing pin
Fig. 5 (11) out of the turn hinge
and lower door.
u
Remove the plastic cap
Fig. 5 (10).
CAUTION
Risk of injury if the door tips!
u
Take good hold of the door.
u
Set down the door carefully.
u
Open the lower door.
u
Detach the middle turn hinge
Fig. 5 (13).
u
Lift up the door and set it aside.
4.1.3 Transferring the middle bearing elements
Fig. 5
u
Carefully detach the cover panel
Fig. 5 (12).
u
Turn the middle turn hinge
Fig. 5 (13) through 180° and screw
it firmly into place on the new hinge side (with 4 Nm).
u
Turn the cover panel
Fig. 5 (12) through 180° and snap it into
place again on the new handle side.
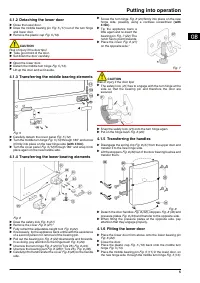
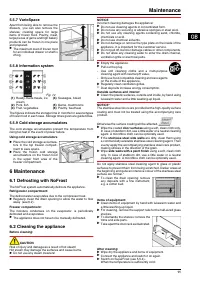
4.1.4 Transferring the lower bearing elements
Fig. 6
u
Draw the safety lock
Fig. 6 (21).
u
Remove the cover
Fig. 6 (27).*
u
Fully retract the adjustable-height foot
Fig. 6 (22).
u
If necessary, tip the appliance back a little with the assistance
of a second person for removal of the bearing pin.
u
Pull out the bearing pin
Fig. 6 (22) downwards and forwards.
In so doing, pay attention to the hinge bush
Fig. 6 (20).
u
Unscrew the turn hinge
Fig. 6 (23) (3 Torx 25) Fig. 6 (24).
u
Unscrew the bearing part
Fig. 6 (26)(1 Torx 25), Fig. 6 (28).
u
Carefully lift off and transfer the cover
Fig. 6 (25) on the handle
side.
u
Screw the turn hinge
Fig. 6 (23) firmly into place on the new
hinge side, possibly using a cordless screwdriver (with
4 Nm).
u
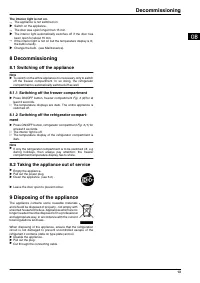
Tip the appliance back a
little again and re-insert the
bearing pin
Fig. 7 (22). The
notch has to point forwards.
u
Place the cover
Fig. 6 (27)
on the opposite side.*
Fig. 7
CAUTION
Risk of injury if the door tips!
u
The safety lock
(21) has to engage with the turn hinge at the
side so that the bearing pin and therefore the door are
secured.
u
u
Snap the safety lock
(21) onto the turn hinge again.
u
Put on the hinge bush
Fig. 6 (20).
4.1.5 Transferring the handles
u
Disengage the spring clip
Fig. 8 (31) from the upper door and
transfer it to the new hinge side.
u
Lift the stoppers
Fig. 8 (30) out of the door bearing bushes and
transfer them.
Fig. 8
u
Detach the door handles
Fig. 8 (32), stoppers Fig. 8 (33) and
pressure plates
Fig. 8 (34) and transfer to the opposite side.
u
When fitting the pressure plates at the opposite side, pay
attention that they engage properly.
4.1.6 Fitting the lower door
u
Place the lower door from above onto the lower bearing pin
Fig. 6 (22).
u
Close the door.
u
Place the plastic cap
Fig. 5 (10) back onto the middle turn
hinge
Fig. 5 (13).
u
Place the middle bearing pin
Fig. 5 (11) in the lower door, on
the new hinge side, through the middle turn hinge
Fig. 5 (13).
Putting into operation
5
Характеристики

Остались вопросы?Не нашли свой ответ в руководстве или возникли другие проблемы? Задайте свой вопрос в форме ниже с подробным описанием вашей ситуации, чтобы другие люди и специалисты смогли дать на него ответ. Если вы знаете как решить проблему другого человека, пожалуйста, подскажите ему :)


