
Холодильник Liebherr CBesf 4006 BioFresh - инструкция пользователя по применению, эксплуатации и установке на русском языке. Мы надеемся, она поможет вам решить возникшие у вас вопросы при эксплуатации техники.
Если остались вопросы, задайте их в комментариях после инструкции.
"Загружаем инструкцию", означает, что нужно подождать пока файл загрузится и можно будет его читать онлайн. Некоторые инструкции очень большие и время их появления зависит от вашей скорости интернета.

15
*
Depending on model and options
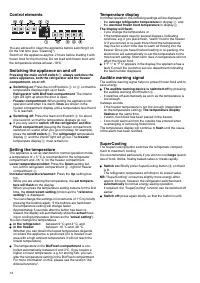
Additional functions
In set-up mode you can set the
child-proof lock
, adjust the
brightness of the display*
and set the
temperature
in the
BioFresh compartment
slightly lower or higher.
Activating set-up mode:
W
Press SuperFrost button for approx. 5 secs - the SuperFrost
button flashes - the display shows
c
for
child-proof lock.
Note: the value to be altered flashes.
W
Select the required function by pressing the Up/Down but-
ton:
c
=
child-proof lock
,
h
=
brightness
or
b
=
BioFresh temperature
.
W
Now select/acknowledge function by pressing SuperFrost
button briefly:
• For
c
=
child-proof lock,
press the
Up/Down button to select
c
1
= child-proof lock
on
or
c
0
= child-proof lock
off
and acknowledge with
the
SuperFrost button.
When the symbol
6
is lit, the child-proof lock is acti-
vated.
• For
h
=
brightness,
press
Up/Down button to select
h
1
=
minimum
to
h
5
=
maximum
brightness
and acknowledge
with the
SuperFrost button.
• With
b
=
BioFresh temperature,
press the
Up/Down button to select from
b
1
=
lowest
to
b
9
=
highest
setting
and confirm with the
SuperFrost button.
The altered BioFresh temperature adjusts slowly to the
new value.
NB: b
5
= factory setting. By decreasing the temperature,
b
4
to b
1
, minus temperatures can be reached and the
food in the BioFresh compartment will freeze slightly.
Exit set-up mode:
W
To exit the set-up mode, press the On/Off button; after
2 min. the electronic system switches over automatically.
- The normal operating mode is activated again.
Power failure- / FrostControl-display
If appears in the display , this means that:
the freezer temperature has risen too
high
during
the last few hours or days due to a power failure.
W
If you press the audible warning on/off button 5
whilst the display is reading , the
highest
temperature
registered during the power failure will be displayed.
Check the quality of the food and its suitability for con-
sumption in case it has become too warm or even defrost-
ed.
- The highest temperature will appear for approx. 1 minute.
After that, the actual temperature in the freezer will re-ap-
pear. The display can be switched off by repeatedly press-
ing the audible warning on/off button.
Once the power is re-instated, the appliance will continue to
operate at the most recent temperature setting.
Notes on cooling
- Store food in such a way that the air can circulate well, i.e.
do not store goods too close together. Do not cover the fan
slits* on the rear wall - otherwise the refrigerating capacity
will be impaired!
- Food which gives off or absorbs odours and flavours, and
liquids should always be stored covered or in closed con-
tainers.
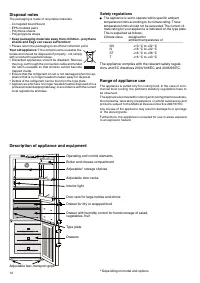
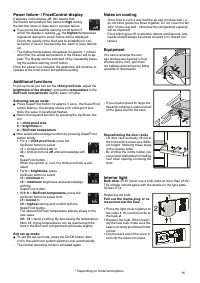
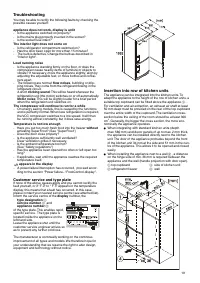
Equipment
You can re-arrange the stor-
age shelves as required. Lift up
shelves at the front, pull them
out halfway and remove by tilting
upwards or downwards.
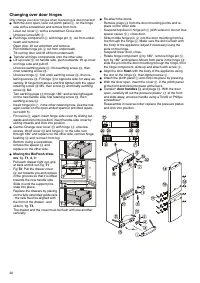
Repositioning the door racks
- Lift door rack vertically, lift out to
the front and re-insert at a differ-
ent height, following these steps
in the reverse order.
- By shifting the bottle holder you
can protect the bottles from falling
over when opening or closing the
door.
- If you require space for large bot-
tles and containers, slide one half
of the glass shelf to the back.
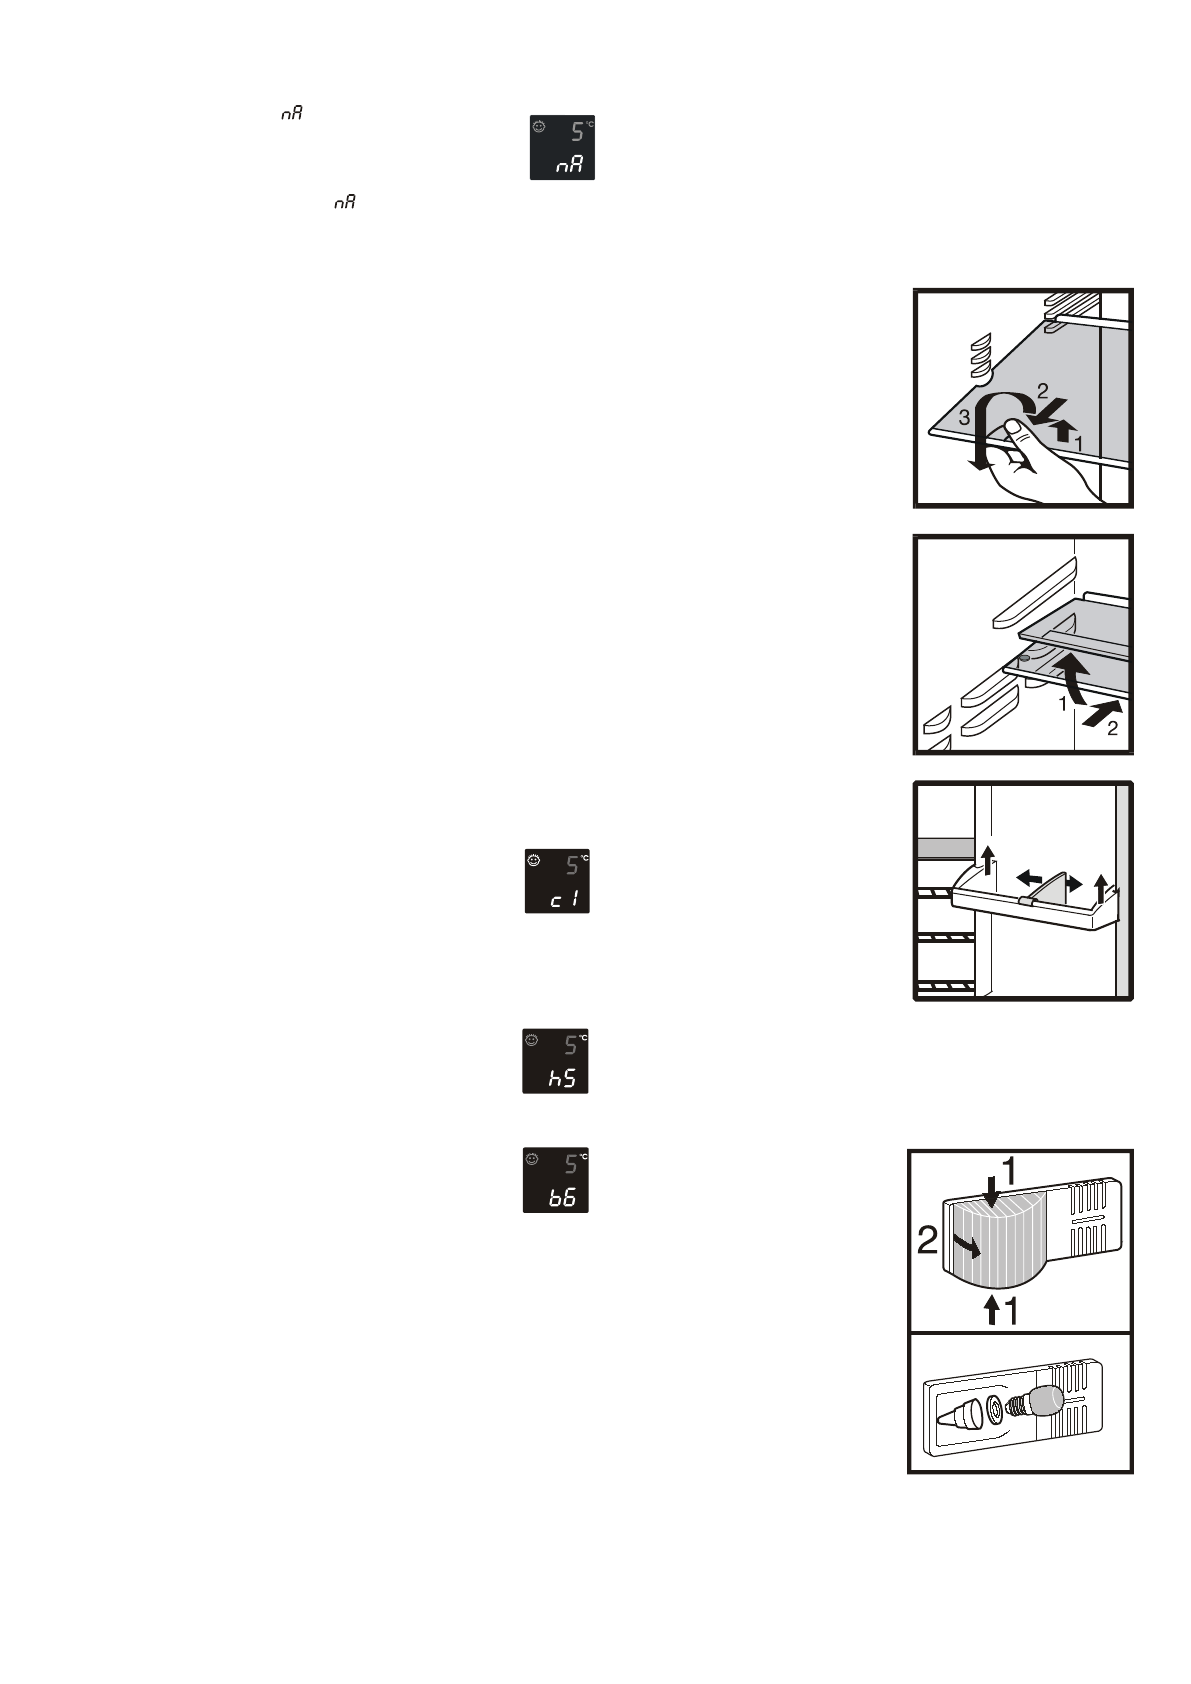
Interior light
Bulb data:
25 W (never use a bulb rated at more than 25 W).
The voltage should agree with the details on the type plate.
Socket: E 14.
Replacing the bulb:
Pull out the mains plug or re-
move/unscrew the fuse.
• Press the light cover together at
the sides
1
, lift out and unclip at
the back
2
.
• Replace the bulb. When insert-
ing the new bulb, make sure the
seal is correctly positioned in the
socket.
• Clip the back end of the cover in
and clip the sides into place.
Характеристики

Остались вопросы?Не нашли свой ответ в руководстве или возникли другие проблемы? Задайте свой вопрос в форме ниже с подробным описанием вашей ситуации, чтобы другие люди и специалисты смогли дать на него ответ. Если вы знаете как решить проблему другого человека, пожалуйста, подскажите ему :)


