
Газонокосилки STIGA TWINCLIP 950e V294513898/ST2 - инструкция пользователя по применению, эксплуатации и установке на русском языке. Мы надеемся, она поможет вам решить возникшие у вас вопросы при эксплуатации техники.
Если остались вопросы, задайте их в комментариях после инструкции.
"Загружаем инструкцию", означает, что нужно подождать пока файл загрузится и можно будет его читать онлайн. Некоторые инструкции очень большие и время их появления зависит от вашей скорости интернета.


EN - 4
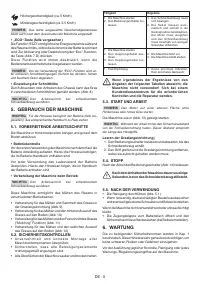
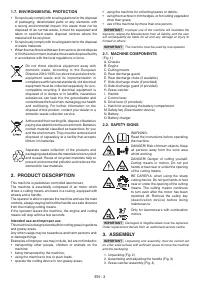
4. CONTROLS
•
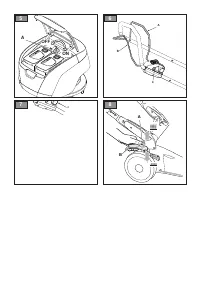
Safety key (Deactivation device)
The safety key found inside the battery compartment enables
/ disables the machine electric circuit (Fig. 5)
.
Removing the key, the electric circuit is completely deactivated
to prevent uncontrolled use of the machine.
IMPORTANT
Remove the safety key whenever the machine
is unused or left unattended.
• Operator presence lever
The operator presence lever (Fig. 6.A) enables the
engagement of the cutting device. The handle is located in
the front position.
Press the safety button (Fig. 6.C) and move the lever towards
the handle to start the cutting device.
When the lever is released, the motor automatically stops
and all functions are disabled.
•
Power button (if provided)
The power button (Fig. 7.A) is used for:
Switching on the machine.
Pressing the button (Fig. 7.A) the LED (Fig. 7.B) turns
on and the machine is ready for use.
NOTE
The machine can only be switched on if the
operator presence lever and the drive lever are released.
NOTE
If the machine is not used, the LED turns off
after 15 seconds and the above-mentioned operation
must be carried out again.
Cutting means engagement.
NOTE
The cutting device engagement is possible on-
ly by pressing the operator presence lever against the
handle (see par. 6.3).
Cutting means disengagement.
With the cutting device engaged, release the operator
presence lever (Fig. 6.A); the cutting device stops
keeping the machine switched on.
•
Drive lever (if provided):
This engages the wheel drive and allows the machine
to move forward (Fig. 6.B). The handle is located in
the rear position.
IMPORTANT
The engine must always be running with the
drive disengaged.
IMPORTANT
To prevent damage to the transmission, do not
pull the machine backwards with the drive engaged.
For some models it's possible to adjust the feed speed using
the selection knob on the right of the handle (Fig. 7.C).
You can select 6 different levels of speed.
Maximum speed (about 5 Km/h).
Minimum speed (about 2.5 Km / h)
NOTE
The last speed level selected remains set also after the
machine shutdown.
•
"ECO" button (if provided)
The “ECO” mode allows to save energy when cutting the grass,
optimising the battery life. To activate or deactivate the "Eco"
function, press the button (Fig. 7.D).
This mode automatically turns off when the operator presence
lever is released.
NOTE
It is not recommended to use the “ECO” function in
heavy grass cutting conditions (cutting of dense, high, humid
grass).
•
Cutting height adjustment
By lowering or raising the chassis the grass can be cut at
different heights. (Fig. 8)
IMPORTANT
This operation must be carried out when the
cutting device is stationary.
5. USING THE MACHINE
IMPORTANT
For instructions regarding the engine and the
battery (if supplied), read the relevant manual.
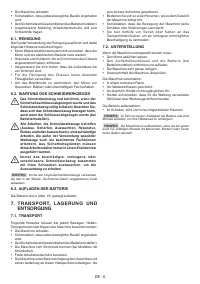
5.1. PRELIMINARY PROCEDURES
Place the machine in a stable horizontal position on the ground.
• Checking the battery
Before using the machine for the first time after purchase,
fully charge the battery following the instructions in the
battery booklet.
Before every use of the machine, check the battery charge
status according to the instructions in the battery booklet.
•
Preparing the machine before starting work
IMPORTANT
Carry out this operation with the cutting de
-
vice stationary.
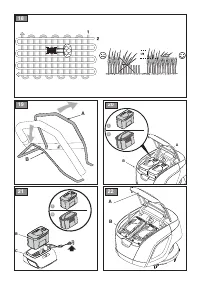
With this machine, it is possible to mow the lawn in several ways:
•
Setting up for cutting the grass and collecting it in the
grass catcher (Fig. 9)
•
Setting up for cutting and rear grass discharge onto the
ground (Fig. 10)
•
Setting up for cutting and shredding the grass ('mulching'
function) (Fig. 11)
•
Setting up for cutting and lateral grass discharge onto the
ground (Fig. 12)
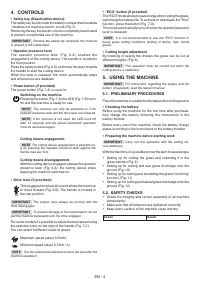
5.2. SAFETY CHECKS
•
Check the integrity and correct assembly of all machine
components;
•
Make sure that all fasteners are tightened correctly;
•
Keep every surface of the machine clean and dry.
Action
Result
Содержание
- 89 РУССКИЙ - Перевод оригинальной инструкции; ОБУЧЕНИЕ
- 90 ВАЖНО; ЭЛЕКТРОПИТАНИЕ
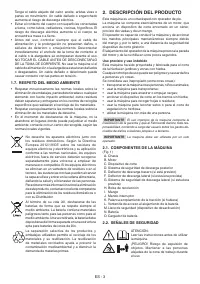
- 91 ОХРАНА ОКРУЖАЮЩЕЙ СРЕДЫ; ОПИСАНИЕ ИЗДЕЛИЯ; Предусмотренное использование и неправильное
- 92 МОНТАЖ; Ключ безопасности (Устройство отключения)
- 93 ИСПОЛЬЗОВАНИЕ МАШИНЫ; ПОДГОТОВИТЕЛЬНЫЕ ОПЕРАЦИИ; ЗАПУСК И ОПИСАНИЕ РАБОТЫ
- 94 ТЕХНИЧЕСКОЕ ОБСЛУЖИВАНИЕ; ТРАНСПОРТИРОВКА, ХРАНЕНИЕ; ПРИМЕЧАНИЕ


