
Фрезеры Bosch GKF 12V-8 - инструкция пользователя по применению, эксплуатации и установке на русском языке. Мы надеемся, она поможет вам решить возникшие у вас вопросы при эксплуатации техники.
Если остались вопросы, задайте их в комментариях после инструкции.
"Загружаем инструкцию", означает, что нужно подождать пока файл загрузится и можно будет его читать онлайн. Некоторые инструкции очень большие и время их появления зависит от вашей скорости интернета.


16
| English
1 609 92A 3WR | (10.8.17)
Bosch Power Tools
Dust/Chip Extraction
Dust from materials such as lead-containing coatings,
some wood types, minerals and metal can be harmful to
one’s health. Touching or breathing-in the dust can cause
allergic reactions and/or lead to respiratory infections of
the user or bystanders.
Certain dust, such as oak or beech dust, is considered car-
cinogenic, especially in connection with wood-treatment
additives (chromate, wood preservative). Materials con-
taining asbestos may only be worked by specialists.
– Provide for good ventilation of the working place.
– It is recommended to wear a P2 filter-class respirator.
Observe the relevant regulations in your country for the
materials to be worked.
Operation
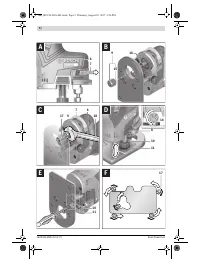
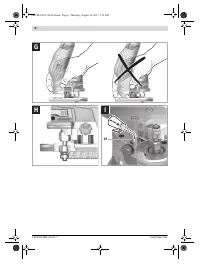
Adjusting the Depth-of-cut (see figures D – E)
The adjustment of the depth-of-cut may only be carried
out when the router is switched off.
Place the machine with the router bit mounted on the work-
piece to be machined.
Turn the locking wheel
14
anti-clockwise approximately half a
revolution to unlock the depth-of-cut adjuster.
Push and hold the depth-of cut coarse adjustment button
8
.
Move the drive unit up or down and adjust the cutting depth to
approximately the required position. Release the
8
button.
Use the thumbwheel
10
to set the exact cutting depth re-
quired. Each revolution of the thumbwheel alters the cutting
depth by 1 mm.
Turn the locking wheel
14
clockwise approximately half a rev-
olution to lock the depth-of-cut adjuster.
Check the adjusted depth-of-cut with a trial cut and correct it,
if necessary.
If you want to keep the tool at the cutting depth you have set,
you can screw the fixing screw
11
into the depth-of-cut fine
adjustment thumbwheel
10
.
Starting Operation
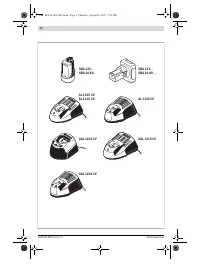
Inserting the battery
Note:
Use of batteries not suitable for the machine can lead to
malfunctions of or cause damage to the power tool.
Insert the charged battery
1
into the battery port until it can
be felt to engage and is seated flush.
Switching On and Off
To
switch on
the power tool, slide the On/Off switch
5
down
so that
“I”
appears on the switch.
To
switch off
the power tool, slide the On/Off switch
5
up so
that
“0”
appears on the switch.
To save energy, only switch the power tool on when using it.
Working Advice
Before any work on the machine itself (e. g. mainte-
nance, tool change, etc.), remove the battery from the
power tool.
There is danger of injury when unintentionally
actuating the On/Off switch.
Protect router bits against shock and impact.
Direction of Feed and Routing Process (see figure F – G)
The feed motion of the router bit 17 must always be
carried out against the rotation direction of the router
bit (up-cutting).
When routing in the rotation direction of
the router bit (down-cutting), the machine can break
loose, eliminating control by the user.
Note:
Take into consideration that the router bit
17
always
extends out of the base plate
12
. Do not damage the template
or the workpiece.
Set the desired depth-of-cut.
Switch the machine on and guide it to the location subject to
working.
Carry out the routing process applying uniform feed.
Switch the machine off after finishing the routing process.
Do not place the power tool down until after the router
bit has come to a complete stop.
Coasting application
tools can cause injuries.
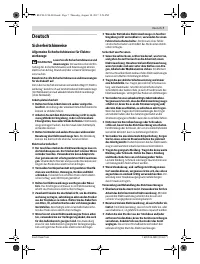
Shaping or Molding Applications (see figure H)
For edge milling and profile milling, the milling cutter must be
fitted with a pilot pin or a ball bearing. We recommend using
milling cutters with a ball bearing.
Guide the switched on power tool from the side toward the
workpiece until the pilot or the ball bearing of the router bit
faces against the workpiece edge to be machined.
Guide the machine alongside the workpiece edge. Ensure that
the tool rests on the workpiece at the correct angle. Excessive
pressure can damage the edge of the workpiece.
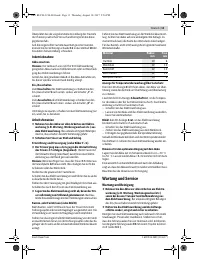
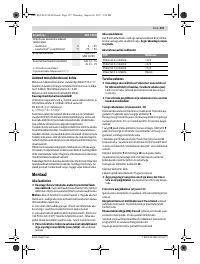
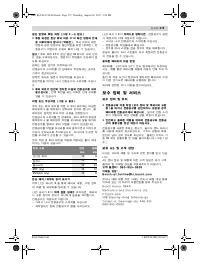
The following maximum workpiece dimensions apply for edge
and profile milling operations:
Temperature Control/Overload Protection Indicator
The red LED indicator
3
helps you to protect the battery
against overheating and the drive against overheating and
overload.
If the LED indicator
3
is lit up
permanently in red
, the tem-
perature of the battery or drive unit is too high. The power tool
switches off automatically.
– Switch the power tool off.
– Allow the battery and power tool to cool down before you
carry on working.
The LED indicator
3
flashes red
, the power tool is blocked
and switches off automatically.
– Switch the power tool off.
– Remove the power tool from the workpiece.
– Unlock the spindle lock if necessary.
As soon as the blockade has been removed and the motor
spindle is able to turn freely again, you can switch the power
tool back on.
Material
Radius
mm
Chamfer
mm
Hardwood
10
6
Softwood
12
10
Plastic
12
10
MDF sheets
12
10
Plywood sheets
10
6
OBJ_BUCH-3210-001.book Page 16 Thursday, August 10, 2017 2:56 PM
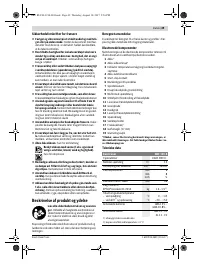
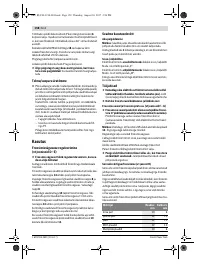
Содержание
- 103 Безопасность людей
- 104 Сервис; Описание продукта и услуг; Применение по назначению
- 105 Технические данные; Пользуйтесь средствами защиты органов слуха!; Сборка; Зарядка аккумулятора; Извлечение аккумулятора; Замена рабочего инструмента; Кромкофрезерный станок; СИД
- 106 Фрезы с твердосплавными режущими кромками (HM); Отсос пыли и стружки; Работа с инструментом; Включение электроинструмента
- 107 Указания по применению; Техобслуживание и сервис; Техобслуживание и очистка; Материал
- 108 Россия; Транспортировка
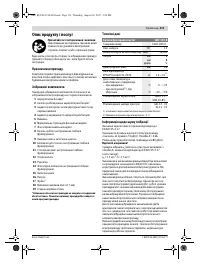
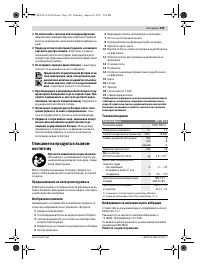
Характеристики

Остались вопросы?Не нашли свой ответ в руководстве или возникли другие проблемы? Задайте свой вопрос в форме ниже с подробным описанием вашей ситуации, чтобы другие люди и специалисты смогли дать на него ответ. Если вы знаете как решить проблему другого человека, пожалуйста, подскажите ему :)


