
Электропилы VERTO Li-Ion 52G585 - инструкция пользователя по применению, эксплуатации и установке на русском языке. Мы надеемся, она поможет вам решить возникшие у вас вопросы при эксплуатации техники.
Если остались вопросы, задайте их в комментариях после инструкции.
"Загружаем инструкцию", означает, что нужно подождать пока файл загрузится и можно будет его читать онлайн. Некоторые инструкции очень большие и время их появления зависит от вашей скорости интернета.


16
•
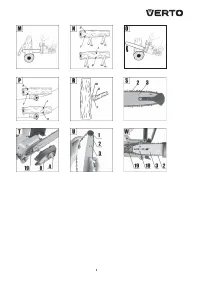
When cutting a trunk that is lying on the ground, first make a cut deep
1/3 of the trunk diameter, then turn the trunk over and finish cutting
at the opposite side.
•
When cutting a trunk that is lying on the ground, do not allow to sink
the cutting chain into the ground under the trunk. Negligence may
cause immediate damage to the chain.
•
When cutting trunk that is lying on the slope, the operator should
always be at the slope side above the trunk.
CUTTING A TRUNK LIFTED ABOVE THE GROUND
•
In case the log is supported or placed on stable sawing horse,
depending on the place of operation, make the cut 1/3 of the trunk
diameter deep on the side under compressive stress and finish cutting
on the opposite side (
fig. N
).
TRIMMING / CUTTING BUSHES AND TREE BRANCHES
•
Start cutting branches of a felled tree at its base and continue towards
top of the tree. Process small branches with a single cut.
•
First, check which way the branch bends. Then make a preliminary cut
from the inside of the bend and finish cutting on the opposite side. Be
careful, the branch being cut may spring back.
•
When trimming tree branches, always cut downward to enable free
fall of cut branch. However, sometimes undercutting the branch from
the bottom may be helpful (
fig. R
).
•
Be very careful when cutting a branch that may be under stress. Such
branch may spring aside and hit the operator.
• Do not cut branches when climbing up the tree.
• Do not stand on ladder, platforms, logs or positions that may
cause loss of balance and control over the chain saw.
• Do not cut above level of your shoulders.
• Always hold the chain saw with both hands.
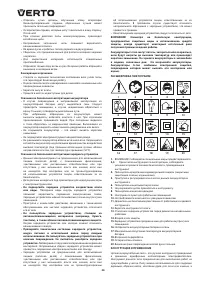
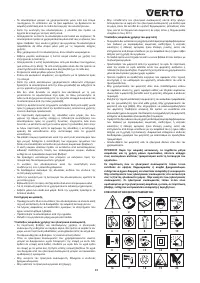
OPERATION AND MAINTENANCE
Remove the battery from the device before commencing any
activities related to installation, adjustment, repair or maintenance.
Exercise caution due to sharp edges in the chain. When the chain
is not used, always protect the guide bar and chain with a shield.
CHAIN SHARPENING
Pay attention to cutting tools. Cutting tools should be sharp and clean,
it allows efficient and safe operation. Sharpening the chain by yourself
requires necessary equipment and skills. It is recommended to entrust
sharpening the chain to specialised workshops.
CHAIN GUIDE BAR
Guide bar is exposed to heavy wear, especially on tip and bottom part.
To prevent side wear due to friction, it is recommended to turn the guide
bar over every time the chain is sharpened.
SPROCKET
Sprocket (
19
) is subject to especially heavy wear. Replace the sprocket
when you observe clear signs of wear of wheel teeth. Worn out sprocket
additionally reduces durability of chain. Sprocket should be replaced by
authorised service workshop.
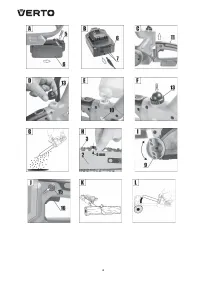
INSTALLATION OF GUIDE BAR AND SAW CHAIN
Chain saw should be disconnected from power supply (battery). To
prevent body injury caused by sharp edges, wear protective gloves
during installation and checking of the chain.
Check proper position of cutting teeth of the chain before
assembling chain and guide bar! (Correct move direction is
indicated with an arrow on the guide bar (fig. S).)
Chain tensioning is possible using the pin (18) and chain tensioning
knob (9). It is very important that the pin (18) located on the
adjustment screw falls into lower hole in the guide bar during
installation of the guide bar. You can move the pin (18) to the front
or back by turning the chain tensioning knob (9). Those parts must
be set appropriately prior to starting guide bar installation in the
saw.
•
Undo the bar shield fixing knob (
4
) and remove the guide bar shield
(
8
) (
fig. T
).
•
Remove the guide bar and chain by taking it off the sprocket (
19
).
•
Hold guide bar (
3
) vertically so its tip points up.
•
Install chain (
2
) starting from the tip of the guide bar (
3
) (
fig. U
).
•
Ensure the pin (
18
) of the chain tension adjustment screw is in the
middle of the lower hole of the guide bar (
3
), adjust when necessary.
•
Put the guide bar (
3
) with the chain (
2
) onto pin (
18
).
•
Put the chain on the sprocket (
19
) (ensure the assembly is done
properly) (
fig. W
).
•
Place the guide bar shield (
8
) in its place and fix with the bar shield
fixing knob (
4
).
•
Tension the chain appropriately with the chain tensioning knob (9).
New chain requires start-up period, which lasts approximately 5
minutes. Chain lubrication is very important in this phase. Check
chain tension after start-up period and readjust if necessary.
Check and adjust the chain tension frequently. Too loose chain can
easily slide off the guide bar, quickly wear out or quickly wear out
the guide bar.
MAINTENANCE AND STORAGE
•
Do not use any cleaning agents or solvents, they may damage plastic
parts.
•
Be careful to avoid ingress of water into the device.
•
Always remember to keep the ventilation holes of the tool body
unobstructed.
•
You can proceed with maintenance actions only as described within
this instruction manual. Any other action can be carried out only by
authorized service.
•
Do not make any changes in the chain saw design.
•
When not in use, the chain saw should be stored clean, on a flat
surface, in a dry place and beyond reach of children.
All defects should be repaired by service workshop authorized by the
manufacturer.
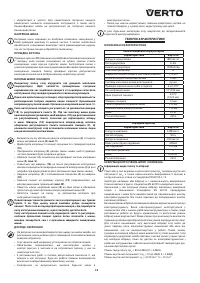
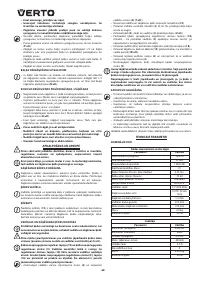
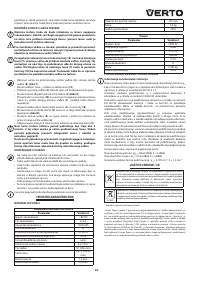
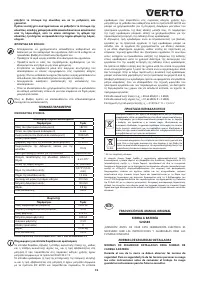
TECHNICAL PARAMETERS
RATED PARAMETERS
Cordless Chain Saw
Parameter
Value
Battery voltage
18V DC
Battery type
Li-Ion
Battery capacity
1300mAh
Protection class
III
Chain linear speed (no load)
3,73 m/s
Chain oil tank capacity
70 ml
System for chain oil feed
manual
Sprocket (teeth x pitch)
6 x 0,375’’
Type of guide bar
12’’ (300 mm)
Chain pitch
0,375’’ (9,525 mm)
Chain thickness
1,3 mm
Guide bar working length
210 mm
Maximum cutting diameter
130 mm
Weight 2,9
kg
Year of production
2016
Charger
Parametr
Value
Supply voltage
230V AC
Power supply frequency
50Hz
Charging voltage
21V DC
Max. charging current
400mA
Battery charging time
3-5 h
Protection class
II
Weight
0,295 kg
Year of production
2016
NOISE LEVEL AND VIBRATION PARAMETERS
Noise and vibration information
Parameters of produced noise level, such as sound pressure level Lp
A
and
sound power level Lw
A
with measurement uncertainty K are specified
below in this manual, in accordance with EN 60745-2-13.
Vibration values a
h
and measurement uncertainty K are determined in
accordance with EN 60745 and specified below.
Vibration level specified in this manual was measured in accordance
with measurement procedure defined in EN 60745 and can be used
to compare power tools. It can also be used for initial assessment of
exposure to vibrations.

