Духовые шкафы Korting OKB 9113 CFX - инструкция пользователя по применению, эксплуатации и установке на русском языке. Мы надеемся, она поможет вам решить возникшие у вас вопросы при эксплуатации техники.
Если остались вопросы, задайте их в комментариях после инструкции.
"Загружаем инструкцию", означает, что нужно подождать пока файл загрузится и можно будет его читать онлайн. Некоторые инструкции очень большие и время их появления зависит от вашей скорости интернета.

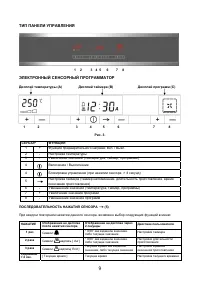

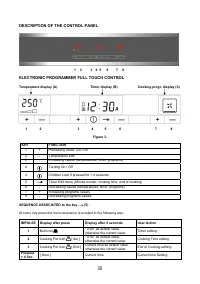

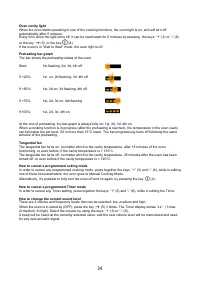

Temperature display (A)
It shows the temperature setting, and provides some icons and a temperature bar-graph indication.
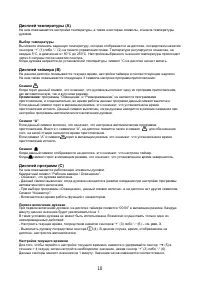
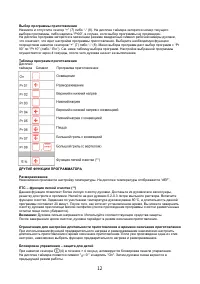
Cooking temperature selection
The temperature shown on the display can be changed using the keys “+” (1) or “-“ (2) on the left of the
control panel, with variations of 5°C, from a minimum of 50°C up to a maximum of 250°C. The value is
accepted and becomes operative 4 seconds after the last keyboard action.
The °C symbol flashes upon reaching the desired temperature.
Timer display (B)
The Timer display shows Current Time, Timer Settings, and Messages.
It shows also 3 icons representing the Timer settings:
Cooking pot icon
When the symbol is on, it means that a cooking function is operating, for manual cooking mode as well.
Note:
the cooking functions “Light” and “Defrost” are not considered to be cooking functions, therefore the
icon is off in these modes.
If the symbol is flashing, it means that the pre-set cooking time is finished. The symbol is off in delayed
cooking mode.
“AUTO” icon – “A”
If it is on, it indicates that an automatic cooking mode is selected.
Along with the “A” symbol the symbol
will appear on the display, to indicate the status of the cooking time.
When the “A” symbol is flashing together with the symbol
, it means that the pre-set cooking time is
finished.
Bell icon
If it is on, it indicates that the timer mode has been selected.
If the symbol is flashing, it means that the selected time has finished.
Cooking Program display (C)
It indicates the active elements of the oven.
The “Oven Cavity / Light” square symbol:
- Represents the oven actively turned on.
- It is off while in delayed cooking mode, to represent the “wait for a start” condition.
- In the light position it is always on, since there are no other indications.
The “Fan” Symbol:
- For Fan assisted cooking functions, it appears as a “turning fan”.
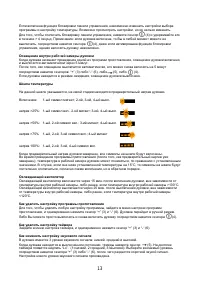
The first switch on
When the oven is switched on for the first time, the timer display shows “00:00” flashing, that will increase by
1 each minute.
The oven cannot be used in this condition.
The only two operations allowed are:
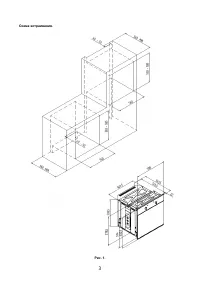
- Time setting, by means of the keys “+” (3) or “-“ (6) - see
figure 3
.
- Oven turn-on by means of [On/Off] key
(4). In such case, the time currently shown on the display is
accepted automatically.
Time setting
To enter in time setting, press and keep pressed the key
(5) for > 4 seconds, then select the value by
means of the keys “+” (3) or “-“ (6) .
The two keys operate on 1 minute basis, so that the hours are modified as a consequence.
Turning On / Off
To turn on the oven, press and release the key
(4) . The Clock display shows “On “ and after 2 seconds
it goes into Program_00 (LIGHT): the oven light and the Cooking Program Display are turned on.
To turn off the oven, press and release the key
(4). The Clock display shows “Off “ and after 2 seconds it
goes into Off mode.
31


