
Вытяжки Falmec Plane (A+) 90 - инструкция пользователя по применению, эксплуатации и установке на русском языке. Мы надеемся, она поможет вам решить возникшие у вас вопросы при эксплуатации техники.
Если остались вопросы, задайте их в комментариях после инструкции.
"Загружаем инструкцию", означает, что нужно подождать пока файл загрузится и можно будет его читать онлайн. Некоторые инструкции очень большие и время их появления зависит от вашей скорости интернета.


ENGLISH
23
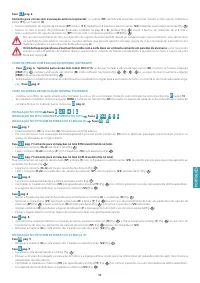
OPERATION
WHEN SHOULD THE HOOD BE SWITCHED ON AND OFF?
Switch on the hood at least one minute before starting to cook: this enhances the airflow to convey fumes and vapours towards the suction surface.
After cooking, leave the hood operating until complete extraction of all vapours and odours. If required, for versions with electronic push button
control panel, by means of the Timer function, it is possible to set hood auto switch-off after 15 minutes of operation.
WHICH SPEED IS TO BE SELECTED?
The
first
speed is a low consumption energy-saving way of keeping the air clean, the
second
speed is used in normal conditions, and the
third
speed is used when there are strong odours and vapours.
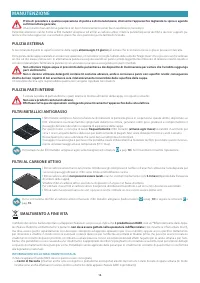
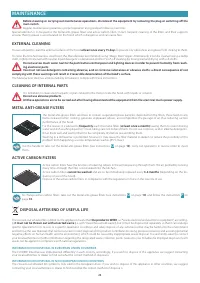
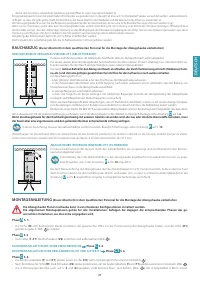
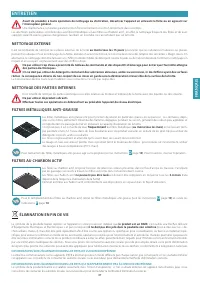
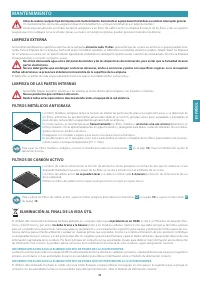
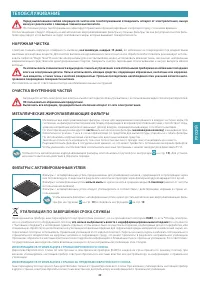
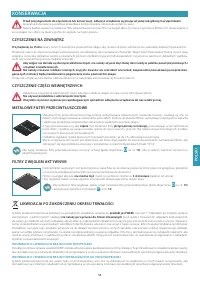
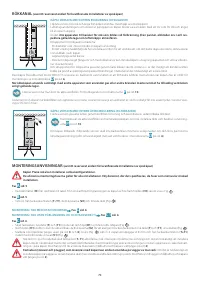
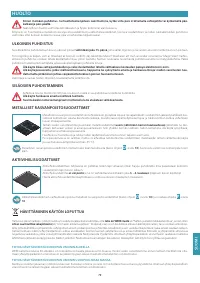
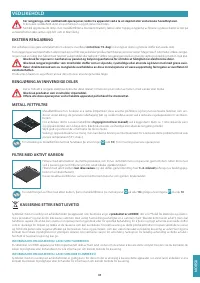
WHEN SHOULD THE FILTERS BE WASHED OR REPLACED?
The hood is assembled with two different types of filters: metal ones (washable) and active carbon ones (non-washable). The former must be cleaned eve-
ry 30 hours of use (for versions with electronic push button control panel, the fixed red light
indicates that they need to be washed), the latter are to be
replaced every 3-4 months, depending on the use of the hood. For further information, please read the chapter regarding "
Maintenance"
on page
24
.
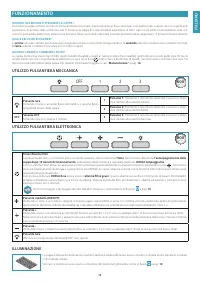
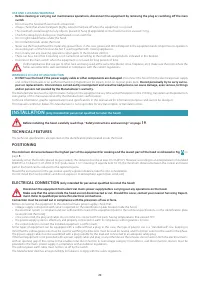
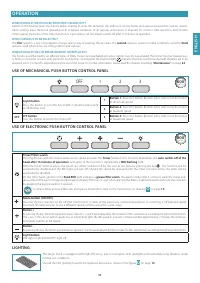
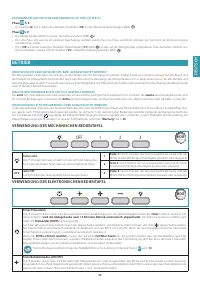
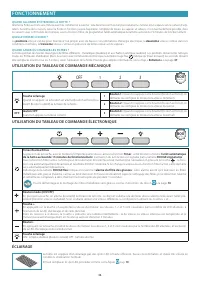
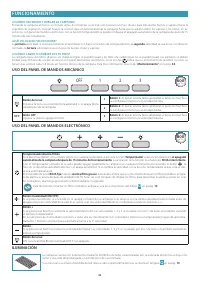
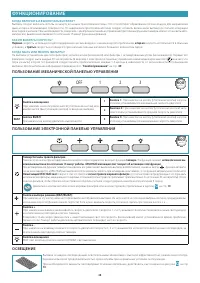
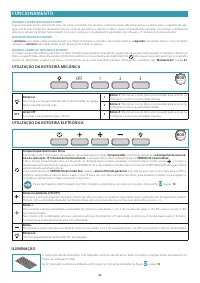
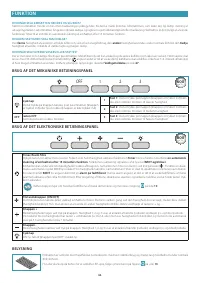
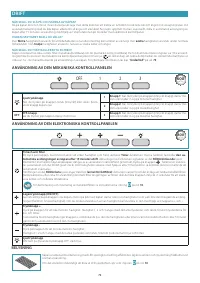
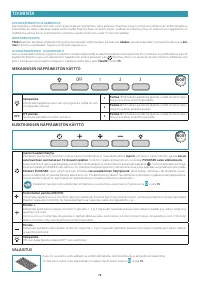
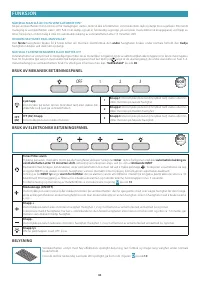
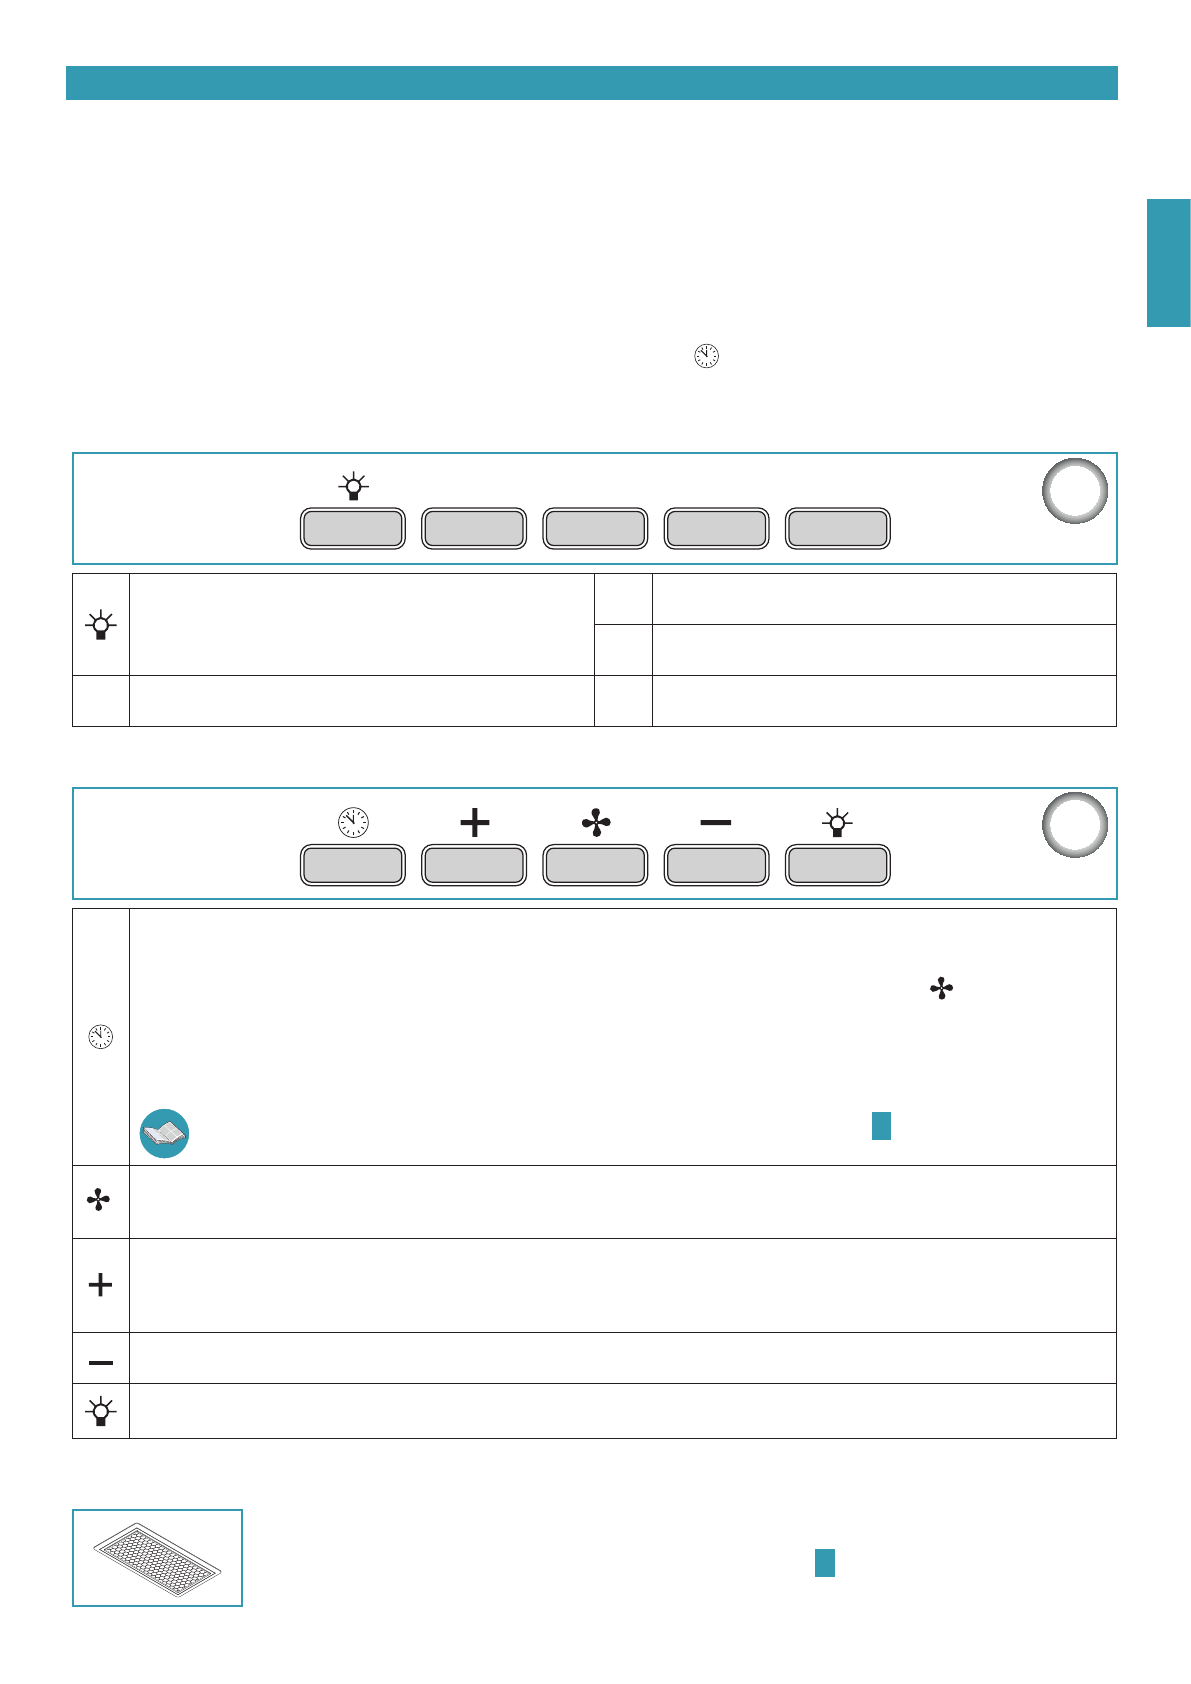
USE OF MECHANICAL PUSH BUT TON CONTROL PANEL
OFF
1
2
3
Light button
Press this button to turn the hood light on (button pressed in)
or off (button out)
1
Button 1:
Press this button (button in) to start or set the motor
at minimum speed
2
Button 2:
Press this button (button in) to start or set the motor
at medium speed
OFF
OFF button
Press this button to switch the motor off
3
Button 3:
Press this button (button in) to start or set the motor
at maximum speed
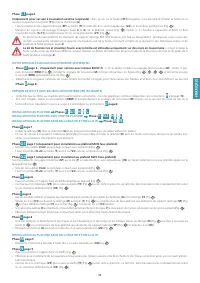
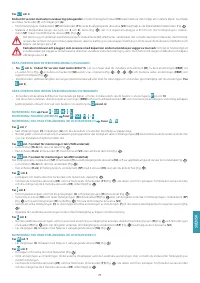
USE OF ELECTRONIC PUSH BUT TON CONTROL PANEL
Timer/Filters alarm
Pressing the key with the motor active at any speed activates the
Timer
function: this function determines the
auto switch-off of the
hood after 15 minutes of operation
. Activation of the function is signalled by a
RED flashing
light.
With the Timer function active, the hood can still be switched off by the user at any time by pressing the key
: the function will be
automatically disabled and the RED light will turn off. Should the speed be changed with the Timer function active, the latter will be
automatically disabled.
On the other hand, ignition of the
fixed RED
light indicates a
grease filter alarm
: this alarm notifies that it is time to wash the metal anti-
grease filters (the alarm is triggered after approximately 30 hours of use). After cleaning the filters, disable the alarm and reset the counters
by keeping the key pressed for 3 seconds.
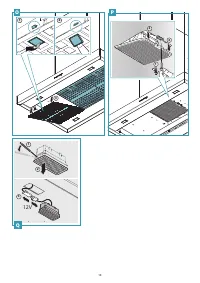
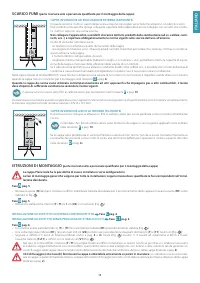
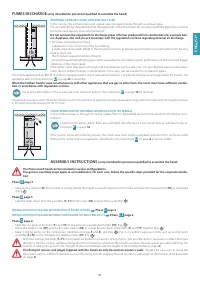
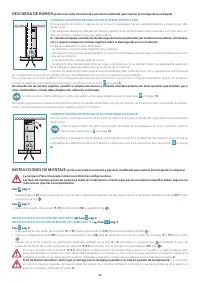
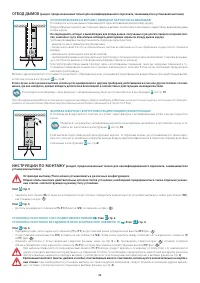
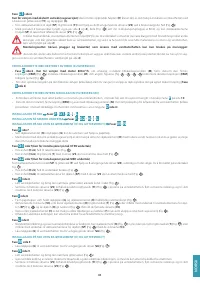
To disassemble and assemble the anti-grease metal filters, refer to the instructions on drawing
O
on page
10
.
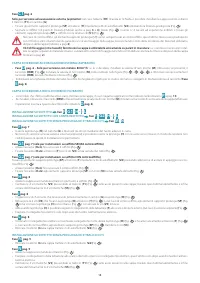
Mode button (ON/OFF)
Pressing the key switches on (or off ) the hood motor: it starts at the previously selected speed prior to switching it off (desired speed
function). Should you wish to use a different speed, set if by using the + and - keys.
Button +
By pressing the key, the motor speed increases. Speeds 1, 2 and 3 are displayed by the number of LEDs switched on, excluding the light and timer LEDs.
The + key in the version with 4 speeds has an intermittent light: the 4th speed or intensity is timed and after approximately 7 minutes the motor au-
tomatically switches to 3rd speed.
Button -
By pressing the key, the motor speed reduces. Speeds 1, 2 and 3 are displayed by the number of LEDs switched on, excluding the light and timer LEDs.
Light button
ON: light on (lit button)OFF: light off
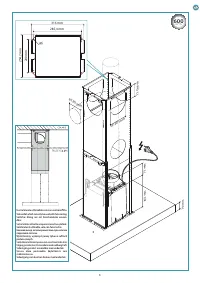
600
m
3
/h
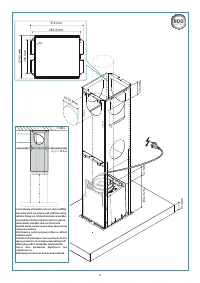
800
m
3
/h
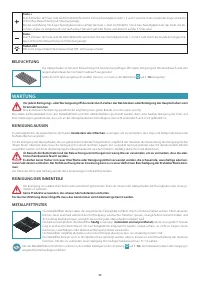
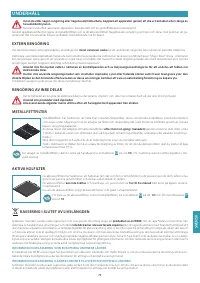
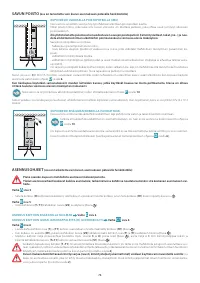
LIGHTING
The range hood is equipped with high efficiency, low consumption LED spotlights with extremely long duration under
normal use conditions.
Should the LED spotlight need to be replaced, proceed as shown in the figure
Q
on page
10
.
Содержание
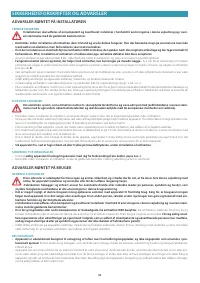
- 44 ТЕХНИКА БЕЗОПАСНОСТИ И МЕРЫ ПРЕДОСТОРОЖНОСТИ; МЕРЫ ПРЕДОСТОРОЖНОСТИ ДЛЯ УСТАНОВЩИКА; МЕРЫ ПРЕДОСТОРОЖНОСТИ ДЛЯ ПОЛЬЗОВАТЕЛЯ
- 45 СИЙ; УСТАНОВКА; ТЕХНИЧЕСКИЕ ХАРАКТЕРИСТИКИ; ПОДК ЛЮЧЕНИЕ К СЕТИ ЭЛЕКТРОПИТАНИЯ
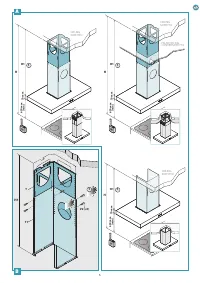
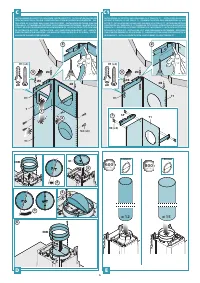
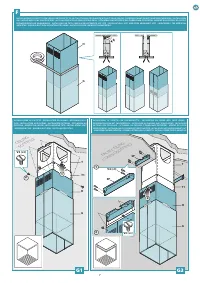
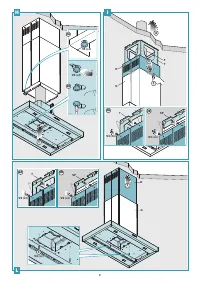
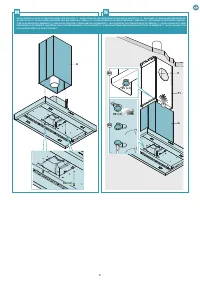
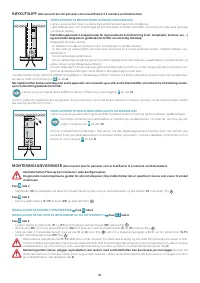
- 46 ОТВОД ДЫМОВ; ИНСТРУКЦИИ ПО МОНТАЖУ
- 48 ФУНКЦИОНИРОВАНИЕ; ПОЛЬЗОВАНИЕ МЕХАНИЧЕСКОЙ ПАНЕЛЬЮ УПРАВЛЕНИЯ; ПОЛЬЗОВАНИЕ ЭЛЕКТРОННОЙ ПАНЕЛЬЮ УПРАВЛЕНИЯ
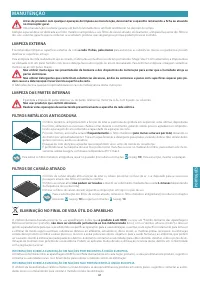
- 49 ТЕХОБС ЛУЖИВАНИЕ; НАРУЖНАЯ ЧИСТКА; ОЧИСТКА ВНУ ТРЕННИХ ЧАСТЕЙ; ФИЛЬТРЫ С АКТИВИРОВАННЫМ УГЛЕМ; У ТИЛИЗАЦИЯ ПО ЗАВЕРШЕНИИ СРОКА С ЛУЖБЫ
Характеристики

Остались вопросы?Не нашли свой ответ в руководстве или возникли другие проблемы? Задайте свой вопрос в форме ниже с подробным описанием вашей ситуации, чтобы другие люди и специалисты смогли дать на него ответ. Если вы знаете как решить проблему другого человека, пожалуйста, подскажите ему :)


