
Вытяжки Faber ECLIPSE EV8 LED X A37 - инструкция пользователя по применению, эксплуатации и установке на русском языке. Мы надеемся, она поможет вам решить возникшие у вас вопросы при эксплуатации техники.
Если остались вопросы, задайте их в комментариях после инструкции.
"Загружаем инструкцию", означает, что нужно подождать пока файл загрузится и можно будет его читать онлайн. Некоторые инструкции очень большие и время их появления зависит от вашей скорости интернета.


EN
9
9
1
1
2
2
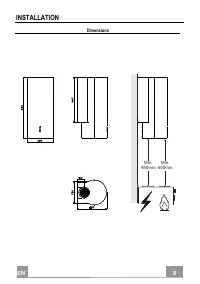
533
116
1÷2
116
650 min.
11
12a
590
300
290
12a
Vr
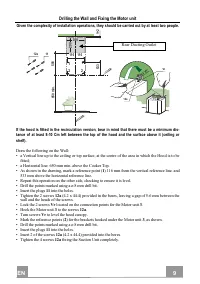
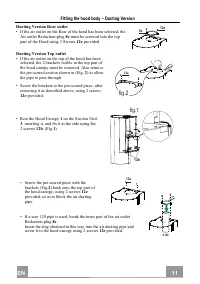
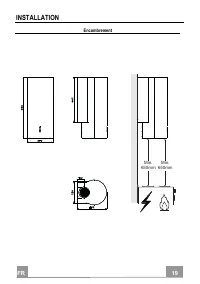
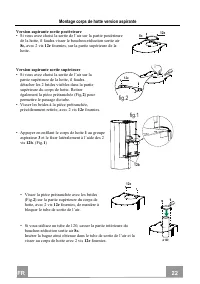
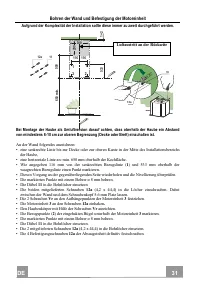
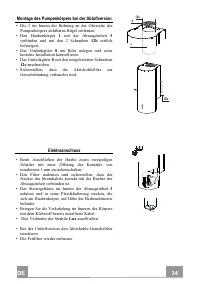
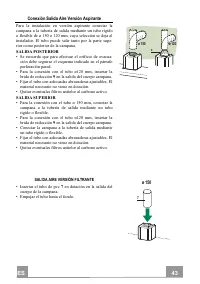
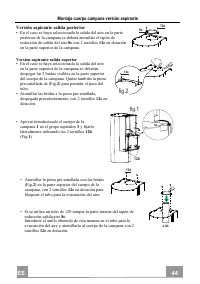
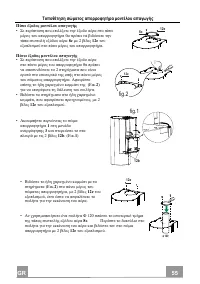
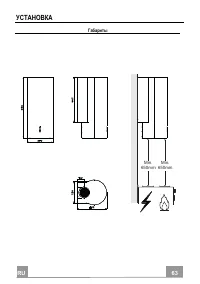
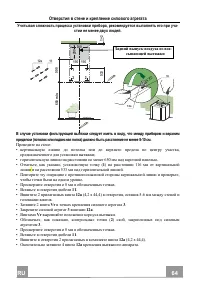
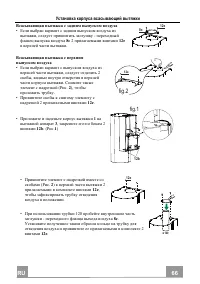
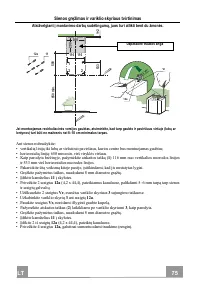
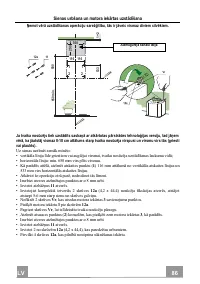
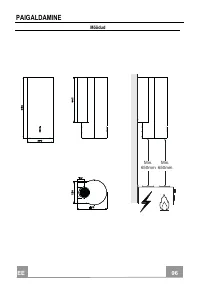
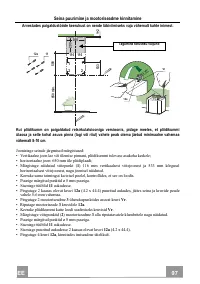
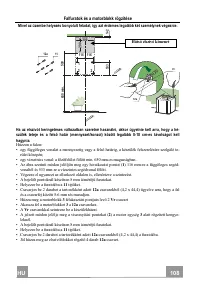
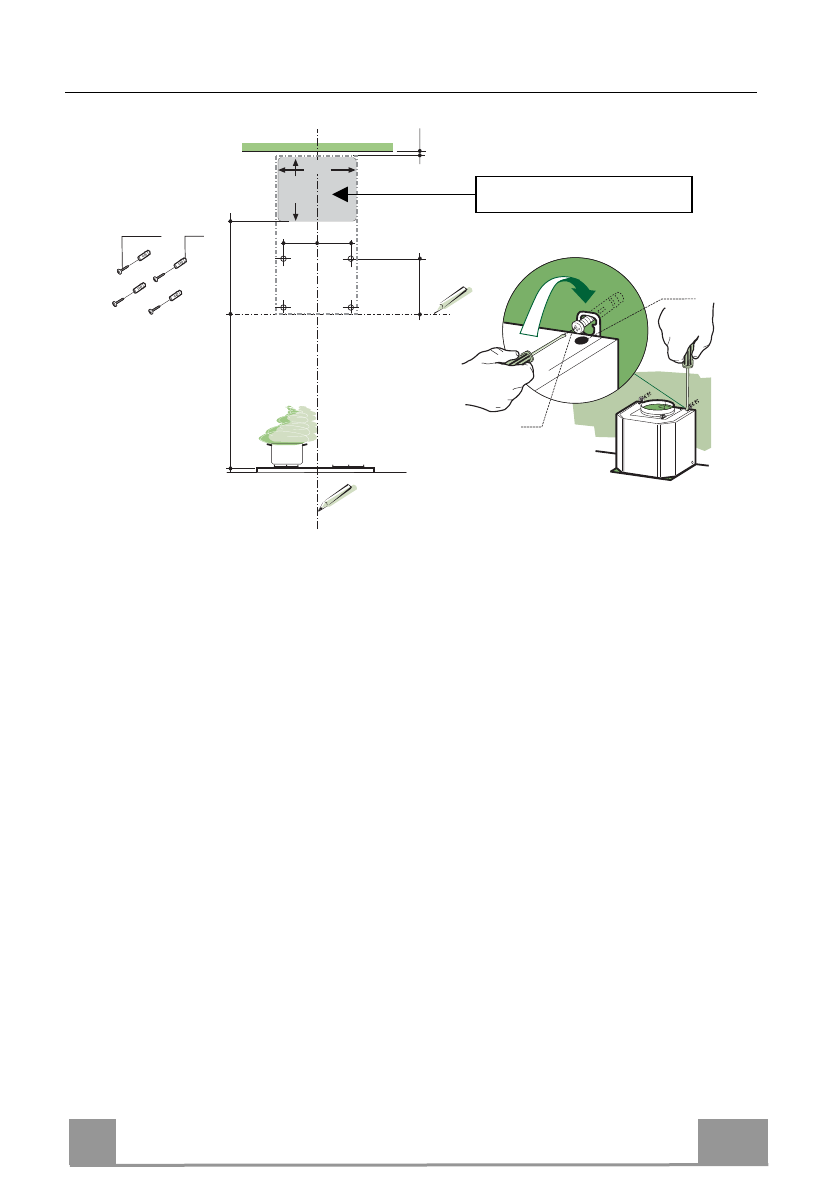
Drilling the Wall and Fixing the Motor unit
Given the complexity of installation operations, they should be carried out by at least two people.
If the hood is fitted in the recirculation version, bear in mind that there must be a minimum dis-
tance of at least 8-10 Cm left between the top of the hood and the surface above it (ceiling or
shelf).
Draw the following on the Wall:
• a Vertical line up to the ceiling or top surface, at the centre of the area in which the Hood is to be
fitted;
• a Horizontal line: 650 mm min. above the Cooker Top.
• As shown in the drawing, mark a reference point (
1
) 116 mm from the vertical reference line, and
533 mm above the horizontal reference line.
• Repeat this operation on the other side, checking to ensure it is level.
• Drill the points marked using a ø 8 mm drill bit.
• Insert the plugs
11
into the holes.
• Tighten the 2 screws
12a
(4.2 x 44.4) provided in the bores, leaving a gap of 5-6 mm between the
wall and the heads of the screws.
• Lock the 2 screws
Vr
located on the connection points for the Motor unit
3
.
• Hook the Motor unit
3
to the screws
12a
.
• Turn screws
Vr
to level the hood canopy.
• Mark the reference points (
2
) for the brackets hooked under the Motor unit
3
, as shown.
• Drill the points marked using a ø 8 mm drill bit.
• Insert the plugs
11
into the holes.
• Insert 2 of the screws
12a
(4.2 x 44.4) provided into the bores.
• Tighten the 4 screws
12a
fixing the Suction Unit completely.
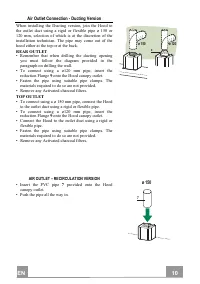
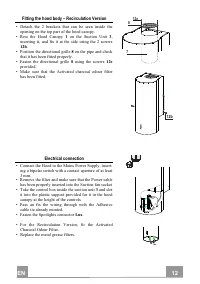
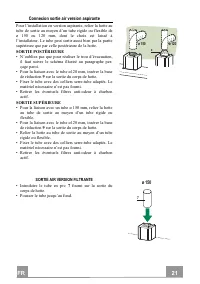
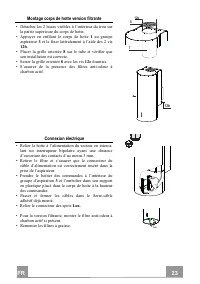
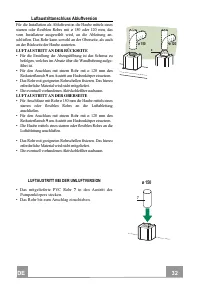
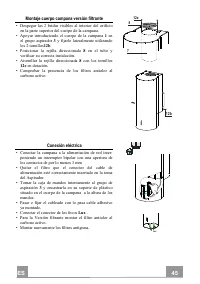
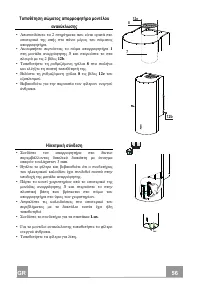
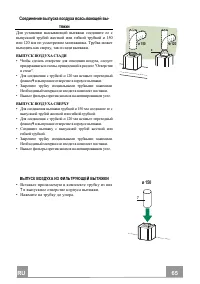
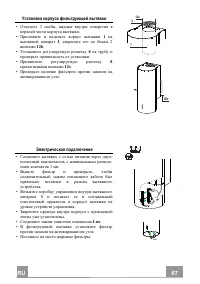
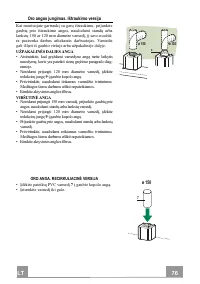
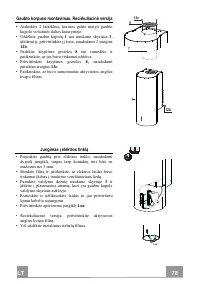
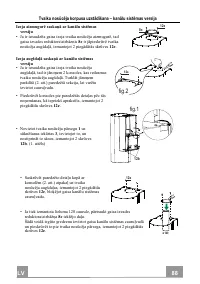
Rear Ducting Outlet
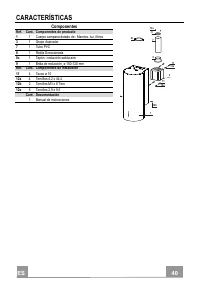
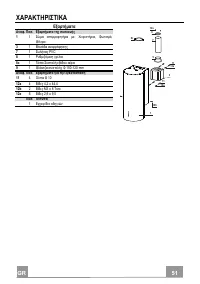
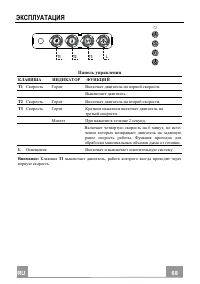
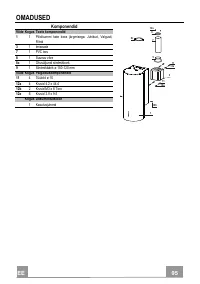
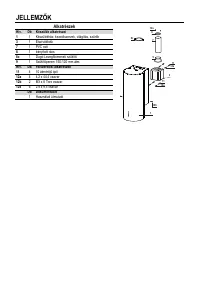
Характеристики

Остались вопросы?Не нашли свой ответ в руководстве или возникли другие проблемы? Задайте свой вопрос в форме ниже с подробным описанием вашей ситуации, чтобы другие люди и специалисты смогли дать на него ответ. Если вы знаете как решить проблему другого человека, пожалуйста, подскажите ему :)


