
Винные шкафы Liebherr WTI 2050 - инструкция пользователя по применению, эксплуатации и установке на русском языке. Мы надеемся, она поможет вам решить возникшие у вас вопросы при эксплуатации техники.
Если остались вопросы, задайте их в комментариях после инструкции.
"Загружаем инструкцию", означает, что нужно подождать пока файл загрузится и можно будет его читать онлайн. Некоторые инструкции очень большие и время их появления зависит от вашей скорости интернета.


3 Controls and displays
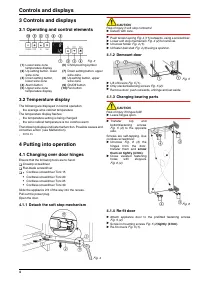
3.1 Operating and control elements
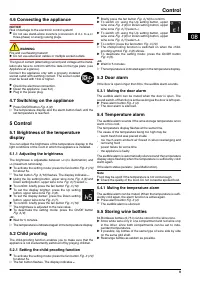
Fig. 3
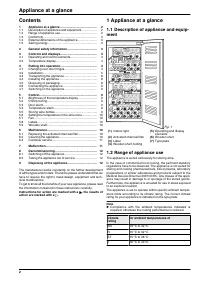
(1) Lower wine zone
temperature display
(6) Child-proofing symbol
(2) Up setting button, lower
wine zone
(7) Down setting button, upper
wine zone
(3) Down setting button,
lower wine zone
(8) Up setting button, upper
wine zone
(4) Alarm button
(9) On/Off button
(5) Upper wine zone
temperature display
(10) Fan button
3.2 Temperature display
The following are displayed in normal operation:
-
the average wine cabinet temperature
The temperature display flashes:
-
the temperature setting is being changed
-
the wine cabinet temperature is too cold/too warm
The following displays indicate malfunction. Possible causes and
corrective action (see Malfunction).
-
F0
to
F5
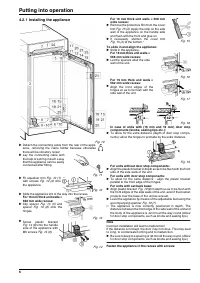
4 Putting into operation
4.1 Changing over door hinges
Ensure that the following tools are to hand:
q
Crosstip screwdriver
q
Flat-blade screwdriver
q
•
Cordless screwdriver Torx 15
•
Cordless screwdriver Torx 20
•
Cordless screwdriver Torx 25
•
Cordless screwdriver Torx 30
Slide the appliance 2/3 of the way into the recess.
Pull out the power plug.
Open the door.
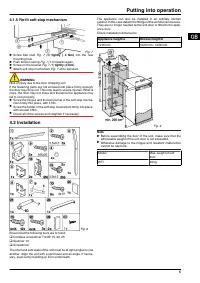
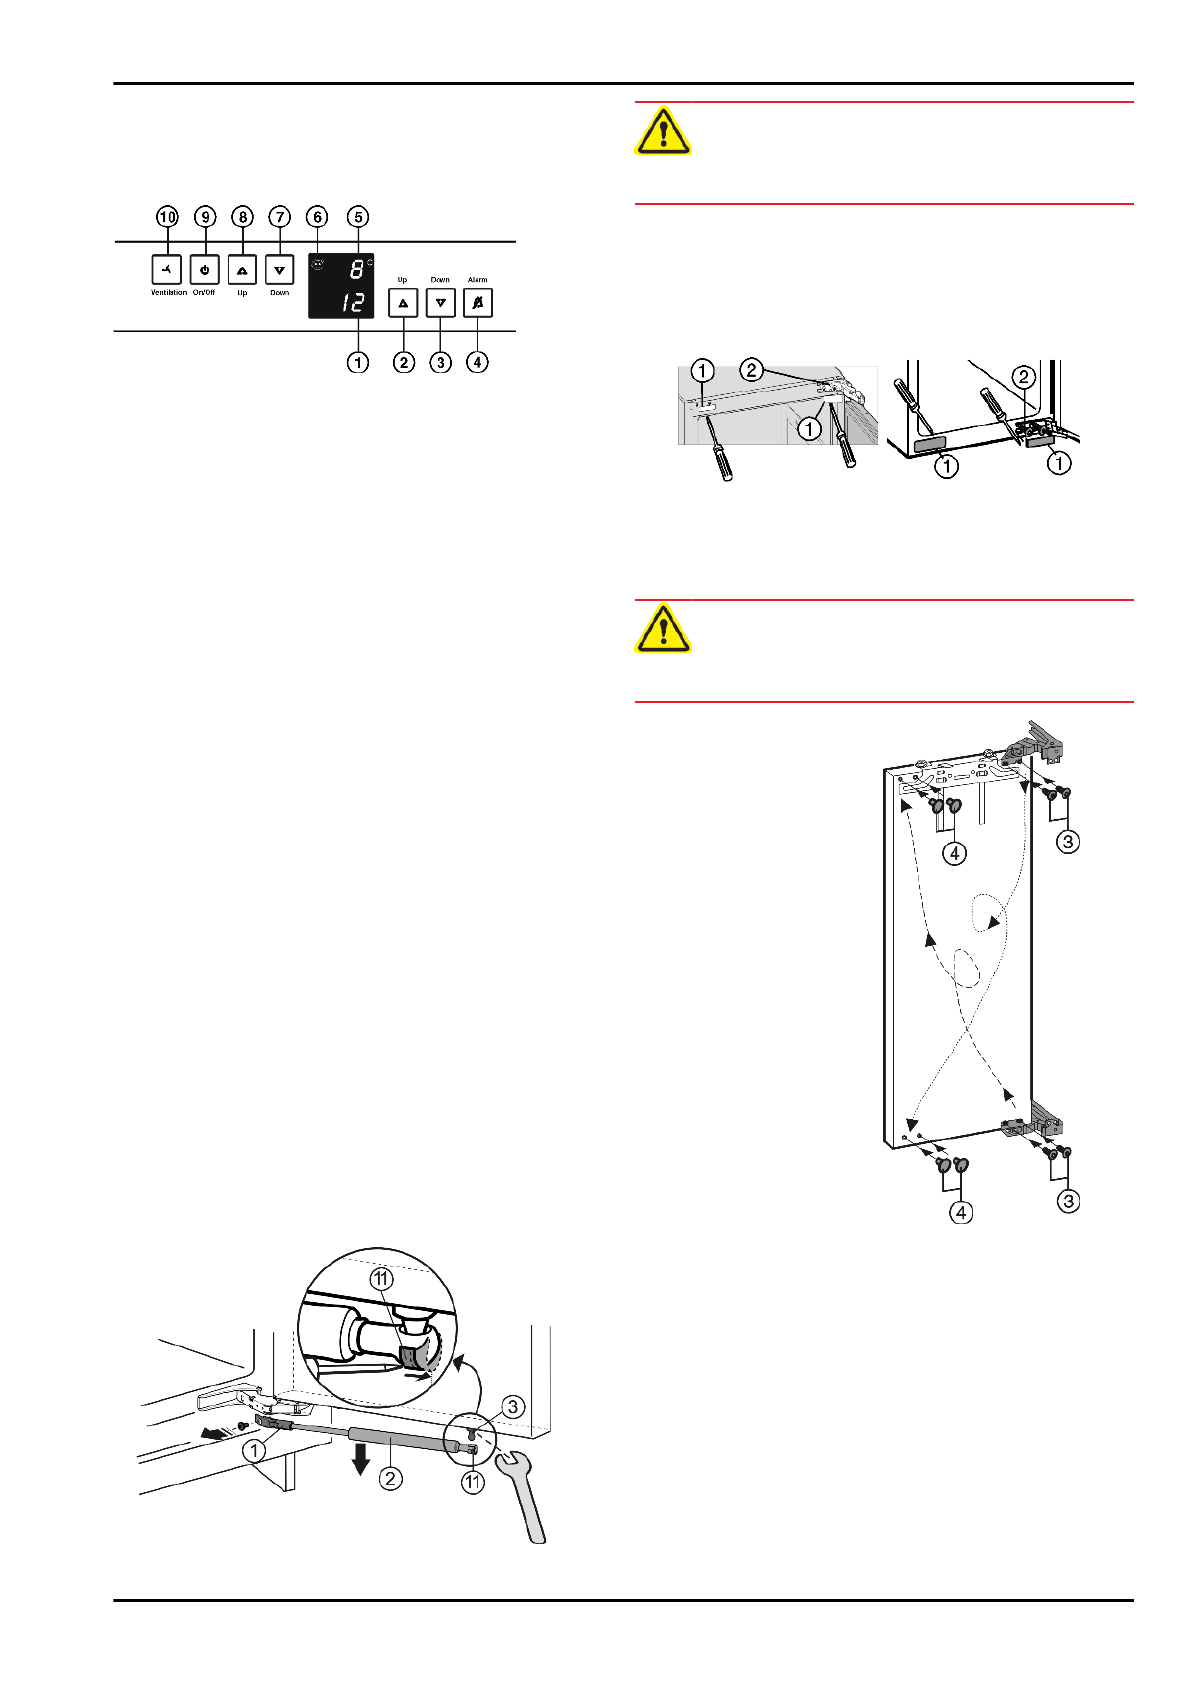
4.1.1 Detach the soft stop mechanism
Fig. 4
CAUTION
Risk of injury if soft stop contracts!
u
Detach with care.
u
Push tension spring
Fig. 4 (11) outwards, using a screwdriver.
u
Lower soft stop mechanism
Fig. 4 (2) for removal.
u
Unscrew holder
Fig. 4 (1).
u
Unfasten ball stud
Fig. 4 (3) using a spanner.
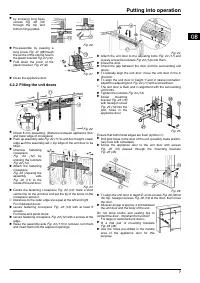
4.1.2 Demount door
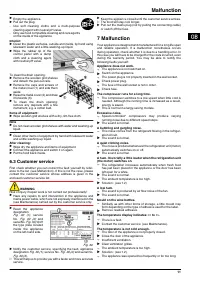
Fig. 5
u
Lift offcovers
Fig. 5 (1).
u
Only slackenfastening screws
Fig. 5 (2).
u
Remove door: push outwards, unhinge and set aside.
4.1.3 Changing bearing parts
CAUTION
Risk of injury if hinges fold!
u
Leave hinges open.
u
Transfer
top
and
bottomfastening
screws
Fig. 5 (2) to the opposite
side.
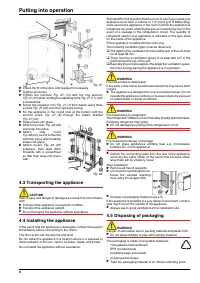
Screws are self-tapping. Use
cordless screwdriver:
u
Unscrew
Fig. 6 (3) the
hinges from the door,
transfer them and screw
them on tightly (4 Nm).
u
Close vacated fastening
holes
with
stoppers
Fig. 6 (4).
Fig. 6
4.1.4 Re-fit door
u
Attach appliance door to the prefitted fastening screws
Fig. 5 (2).
u
Screw in mounting screws
Fig. 5 (2)tightly (4 Nm).
u
Re-fit covers
Fig. 5 (1).
Controls and displays
4
Характеристики

Остались вопросы?Не нашли свой ответ в руководстве или возникли другие проблемы? Задайте свой вопрос в форме ниже с подробным описанием вашей ситуации, чтобы другие люди и специалисты смогли дать на него ответ. Если вы знаете как решить проблему другого человека, пожалуйста, подскажите ему :)


