
Варочная панель Kuppersberg FA6VS01 - инструкция пользователя по применению, эксплуатации и установке на русском языке. Мы надеемся, она поможет вам решить возникшие у вас вопросы при эксплуатации техники.
Если остались вопросы, задайте их в комментариях после инструкции.
"Загружаем инструкцию", означает, что нужно подождать пока файл загрузится и можно будет его читать онлайн. Некоторые инструкции очень большие и время их появления зависит от вашей скорости интернета.


9
English
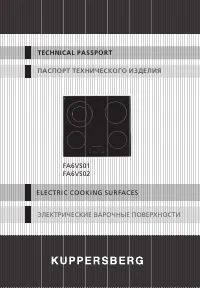
TEchnical passporT
Electric hob
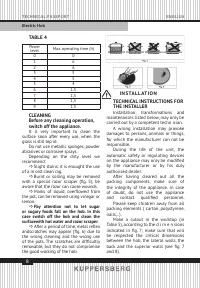
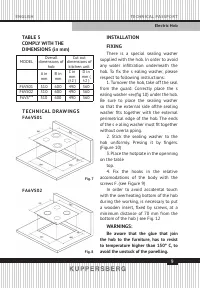
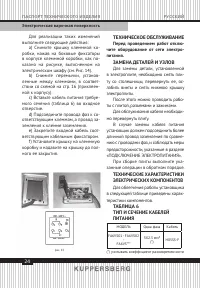
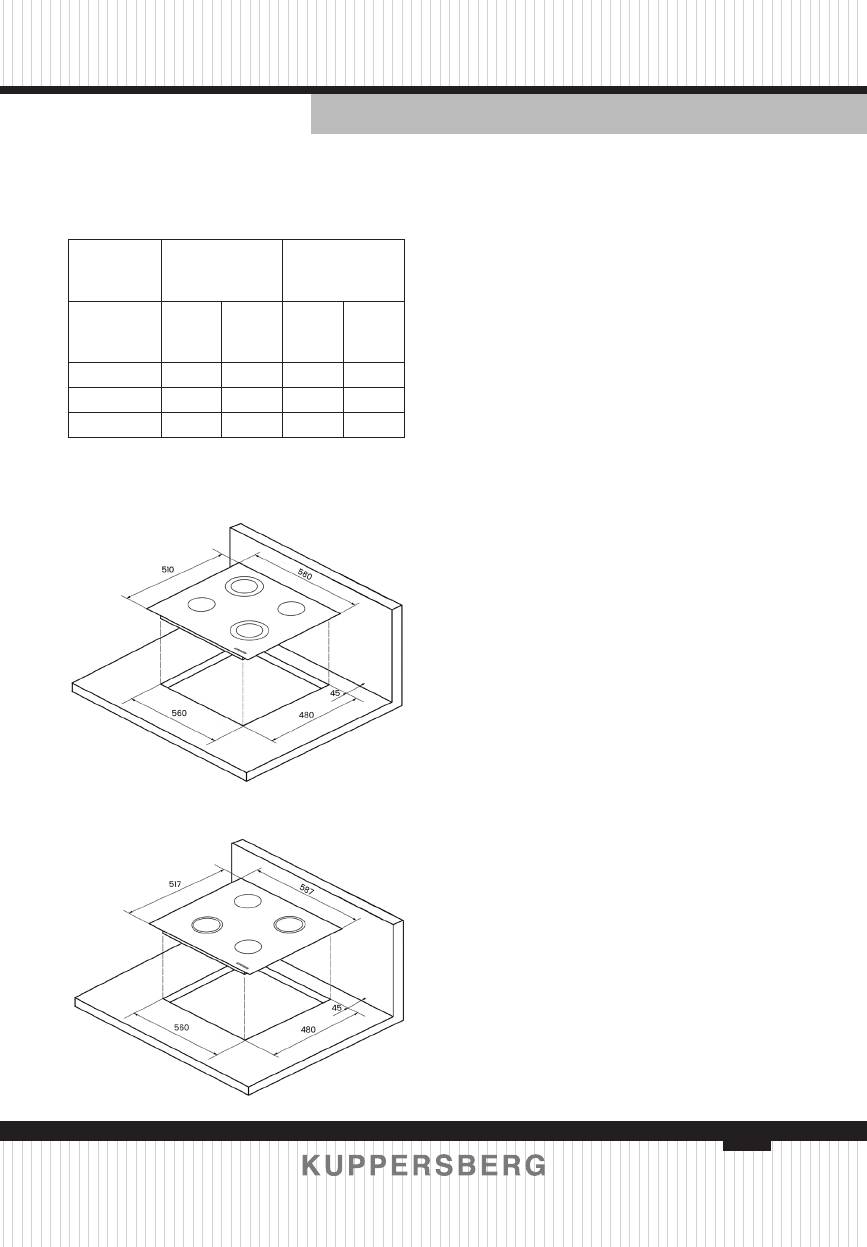
TABLE 5
COMPLY WITH THE
DIMENSIONS (in mm)
MODEL
Overall
dimensions of
hob
Cut out
dimensions of
kitchen unit
A in
mm
B in
mm
С in
mm
(±2 )
D in
mm (
±2 )
F6VS01
510
600
490
560
F6VS02
510
600
490
560
F6VS***
510
600
490
560
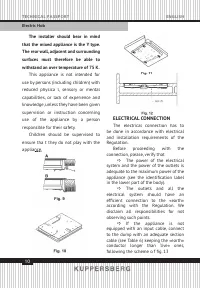
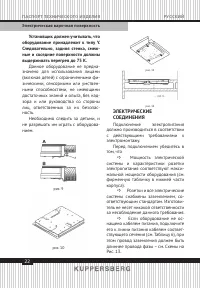
INSTALLATION
FIXING
There is a special sealing washer
supplied with the hob. In order to avoid
any water infiltration underneath the
hob. To fix the s ealing washer, please
respect to following instructions:
1. Turnover the hob, take off the seal
from the guard. Correctly place the s
ealing washer «e»(fig 10) under the hob.
Be sure to place the sealing washer
so that the external side ofthe sealing
washer fits together with the external
perimetrical edge of the hob. The ends
of the s e aling washer must fit together
without overla pping.
2. Stick the sealing washer to the
hob uniformly. Presing it by fingers.
(Figure 10)
3. Place the hotplate in the openning
on the table
top.
4. Fix the hooks in the relative
accomodations of the body with the
screws F. (see Figure 9)
In order to avoid accidental touch
with the overheating bottom of the hob
during the working, is necessary to put
a wooden insert, fixed by screws, at a
minimum distance of 70 mm from the
bottom of the hob ( see Fig. 12
WARNINGS:
Be aware that the glue that join
the hob to the furniture, has to resist
to temperature higher than 150° C, to
avoid the unstuck of the panelling.
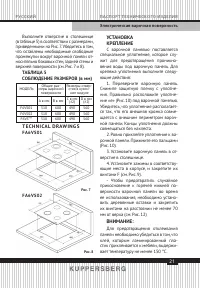
T E C H N I CA L D RAW I N G S
Fig. 7
Fig. 8
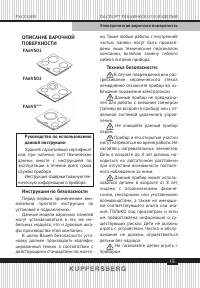
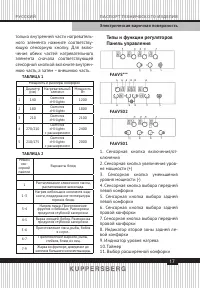
F A6V S01
F A6V S02


