
Варочная панель Gorenje GTW6INI - инструкция пользователя по применению, эксплуатации и установке на русском языке. Мы надеемся, она поможет вам решить возникшие у вас вопросы при эксплуатации техники.
Если остались вопросы, задайте их в комментариях после инструкции.
"Загружаем инструкцию", означает, что нужно подождать пока файл загрузится и можно будет его читать онлайн. Некоторые инструкции очень большие и время их появления зависит от вашей скорости интернета.


5
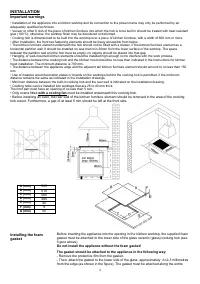
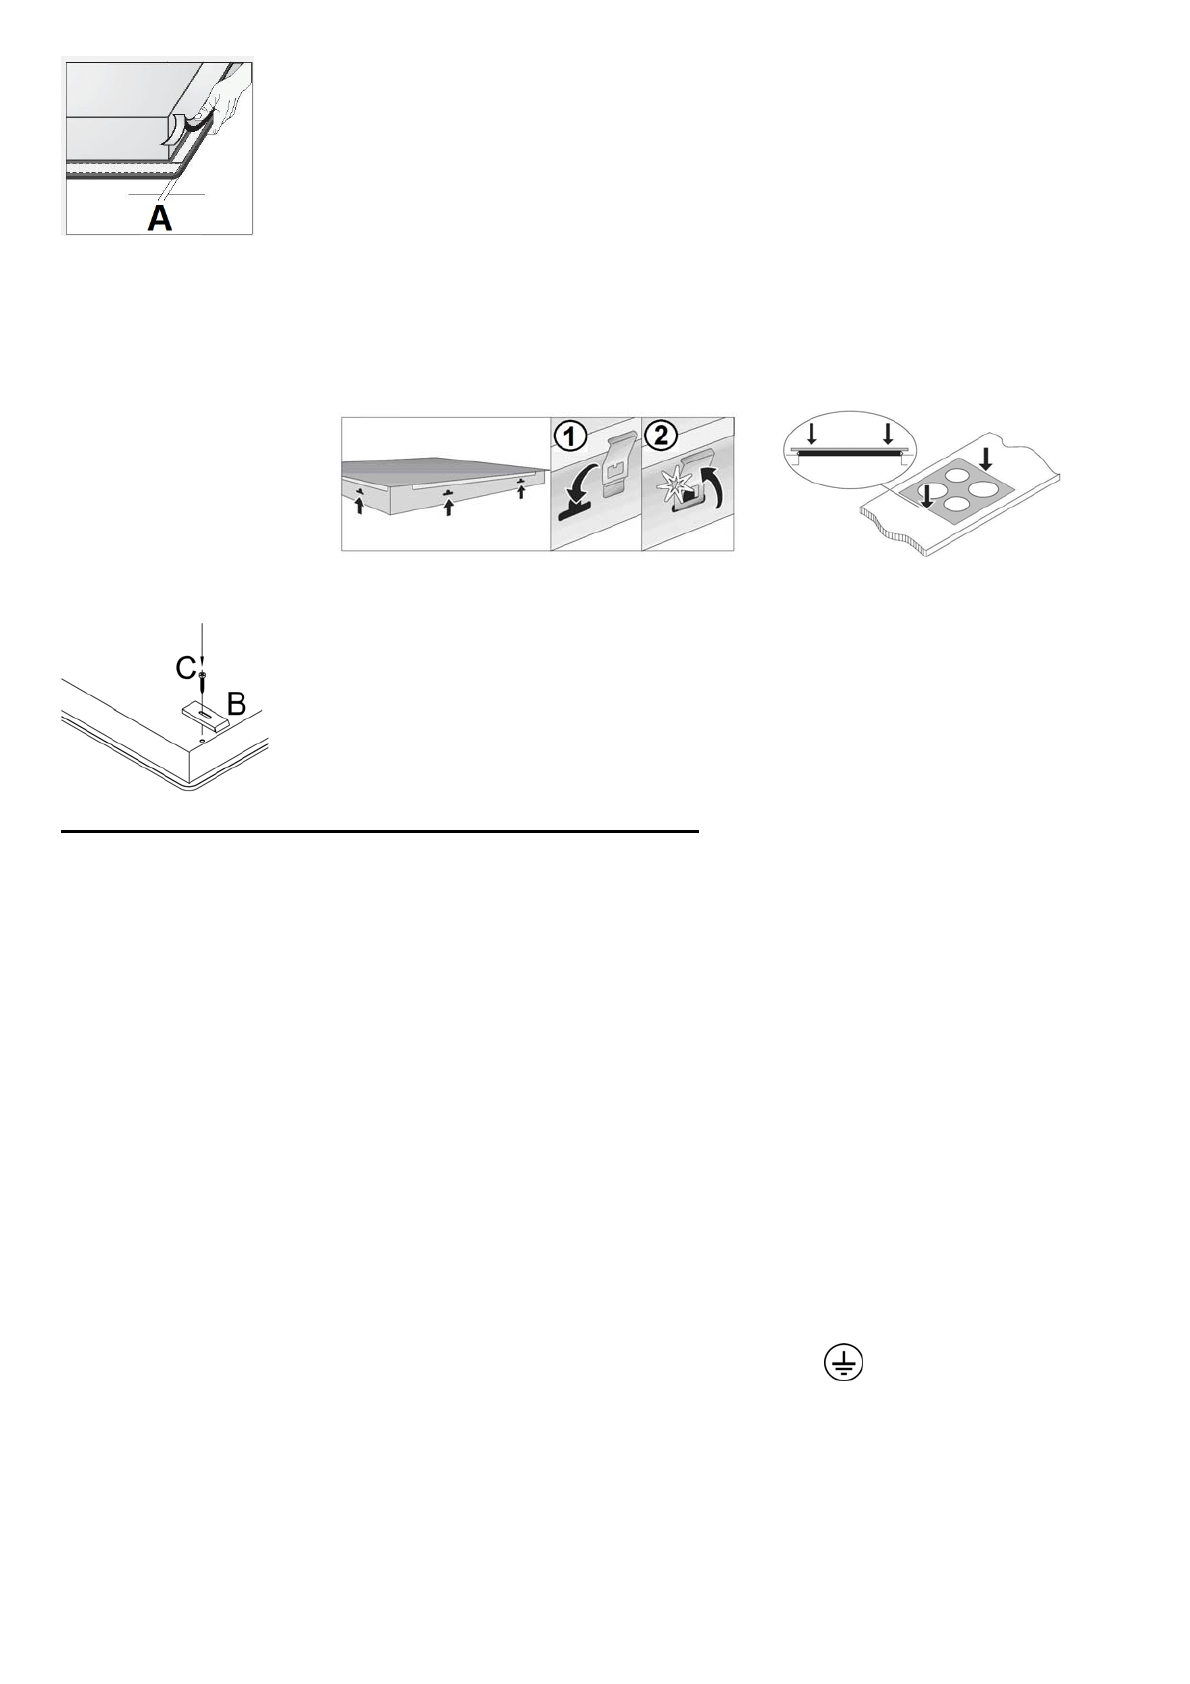
length of the glass edge and should not overlap at the corners.
- When installing the gasket, make sure that the glass does not come into contact with
any sharp objects.
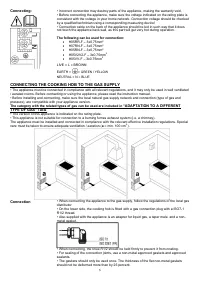
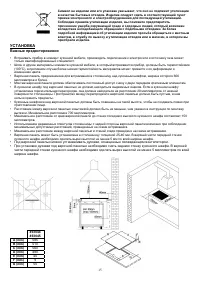
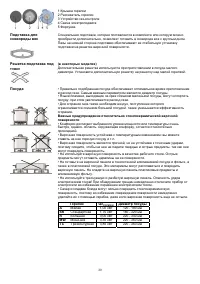
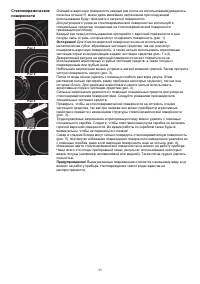
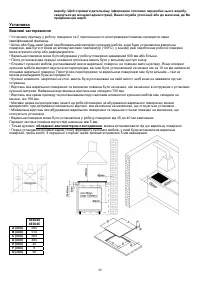
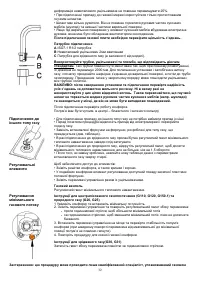
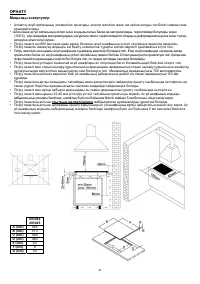
Installation procedure
(with springs)
• Worktop must be placed absolutely horizontal.
• Suitably protect the edges of the cut aperture.
• Connect the cooking hob to the mains power supply (see instructions for the connection
of the cooking hob to mains power supply).
• Put the supplied springs in their places.
• Insert the hob into the cut aperture.
• Press the hob firmly towards the worktop from above.
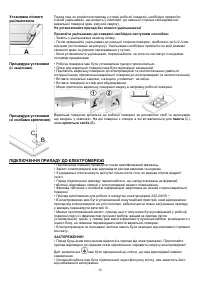
Installation procedure
(with fixing brackets)
The cook top is fixed to the unit by means of the brackets and accessories provided.
Holes are provided in the bottom of the tray where you can attach the
screws
(C) that
hold the
fixing
brackets
(B) in place.
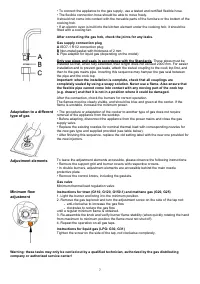
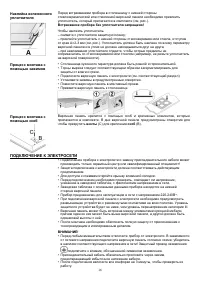
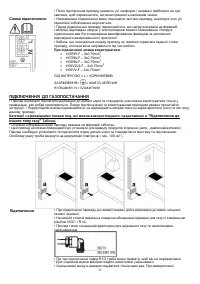
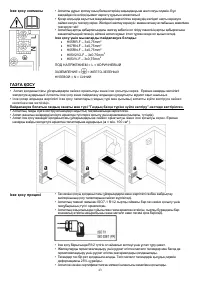
CONNECTING THE APPLIANCE TO THE POWER MAINS
• The appliance may only be connected by an authorized skilled technician.
• Electric system protection should comply with all relevant regulations.
• The connection clips can be accessed when the connection clip covers are opened /
removed.
• Before connecting the appliance, make sure the voltage indicated on the rating plate is
consistent with the voltage in your home circuit.
• The rating plate with basic information is attached on the lower side of the hob.
• The appliance is manufactured for use with the power supply voltage
220-240 V ~.
• In order to make a fixed connection to the mains, insert an all-pole circuit breaker
between the appliance and the mains. This device shall have a contact separation in all
poles, providing full disconnection under overvoltage category III conditions.
• Given the protection from the risk of fire, appliances of this type may be installed in a
worktop next to a piece of kitchen furniture that is taller than the appliance (when
installed); however, in this case, a kitchen furniture element must be installed on the
other side, adjacent to the appliance.
• The current conducting and isolated parts must be protected from any possibility of
direct contact.
WARNING!
• Before any intervention, disconnect the appliance from the power mains. Connect the
appliance in compliance with the electric connections diagram supplied; make sure the
relevant network voltage is observed! The ground wire
should be connected to the
clip indicated by the earthing symbol.
• The mains cable should be fed through the fastening clip which protects it from being
accidentally pulled out.
• After connecting the appliance, turn on all cooking zones / heaters for approximately
three minutes to make sure they are operating correctly.


