
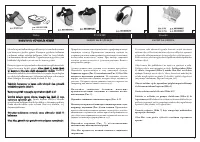
Триммеры Oleo-Mac TR95E 6004-9032T - инструкция пользователя по применению, эксплуатации и установке на русском языке. Мы надеемся, она поможет вам решить возникшие у вас вопросы при эксплуатации техники.
Если остались вопросы, задайте их в комментариях после инструкции.
"Загружаем инструкцию", означает, что нужно подождать пока файл загрузится и можно будет его читать онлайн. Некоторые инструкции очень большие и время их появления зависит от вашей скорости интернета.


16
Italiano
Franćais
English
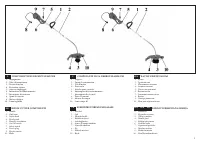
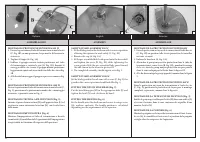
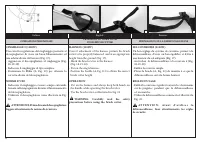
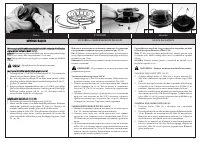
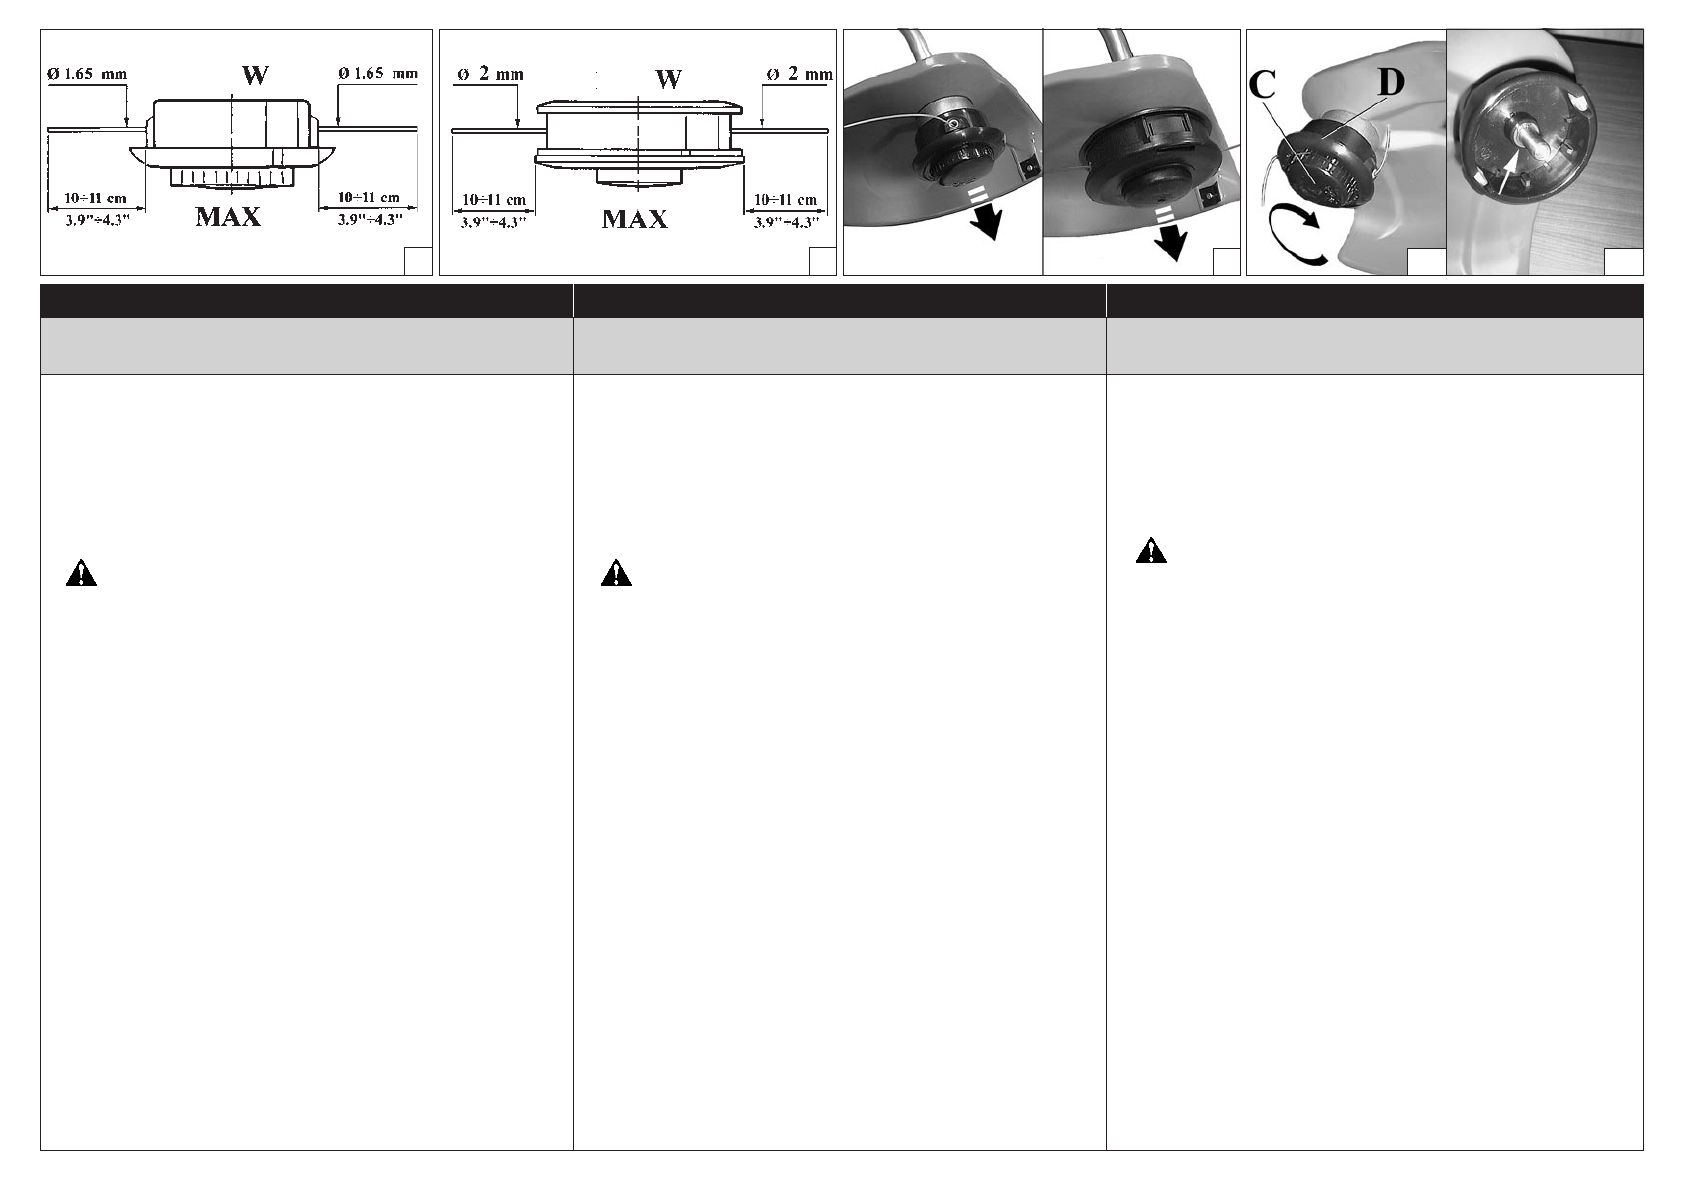
TESTINA A FILI DI NYLON
TETE A FILS DE NYLON
NYLON LINE HEAD
25
26
27
28A
28B
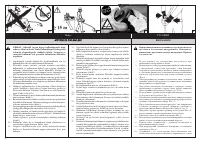
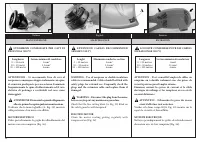
Usare sempre lo stesso diametro del filo originale per non
sovraccaricare il motore (Fig. 25-26).
Fig. 27 Per allungare il filo di nylon, battere la testina sul terreno
mentre si lavora. Ad ogni colpo usciranno circa 2,5 cm di filo.
NOTA:
Non battere la testina sul cemento o sul selciato: può essere
pericoloso.
ATTENZIONE - Non montare utensili di taglio metallici.
SOSTITUZIONE DEL FILO DI NYLON (900 W)
1 - Svitare il pomello (C, Fig. 28A) e togliere la bobina (D). Per smontare
completamente la testina, togliere il seeger (Fig. 28B).
2 - Piegare il filo a metà lasciando una parte più lunga dell’altra di
circa 10 cm. Inserire il filo nell’apposita asola (B, Fig. 31) sulla
bobina. Avvolgere, in direzione della freccia.
3 - Terminato l’avvolgimento del filo, bloccarlo nelle apposite tacche
come indicato in Fig. 32 B. Montare la molla. Infilare il filo
attraverso gli occhielli (Fig. 34 - pag. 18), tirarlo verso l’esterno e
sbloccarlo. Bloccare la testina con il pomello.
SOSTITUZIONE DEL FILO DI NYLON (1100 W)
1 - Premere la linguetta (Fig. 29) e togliere il coperchio e la bobina
interna.
2 - Piegare il filo a metà lasciando una parte più lunga dell’altra di
circa 14 cm. Bloccare il filo nell’apposita tacca (B, Fig. 30) sulla
bobina. Avvolgere, in direzione della freccia, ogni filo nel proprio
alloggiamento in modo uniforme e senza intrecciarli.
3 - Terminato l’avvolgimento del filo, bloccarlo nelle apposite feritoie
come indicato in Fig. 32 A. Montare la molla. Infilare il filo
attraverso gli occhielli (Fig. 34 - pag. 18) e tirarlo verso l’esterno.
Bloccare la testina con il coperchio.
Only use line of the same diameter as the original to avoid
overloading the motor (Fig. 25-26).
Fig. 27
In order to get more line out of the cutting head, tap it lightly
on the ground while working. The nylon line comes out about 2,5
cm each time you tap the ground.
Note:
Never hit the nylon head against hard spots such as concrete
or stones: it could be dangerous.
WARNING - Never fit metal cutting elements.
REPLACING THE NYLON LINE (900 W)
1 - Unscrew the knob (C, Fig. 28A) and remove the spool (D), and
remove the clip.
2 - Double back the line, leaving one end 10 cm longer than the other
one. Insert the line in the notch (B, Fig. 31). Wind the line in the
direction of the arrow.
3 - At the end of the winding, lock in the notches (Fig. 32B). Assemble
the spring. Slip the line through the eyelet (Fig. 34 - pag. 18), pull it
towards the outside and unlock. Lock the head with the knob.
REPLACING THE NYLON LINE (1100 W)
1 - Press the tab (Fig. 29) and remove the cover and the internal
spool.
2 - Double back the line, leaving one end 14 cm longer than the other
one. Lock the line in the notch (B, Fig. 30). Wind the line in the
direction of the arrow, each end in its chink, regulary, without
crossing them.
3 - At the end of the winding, lock in the slits (Fig. 32A) Assemble the
spring. Slip the line through the eyelet (Fig. 34 - pag. 18) and pull
it towards the outside. Lock the head with the cover.
Utilisez toujours le même diamètre de fil, comme celui d'origine
afin de ne pas surcharger le moteur (Fig. 25-26).
Fig. 27
Si vous voulez allonger le fil pendant que vous travaillez, tapez
la tête nylon par terre. Le fil sortira de 2,5 cm à chaque coup.
N.B.:
Ne tapez pas la tête nylon sur du ciment ou sur le pavé, cela
pourrait être très dangereux.
ATTENTION - Ne jamais monter d’organes de coupe
métalliques.
REMPLACEMENT DU FIL NYLON (900 W)
1 - Dévisser le pommeau (C, Fig. 28A) et enlever la bobine (D), et
elevar le anneau de sécurité.
2 - Plier le fil en deux en laissant une partie plus longue d’environs
10 cm que l’autre. Insérer le fil en l‘entaille spécial (B, Fig. 31) sur
la bobine. Enrouler, en direction de la flèche.
3 - Après avoir terminé l’enroulement du fil, bloquer-le dans les
entaille spéciales, comme indiqué en la Fig. 32 B. Monter le ressort.
Introduire le fil à travers les œillets (Fig. 34 - pag. 18), tirer-le vers
l’exterieur et debloquer-le. Bloquer la tête avec le pommeau.
REMPLACEMENT DU FIL NYLON (1100 W)
1 - Appuyer la languette (Fig. 29) et enlever le couvercle et la bobine
interne.
2 - Plier le fil en deux en laissant une partie plus longue d’environs
14 cm que l’autre. Bloquer le fil en l‘entaille spécial (B, Fig. 30)
sur la bobine. Enrouler, en direction de la flèche, chaque file en
son propre logement, uniformement et sans les tresser.
3 - Après avoir terminé l’enroulement du fil, bloquer-le dans les
fentes spéciales, comme indiqué en la Fig. 32 A. Monter le ressort.
Introduire le fil à travers les œillets (Fig. 34 - pag. 18) et tirer-le
vers l’exterieur. Bloquer la tête avec le couvercle.
900
Содержание
- 6 DİKKAT: elektrikli tırpan doğru kullanıldığında hızlı,; GÜVENLİK ÖNLEMLERİ; ВНИМАНИЕ; При правильном использовании это устройство является
- 7 NAPOMENA - Ako se pravilno koristi, ovaj je obrezivač grmlja; Hrvatski; SIGURNOSNI PROPISI; РУССКИЙ
- 11 SKLAPANJE DIJELOVA; MONTAJ; ПОДГОТОВКА; УСТАНОВКА ЗАЩИТЫ 900 W
- 13 UKLJUČIVANJE / OBUSTAVA; ÇALIŞTIRMA / DURDURULMASI
- 15 PRIPREMNE RADNJE; MOTORLU TIRPANIN ÇALIŞMASI; ПОДГОТОВКА К РАБОТЕ; Türkçe
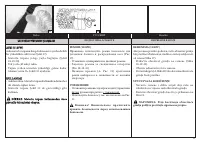
- 17 GLAVA ZA NAJLON; NAPOMENA - Nemojte montirati metalni alat za rezanje.; ГОЛОВКА С НЕЙЛОНОВОЙ ЛЕСКОЙ; MİSİNALI BAŞLIK; Никогда не используйте леску большего диаметра. Это приводит
- 19 ODRŽAVANJE; BAKIM
- 21 SERIJSKI BROJ; GARANTNI LIST; УСЛОВИЯ ГАРАНТИИ
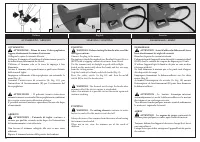
- 24 SPIEGAZIONE SIMBOLI E AVVERTENZE DI SICUREZZA; Indossare casco, occhiali e cuffie di protezione.; particulièrement humide.; - Personne doit approcher à moins de 15 m.; TUMAŠENJE SIMBOLA I SIGURNOSNI PROPISI; - Prêter d’attention au lancement d’objets.; ОПИСАНИЕ СИМВОЛОВ И ЗНАКОВ БЕЗОПАСНОСТИ; DİKKAT


Не нашла в инструкции сечение лески для oleo-Mac 95E.