
Строительные пылесосы Makita VC003GLZ - инструкция пользователя по применению, эксплуатации и установке на русском языке. Мы надеемся, она поможет вам решить возникшие у вас вопросы при эксплуатации техники.
Если остались вопросы, задайте их в комментариях после инструкции.
"Загружаем инструкцию", означает, что нужно подождать пока файл загрузится и можно будет его читать онлайн. Некоторые инструкции очень большие и время их появления зависит от вашей скорости интернета.


15 ENGLISH
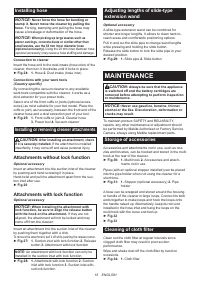
Installing hose
NOTICE:
Never force the hose for bending or
stamp it. Never move the cleaner by pulling the
hose.
Forcing, stamping and pulling the hose may
cause a breakage or deformation of the hose.
NOTICE:
When picking up large wastes such as
planer carvings, concrete dusts or similar other than
small wastes, use the 38 mm inner diameter hose
(optional accessory).
Using the 28 mm inner diameter hose
(optional accessory) may cause a hose stuffing and damage.
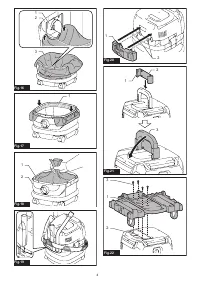
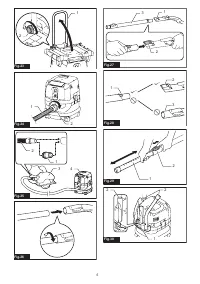
Connection to cleaner
Insert the hose end to the dust intake (hose inlet) of the
cleaner, then turn it clockwise until it locks in place.
►
Fig.24:
1.
Hose
2.
Dust intake (hose inlet)
Connections with your work tools
(Country specific)
By connecting the vacuum cleaner to any available
work tools compatible with the cleaner, it works as a
dust extractor for your power tools.
Select one of the front cuffs or joints (optional acces-
sories) as most suitable for your tool model. Place the
cuffs or joint, as necessary, between the front end of the
cleaner hose and a dust extraction port of your tool.
►
Fig.25:
1.
Front cuffs or joint
2.
Cleaner hose
3.
Power tool
4.
Vacuum cleaner
Installing or removing cleaner attachments
CAUTION:
After installing an attachment, check
if it is securely installed.
If the attachment is installed
imperfectly, it may come off and cause personal injury.
Attachments without lock function
Optional accessory
Insert an attachment into the suction inlet of the cleaner
by pushing and hand screwing it in place.
Hand twist and pull the attachment apart from the suc-
tion inlet after use.
►
Fig.26
Attachments with lock function
Optional accessory
NOTICE:
When installing the attachment with
lock function, be sure to align the release button
with the hook on the attachment.
If they are not
aligned, the attachment will not be locked and may
come off from the cleaner.
Insert an attachment into the suction inlet of the cleaner
by pushing them together with a click.
To remove the attachment, pull it off while pushing the release button.
►
Fig.27:
1.
Suction inlet with lock function
2.
Release
button
3.
Attachment with lock function
NOTE:
An attachment with lock function can only be
installed in the suction inlet with lock function.
►
Fig.28:
1.
Attachment with lock function
2.
Suction
inlet with lock function
3.
Suction inlet with
-
out lock function
Adjusting lengths of slide-type
extension wand
Optional accessory
A slide-type extension wand can be combined for
shorter and longer lengths. It allows to clean hard-to-
reach areas and comfortable positioning options.
Pull in and out the slide pipe to change wand lengths
while pressing and holding the slide button.
Release the slide button to lock the slide pipe in your
desired position.
►
Fig.29:
1.
Slide pipe
2.
Slide button
MAINTENANCE
CAUTION:
Always be sure that the appliance
is switched off and the battery cartridges are
removed before attempting to perform inspection
or maintenance.
NOTICE:
Never use gasoline, benzine, thinner,
alcohol or the like. Discoloration, deformation or
cracks may result.
To maintain product SAFETY and RELIABILITY,
repairs, any other maintenance or adjustment should
be performed by Makita Authorized or Factory Service
Centers, always using Makita replacement parts.
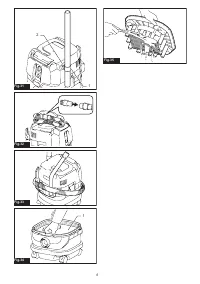
Storage of accessories
Accessories and attachments not in use, such as noz
-
zles and brushes, can be hooked and stored in the multi
hook at the rear of the cleaner.
►
Fig.30:
1.
Multi hook
2.
Accessories and attach
-
ments not in use
Pipes (with an optional stopper installed) can be placed
into the pipe holder when not using the cleaner for a
short time.
►
Fig.31:
1.
Stopper (optional accessory)
2.
Pipe
holder
A hose can be wrapped and stored around the housing
or handle of the cleaner in large loops. Connect its both
ends together to make loops and hook the loops onto
the handle raised up. Alternatively, keep its root end
installed in the hose inlet and hang the loops on the
multi hook with the loose end tied up.
►
Fig.32
►
Fig.33
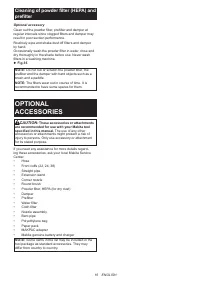
Cleaning of cloth filter
Clean out the cloth filter at regular intervals since
clogged cloth filter may result in poor suction
performance.
Wipe and shake dust off the cloth filter by hand on
occasions.
►
Fig.34:
1.
Cloth filter
Содержание
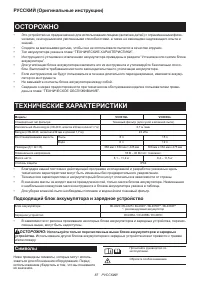
- 87 ОСТОРОЖНО; Подходящий блок аккумулятора и зарядное устройство
- 88 Назначение
- 89 МЕРЫ БЕЗОПАСНОСТИ; Правила техники безопасности
- 90 СОХРАНИТЕ ДАННЫЕ
- 91 Важные правила техники
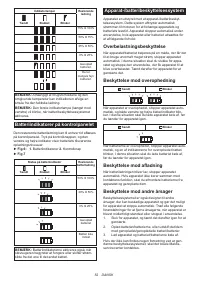
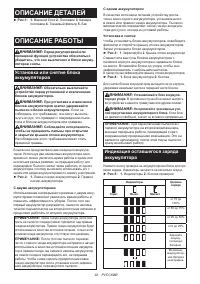
- 92 ОПИСАНИЕ ДЕТАЛЕЙ; Установка или снятие блока
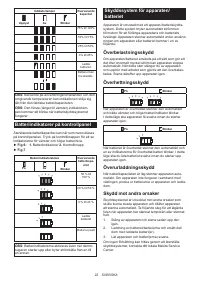
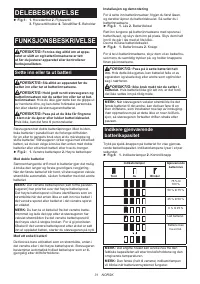
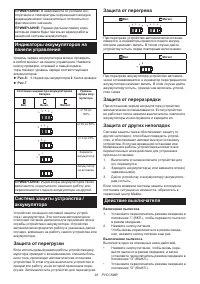
- 93 Индикаторы аккумуляторов на; Система защиты устройства /
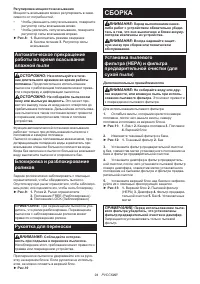
- 94 СБОРКА
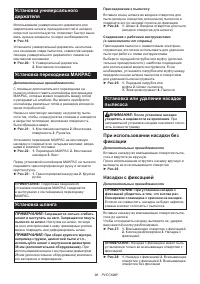
- 95 Установка водяного фильтра; Установка бумажного пакета; Установка полиэтиленового мешка
- 96 При использовании насадки без; Насадки с фиксацией
- 97 Регулировка длины раздвижной; ОБСЛУЖИВАНИЕ; Хранение дополнительного оборудования; ДОПОЛНИТЕЛЬНЫЕ
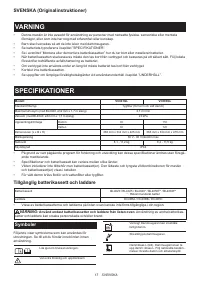
Характеристики

Остались вопросы?Не нашли свой ответ в руководстве или возникли другие проблемы? Задайте свой вопрос в форме ниже с подробным описанием вашей ситуации, чтобы другие люди и специалисты смогли дать на него ответ. Если вы знаете как решить проблему другого человека, пожалуйста, подскажите ему :)


