
Шуруповерты Bosch GDR 120-LI + 5 сверл по металлу HSS-G 0.601.9F0.005 - инструкция пользователя по применению, эксплуатации и установке на русском языке. Мы надеемся, она поможет вам решить возникшие у вас вопросы при эксплуатации техники.
Если остались вопросы, задайте их в комментариях после инструкции.
"Загружаем инструкцию", означает, что нужно подождать пока файл загрузится и можно будет его читать онлайн. Некоторые инструкции очень большие и время их появления зависит от вашей скорости интернета.


14
| English
1 609 92A 4A8 | (02.10.2018)
Bosch Power Tools
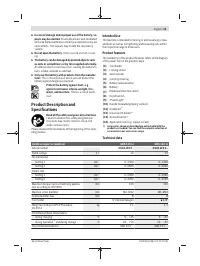
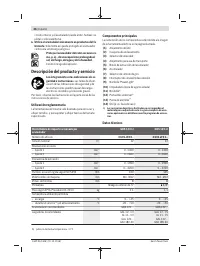
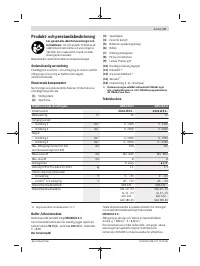
Cordless impact screwdriver
GDR 120-LI
GDS 120-LI
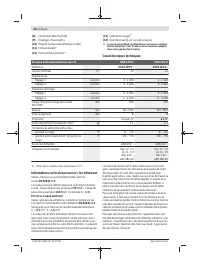
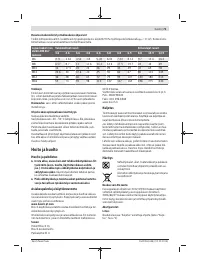
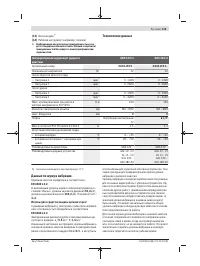
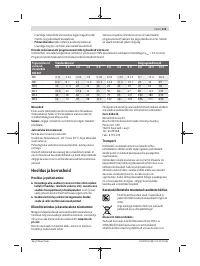
Recommended chargers
GAL 12.. CV
AL 11.. CV
GAL 12V-..
GAX 18V-30
GAL 12.. CV
AL 11.. CV
GAL 12V-..
GAX 18V-30
A) Limited performance at temperatures <0 °C
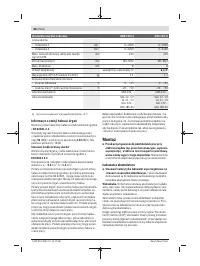
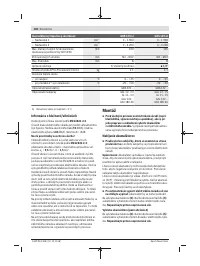
Noise/vibration information
Noise emission values determined according to
EN 62841-2-2
.
Typically the A-weighted noise level of the power tool is:
92
dB(A); sound power level
103
dB(A). Uncertainty K =
3
dB.
Wear hearing protection
Total vibration values a
h
(triax vector sum) and uncertainty K
determined according to
EN 62841-2-2
:
Impact tightening of fasteners of the maximum capacity of
the tool: a
h
=
9,5
m/s
2
, K =
1,5
m/s
2
.
The vibration level and noise emission value given in these
instructions have been measured in accordance with a
standardised measuring procedure detailed in EN 62841
and may be used to compare power tools. They may also be
used for a preliminary estimation of vibration and noise
emissions.
The given vibration level and noise emission value represent
the main applications of the power tool. However, if the
power tool is used for other applications, with different ap-
plication tools or is poorly maintained, the vibration level
and noise emission value may differ. This may significantly
increase the vibration and noise emissions over the total
working period.
To estimate vibration and noise emissions accurately, the
times when the tool is switched off or when it is running but
not actually being used should also be taken into account.
This may significantly reduce vibration and noise emissions
over the total working period.
Implement additional safety measures to protect the oper-
ator from the effects of vibration, such as servicing the
power tool and application tools, keeping the hands warm,
and organising workflows correctly.
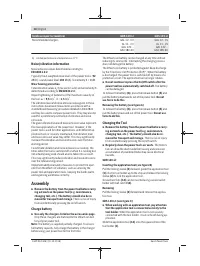
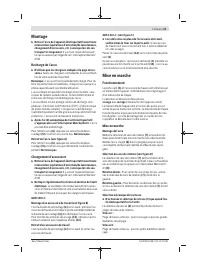
Assembly
u
Remove the battery from the power tool before carry-
ing out work on the power tool (e.g. maintenance,
changing tool, etc.). The battery should also be re-
moved for transport and storage.
There is risk of injury
from unintentionally pressing the on/off switch.
Charge battery
u
Use only the chargers listed on the accessories page.
Only these chargers are matched to the lithium-ion bat-
tery of your power tool.
Note:
The battery is supplied partially charged. To ensure
full battery capacity, fully charge the battery in the charger
before using your power tool for the first time.
The lithium-ion battery can be charged at any time without
reducing its service life. Interrupting the charging process
does not damage the battery.
The lithium-ion battery is protected against deep discharge
by the "Electronic Cell Protection (ECP)". When the battery
is discharged, the power tool is switched off by means of a
protective circuit: The application tool no longer rotates.
u
Do not continue to press the On/Off switch after the
power tool has automatically switched off.
The battery
can be damaged.
To remove the battery
(6)
, press the release button
(5)
and
pull the battery downwards out of the power tool.
Do not
use force to do this.
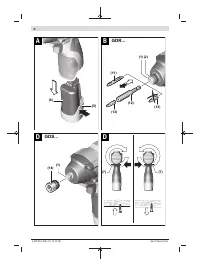
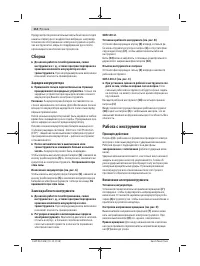
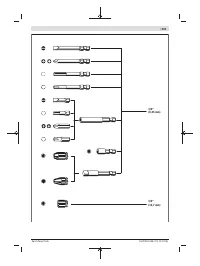
Removing the battery (see figure A)
To remove the battery
(6)
, press the release button
(5)
and
pull the battery back and out of the power tool.
Do not use
force to do this.
Changing the Tool
u
Remove the battery from the power tool before carry-
ing out work on the power tool (e.g. maintenance,
changing tool, etc.). The battery should also be re-
moved for transport and storage.
There is risk of injury
from unintentionally pressing the on/off switch.
u
Regularly clean the power tool’s air vents.
The motor’s
fan can draw the dust inside the housing and excessive
accumulation of powdered metal may cause electrical
hazards.
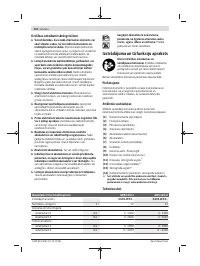
GDR 120-LI:
Inserting the application tool (see figure B)
Pull the locking sleeve
(2)
forward, guide the application tool
(1)
into the tool holder up to the stop and release the locking
sleeve
(2)
to lock the application tool.
Screwdriver bits
(13)
can be inserted using a universal bit
holder with ball catch
(12)
.
Removing
Pull the locking sleeve
(2)
forward and remove the applica-
tion tool.
GDS 120-LI: (see figure C)
u
When working with an application tool, pay attention
that the application tool is connected securely to the
tool holder.
When the application tool is not securely
connected with the tool holder, it can come off during ap-
plication.
Slide the application tool
(14)
onto the square drive of the
tool holder
(1)
.
Содержание
- 110 Указания по технике безопасности; ЖДЕНИЕ
- 111 Применение электроинструмента и обращение с ним
- 112 Сервис; Описание продукта и услуг; Применение по назначению
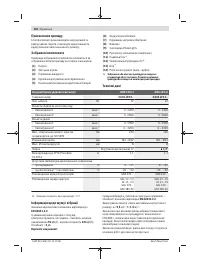
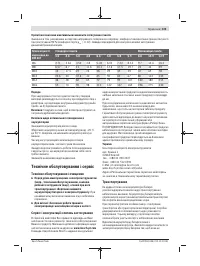
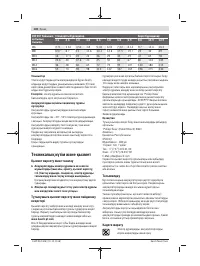
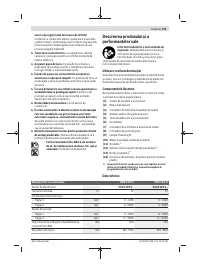
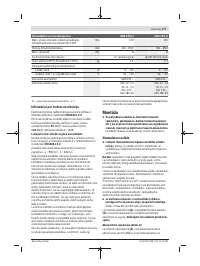
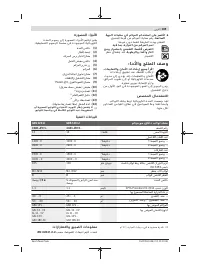
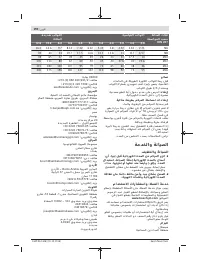
- 113 Технические данные; Данные по шуму и вибрации; Используйте средства защиты органов слуха!
- 114 Сборка; Зарядка аккумулятора; Работа с инструментом; Принцип действия
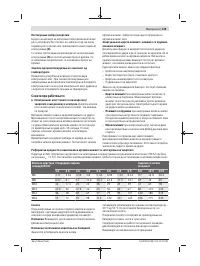
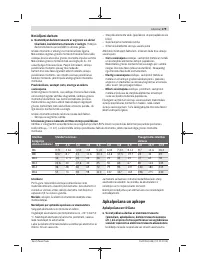
- 115 Указания по применению; Стандартные винты
- 116 Техобслуживание и сервис; Техобслуживание и очистка; Россия
- 117 Українська; Вказівки з техніки безпеки; ДЖЕННЯ


