
Роботы-пылесосы Maxwell MW-3290 - инструкция пользователя по применению, эксплуатации и установке на русском языке. Мы надеемся, она поможет вам решить возникшие у вас вопросы при эксплуатации техники.
Если остались вопросы, задайте их в комментариях после инструкции.
"Загружаем инструкцию", означает, что нужно подождать пока файл загрузится и можно будет его читать онлайн. Некоторые инструкции очень большие и время их появления зависит от вашей скорости интернета.


19
ENGLISH
•
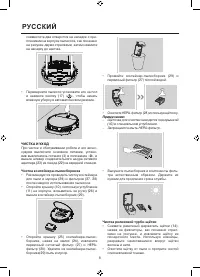
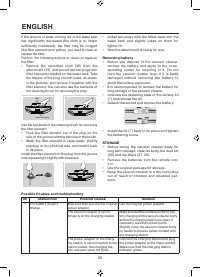
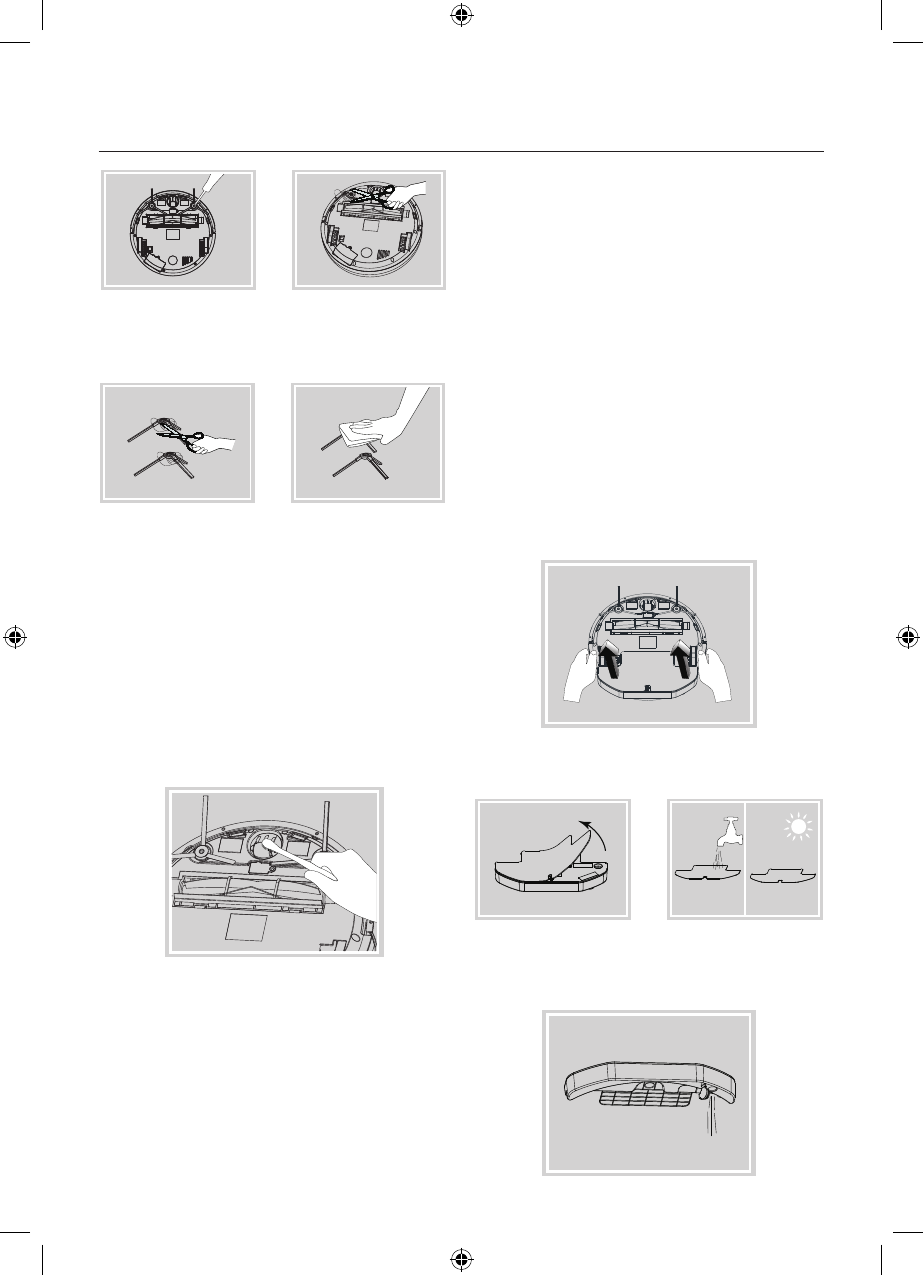
Cut the hair and threads wound up around the
side brushes with the scissors.
•
Clean the brushes from dust and wipe it with a
clean, slightly damp cloth.
•
Install the brushes back to their places and
tighten the fastening screws rotating them
clockwise.
Cleaning the front wheel
If you hear squeaking while the vacuum cleaner is
moving, clean the axis of its front wheel.
•
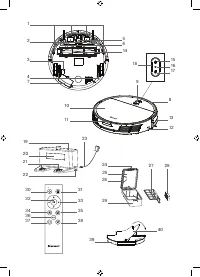
Remove the front wheel (5) from the socket
with a flat screwdriver and remove the axis.
Remove the hair and threads wound up around
the axis. Clean the axis locks and the socket with
the brush. Clean the front wheel (5) from dust
and garbage and wipe it, if there are hair on it,
remove them.
•
Insert the axis into the wheel and install it back
into the socket, make sure that nothing hinders
free rotation of the wheel (5).
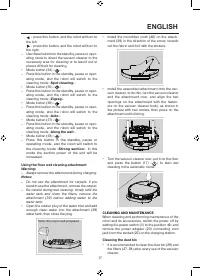
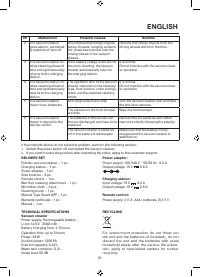
Cleaning the vacuum cleaner body
and the charging station
•
Clean the contact points for battery charging (2)
on the vacuum cleaner and the contact points on
the charging station (1) from dust.
•
Clean and wipe the anti-drop sensors (1) on the
bottom part on the vacuum cleaner body.
•
Wipe the front bumper (8). Keep the front bum-
per (8) clean since there are optical wall sen-
sors (13) in it.
•
Wipe the vacuum cleaner body with a slightly
damp cloth and then wipe it dry.
•
Do not immerse the vacuum cleaner body, the
charging station, the power adapter (23) and the
connecting cord of the power adapter into water
or any other liquids. Provide that no liquid gets
inside the vacuum cleaner body.
•
Do not use solvents or abrasives for cleaning the
vacuum cleaner body, the charging station and
the power adapter (23).
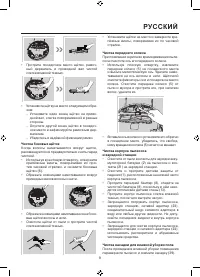
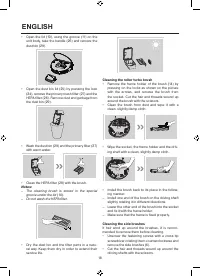
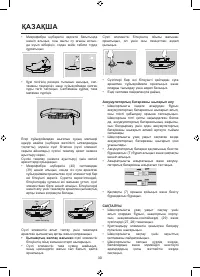
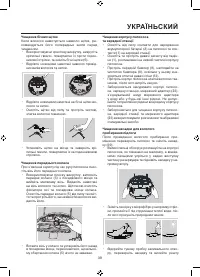
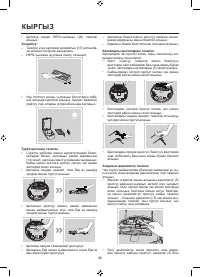
Cleaning the floor wet cleaning attachment
After wet cleaning of the room turn the vacuum
cleaner over and remove the attachment (39).
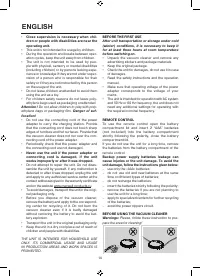
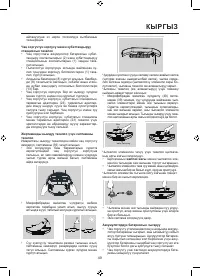
•
Place the thumbs of both hands on the body of
the vacuum cleaner as shown in the picture, rest
your index fingers on the rear protruding part of
the tank and lift the attachment upwards.
•
Remove the microfiber cloth in the direction of
the arrow, wash it under a warm water jet and let
it dry in a natural way.
•
Open the rubber plug of the water inlent, turn
over the attachment and drain the remaining
water from the water tank. Wipe the attachment
with a dry clean cloth.
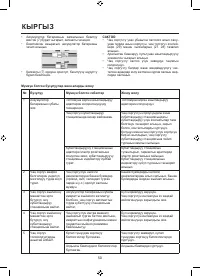
Содержание
- 4 Внимание! Не разрешайте детям играть с; ПЕРЕД ПЕРВЫМ ИСПОЛЬЗОВАНИЕМ; После транспортировки или хранения; ПУЛЬТ ДИСТАНЦИОННОГО УПРАВЛЕНИЯ
- 5 запрещается перезаряжать элементы питания; ПЕРЕД ИСПОЛЬЗОВАНИЕМ ПЫЛЕСОСА; Предостережения: Пожалуйста, соблюдайте; Базовая зарядка
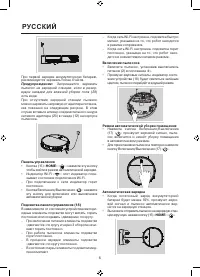
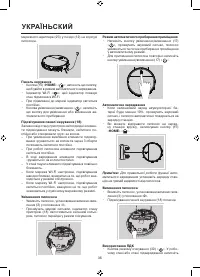
- 6 Предупреждение: Запрещается заряжать; Панель управления; »: нажмите эту кнопку; Включение пылесоса
- 7 Примечание: Для правильной работы функ-; Выключение пылесоса; - нажмите эту кнопку, и робот двинется
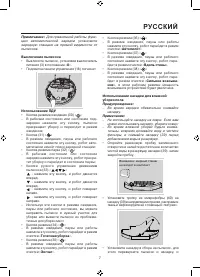
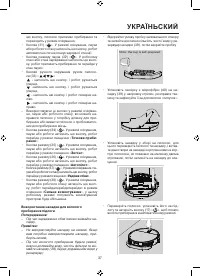
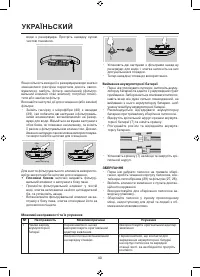
- 8 влажную уборку в автоматическом режиме.; ЧИСТКА И УХОД; Щёточка для очистки находится под крышкой; Чистка роликовой турбо-щётки
- 9 Убедитесь в надёжной фиксации рамки.; Чистка боковых щёток
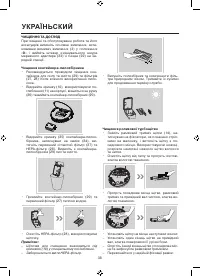
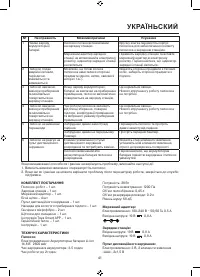
- 10 Плоской стороной щёточки выдавите филь-; Теперь насадка готова к использованию.; Извлечение аккумуляторной батареи
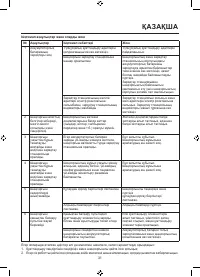
- 11 ХРАНЕНИЕ; Неисправность; Выключите выключатель питания и перезапустите пылесос
- 12 КОМПЛЕКТ ПОСТАВКИ; Входное напряжение: 19 В; Пульт дистанционного управления:; Срок службы устройства – 3 года; ИЗГОТОВИТЕЛЬ: СТАР ПЛЮС ЛИМИТЕД


