Пылесос Polaris PVCR 1226 - инструкция пользователя по применению, эксплуатации и установке на русском языке. Мы надеемся, она поможет вам решить возникшие у вас вопросы при эксплуатации техники.
Если остались вопросы, задайте их в комментариях после инструкции.
"Загружаем инструкцию", означает, что нужно подождать пока файл загрузится и можно будет его читать онлайн. Некоторые инструкции очень большие и время их появления зависит от вашей скорости интернета.


25
The vacuum cleaner is rated for operations with the original accumulator and charger only which are part of
the delivery set. Use of any accumulator and chargers other than original those can cause damage to the
device.
Before using the device, remove from the floor any fragile items, wires, and toys.
Do not sit on the device, and do not put on it any items or pets. Do not allow for children to sit on the vacuum
cleaner, and play with it.
If the device is not used for a long time, or is planned to be cleaned and maintained, disconnect it from
power network.
Remember to clean the device and dust bag each time after use.
Do not wash the device under a water jet, do not wipe it with wet rags, do not operate it on a wet floor.
Prior to disposal, take the accumulator out.
The electric battery disposal shall be performed in line with local law and regulations.
Even at a severe damage to the device. its incineration is prohibited, and mishandling the accumulator can
lead to its explosion.
APPLICATION SCOPE
The appliance is intended for household use only in accordance with this Operation Manual. The vacuum cleaner
is intended for cleaning hard even floor decks of accommodation spaces by way of intaking dust. The device
is not intended for industrial or commercial use.
The device is also not intended for outdoor use, and for use in unheated rooms with air temperature below +15°C
at an increased ambient humidity.
Manufacturer bears no liability for damage arising from misuse or non-observance of the use guidelines specified
in this Operation Manual.
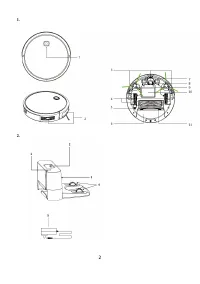
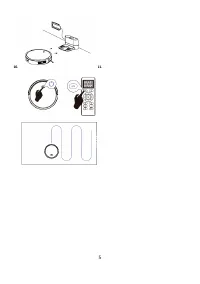
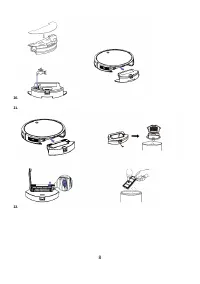
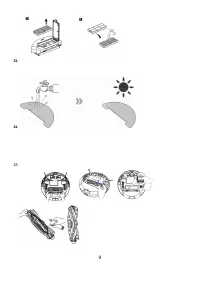
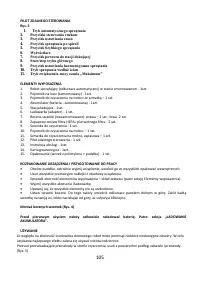
DEVICE DESCRIPTION
Fig. 1
1. ON/OFF/START/STOP button
2. Clash sensors
3. Fall sensors
4. The left/right wheel
5. Power switch (ON/OFF)
6. Dust ba
7. Charging leads
8. Frontal wheel
9. Lateral brushes: the left, the right
10. The electric battery compartment lid
11 The central brush assembly
THE CHARGER
Fig. 2
1.
Activation indicator
2.
The remote control unit storage place
3.
The signal transmission area
4.
The contact unit
5.
The charger
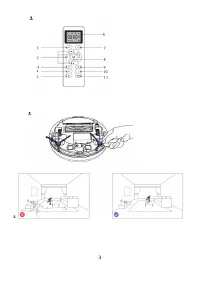
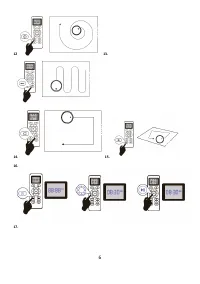
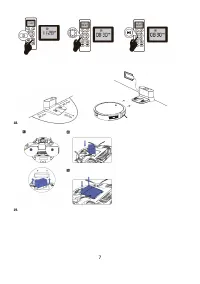
REMOTE CONTROL UNIT
Fig. 3
1.
Automatic cleanup mode
2.
Motion control mode
3.
Timer button
4.
Spiral cleanup mode
5.
Quick cleanup mode
6.
Display
7.
Return-to-Base button
8.
Main mode start/stop button


