Проигрыватели Yamaha BD-S671 - инструкция пользователя по применению, эксплуатации и установке на русском языке. Мы надеемся, она поможет вам решить возникшие у вас вопросы при эксплуатации техники.
Если остались вопросы, задайте их в комментариях после инструкции.
"Загружаем инструкцию", означает, что нужно подождать пока файл загрузится и можно будет его читать онлайн. Некоторые инструкции очень большие и время их появления зависит от вашей скорости интернета.


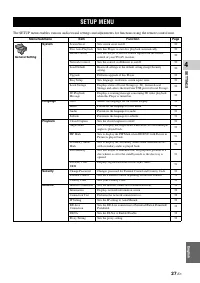


SETUP MENU
32
En
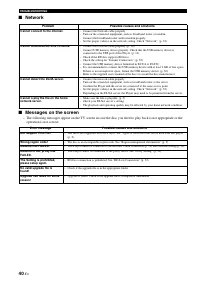
Network
Internet Connection
Set this item to Enable when you use BD-Live (p. 26), DLNA
(p. 21) and software upgrade from the network (p. 37).
Enable
*
, Disable
Information
You can display network information screen. On this
screen, you can view the information of Interface
(Ethernet), Address Type, IP Address, Subnet Mask,
Default Gateway, and DNS.
Connection Test
You can perform an internet connection test. If the test is
failed, please check “IP Setting” (p. 32) and perform the
test again.
IP Setting
You can configure the network settings.
–
Numeric keys
Enters characters.
–
2
/
3
Moves the highlight.
–
CLEAR
Deletes a character.
–
ENTER
Saves the settings and exits from
the menu.
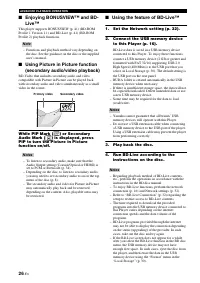
BD-Live Connection
You can set access restriction to BD-Live contents.
DLNA
You can set the DLNA (p. 21) to Enable/Disable. When
you do not use the DLNA function, set to Disable.
Enable
*
, Disable
Proxy Setting
You can set Proxy Setting. Set to Disable for normal use.
Set to Enable to set the proxy setting.
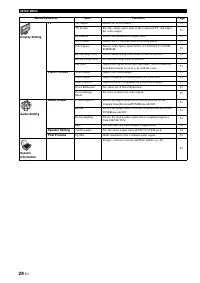
■
Display Setting
The default settings are marked with “
*
”.
TV
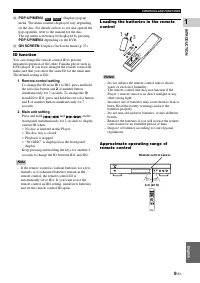
3D Output
You can select 3D or 2D video output from this Player.
– Even if you set “3D Output” to “Auto” and play
back a Blu-ray 3D disc, this Player selects 2D
images depending on the connection and the setting
of TV, etc (p. 12).
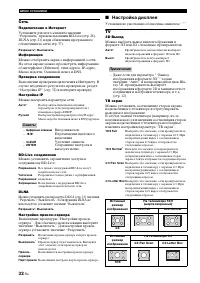
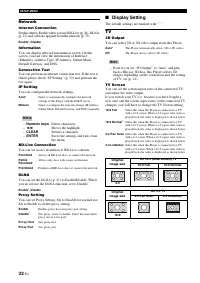
TV Screen
You can set the screen aspect ratio of the connected TV,
and adjust the video output.
If you switch your TV (i.e. because you have bought a
new one) and the screen aspect ratio of the connected TV
changes, you will have to change the TV Screen setting.
Auto*
Select to automatically configure the network
settings of this Player with the DHCP server.
Manual
Select to configure the network settings (IP Address,
Subnet Mask, Default Gateway, and DNS) manually.
Hints
Permitted
Allows all BD-Live discs to connect the network.
Partial
Permitted
*
Allows only discs with owner certification.
Prohibited
Prohibits all BD-Live discs to connect the network.
Enable
Enables proxy host and proxy port setting.
Disable
*
Sets proxy server to disable. Select this item when
proxy server is not used.
Proxy Host
Sets proxy host.
Proxy Port
Sets proxy port.
Auto*
This Player automatically selects 3D or 2D videos.
Off
This Player always selects 2D videos.
Note
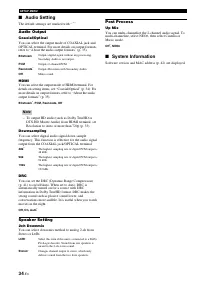
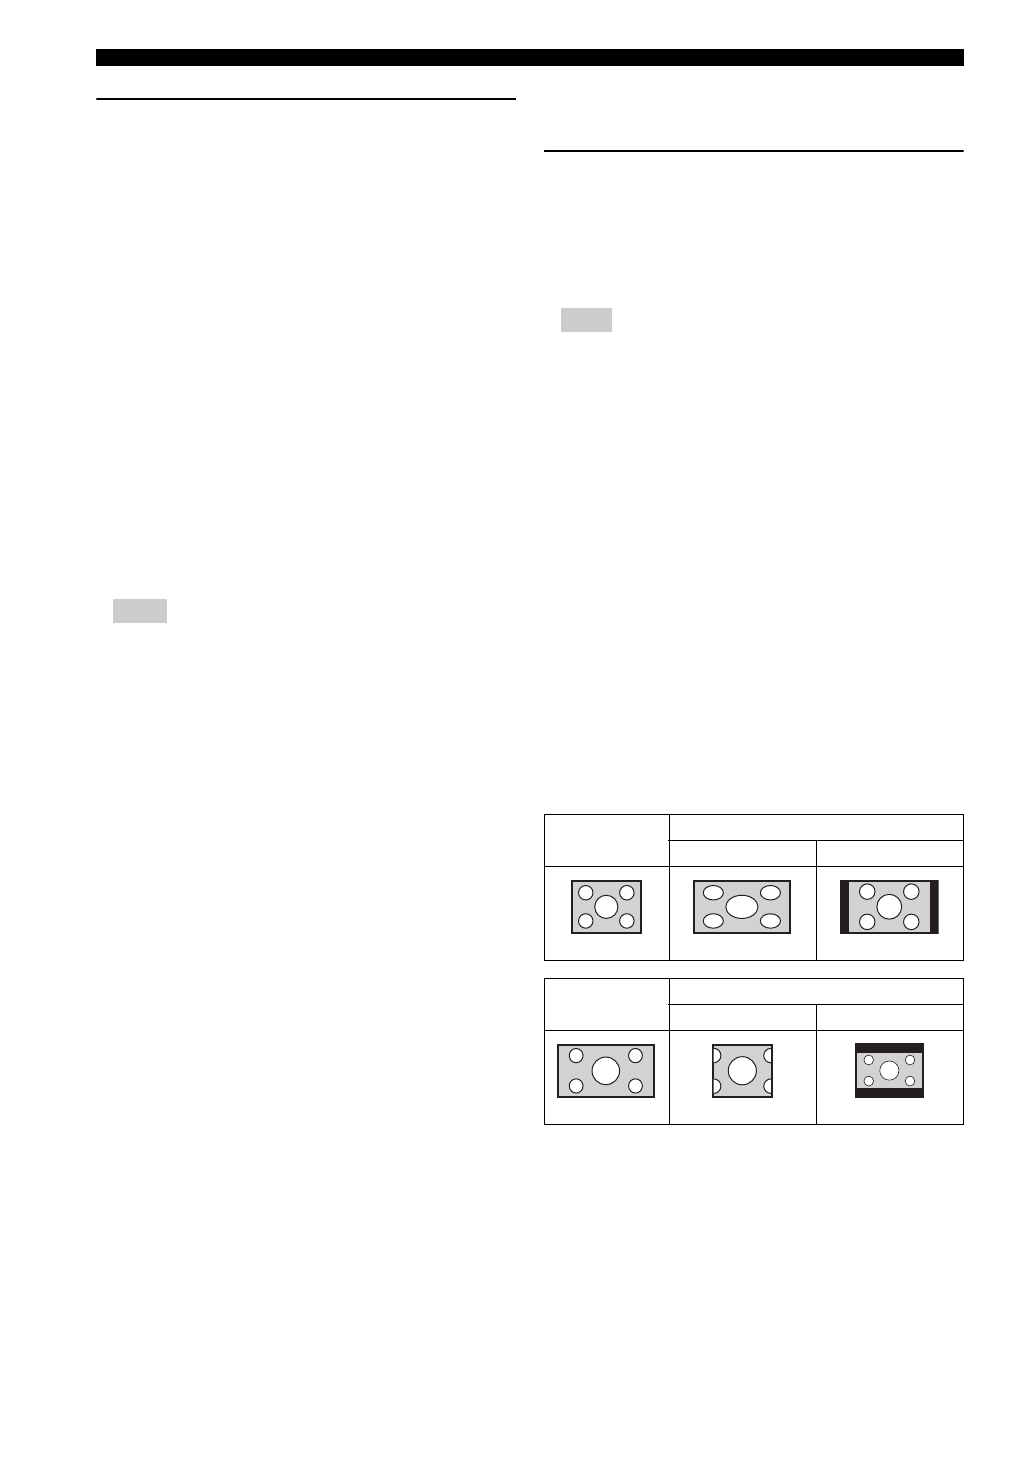
16:9 Full
Select this when this Player is connected to a TV
with a 16:9 screen. When a 4:3 aspect ratio video is
played back, the video is displayed as shown below.
16:9 Normal
*
Select this when this Player is connected to a TV
with a 16:9 screen. When a 4:3 aspect ratio video is
played back, the video is displayed as shown below.
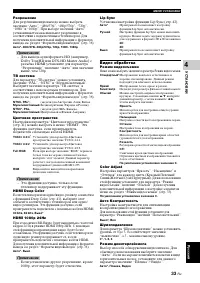
4:3 Pan Scan
Select this when this Player is connected to a TV
with a 4:3 screen. When a 16:9 aspect ratio video is
played back, the video is displayed as shown below.
4:3 Letterbox
Select this when this Player is connected to a TV
with a 4:3 screen. When a 16:9 aspect ratio video is
played back, the video is displayed as shown below.
Original
image size
On 16:9 (wide screen) TV
16:9 Full
16:9 Normal
4:3
Original
image size
On 4:3 TV
4:3 Pan Scan
4:3 Letterbox
16:9
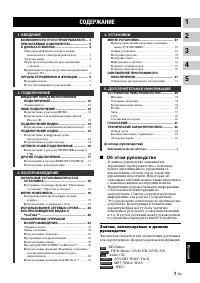
Содержание
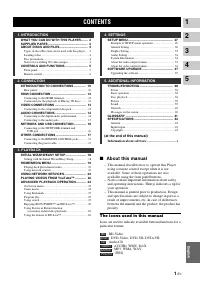
- 3 Русский; Об этом руководстве; СОДЕРЖАНИЕ; ДОПОЛНИТЕЛЬНАЯ ИНФОРМАЦИЯ
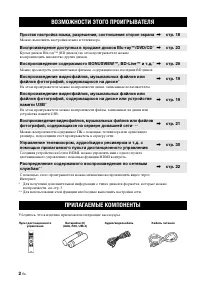
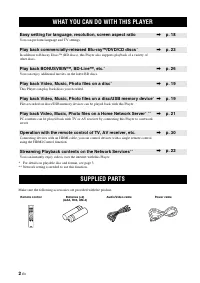
- 4 ВОЗМОЖНОСТИ ЭТОГО ПРОИГРЫВАТЕЛЯ; Простая настройка языка, разрешения, соотношения сторон экрана; ПРИЛАГАЕМЫЕ КОМПОНЕНТЫ
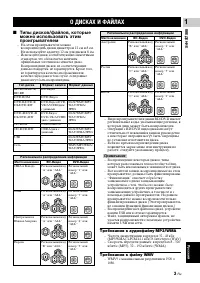
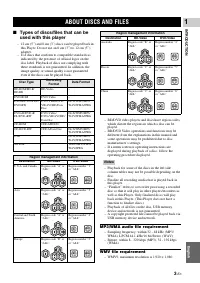
- 5 можно использовать этим; Требования к аудиофайлу MP3/WMA; О ДИСКАХ И ФАЙЛАХ; Примечания
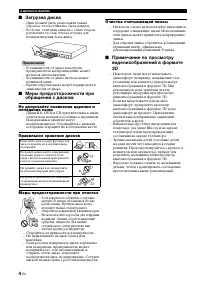
- 6 Загрузка диска; Не допускайте появления царапин и
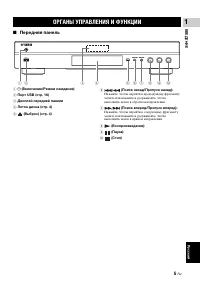
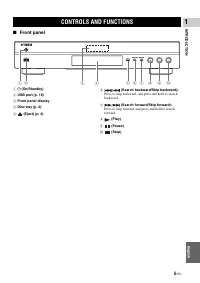
- 7 Передняя панель; Дисплей передней панели; ОРГАНЫ УПРАВЛЕНИЯ И ФУНКЦИИ
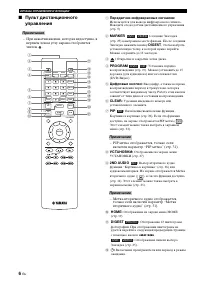
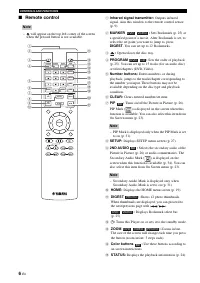
- 8 – При нажатии кнопки, которая недоступна, в; Передатчик инфракрасных сигналов:; – PIP метка отображается, только если; ND AUDIO; – Метка вторичного аудио отображается,
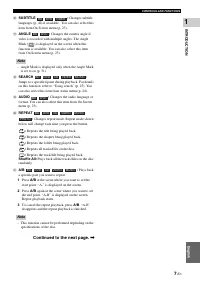
- 9 Примечание; Продолжение на следующей странице.
- 10 TOP MENU
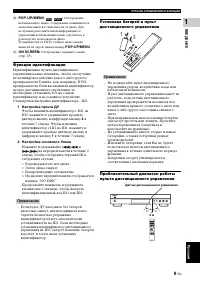
- 11 Функция идентификации
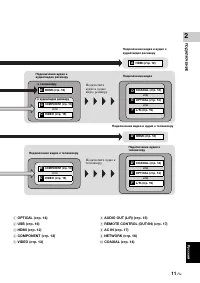
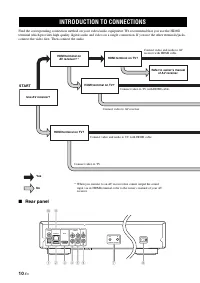
- 12 первую очередь подключить видео. Затем подключите аудио.; Задняя панель; ВВЕДЕНИЕ ПЕРЕД ВЫПОЛНЕНИЕМ ПОДКЛЮЧЕНИЙ; СТАРТ
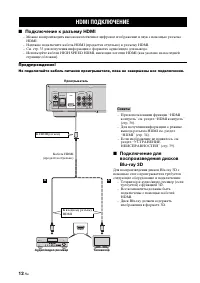
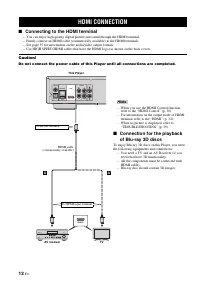
- 14 Подключение к разъему HDMI; HDMI ПОДКЛЮЧЕНИЕ; Советы
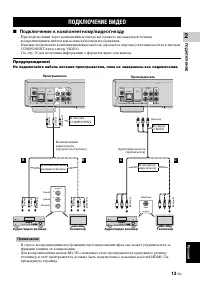
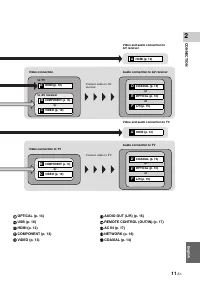
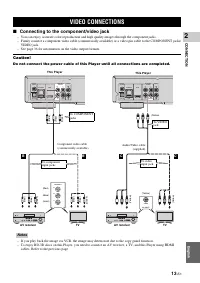
- 15 Подключение к компонентному/видеогнезду; воспроизведением цветов и высоким качеством изображения.; ПОДКЛЮЧЕНИЕ ВИДЕО
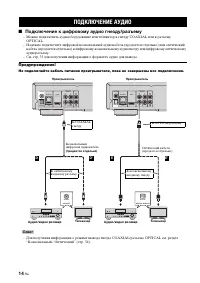
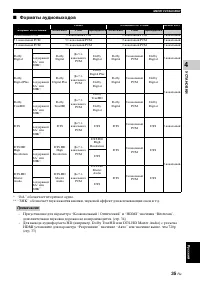
- 16 Подключение к цифровому аудио гнезду/разъему; – См. стр. 35 для получения информации о форматах аудио для вывода.; ПОДКЛЮЧЕНИЕ АУДИО; Совет
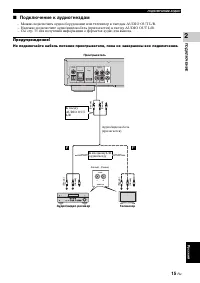
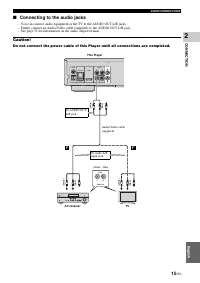
- 17 Подключение к аудиогнездам
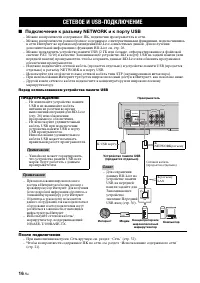
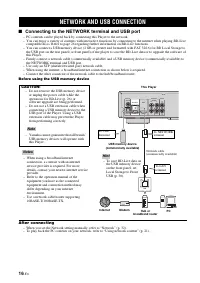
- 18 Подключение к разъему NETWORK и к порту USB; Перед использованием устройства памяти USB; После подключения; СЕТЕВОЕ И USB-ПОДКЛЮЧЕНИЕ
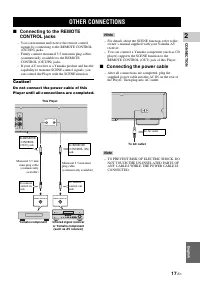
- 19 Подключение кабеля питания; ДРУГИЕ ПОДКЛЮЧЕНИЯ
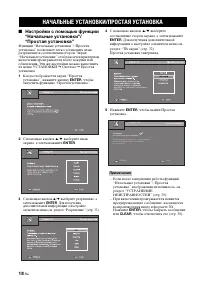
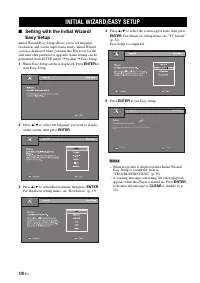
- 20 Настройки с помощью функции; НАЧАЛЬНЫЕ УСТАНОВКИ/ПРОСТАЯ УСТАНОВКА
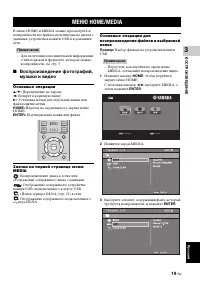
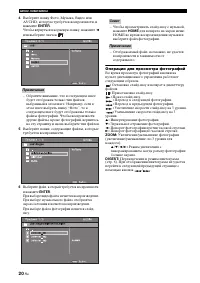
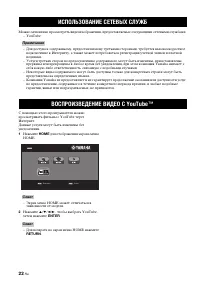
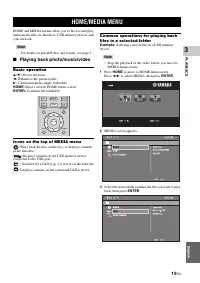
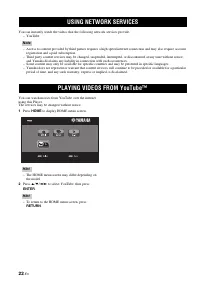
- 24 HOME; ИСПОЛЬЗОВАНИЕ СЕТЕВЫХ СЛУЖБ; ВОСПРОИЗВЕДЕНИЕ ВИДЕО С YouTubeTM
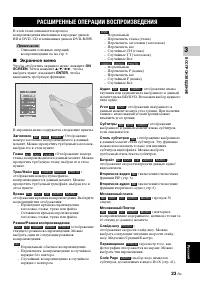
- 25 Экранное меню; РАСШИРЕННЫЕ ОПЕРАЦИИ ВОСПРОИЗВЕДЕНИЯ
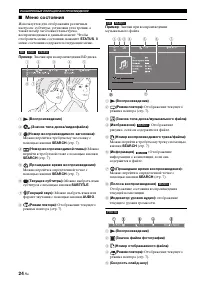
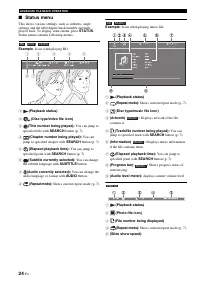
- 26 Меню состояния
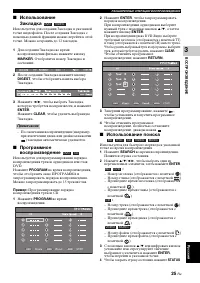
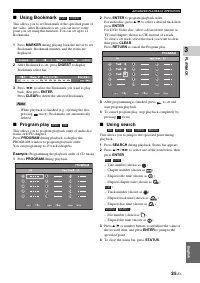
- 27 Использование поиска
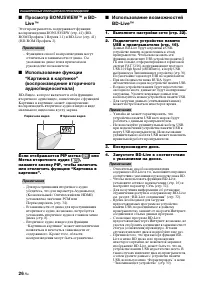
- 28 Если отображается PIP метка (
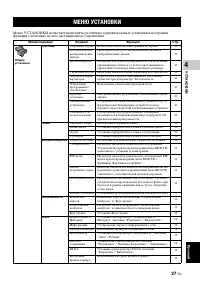
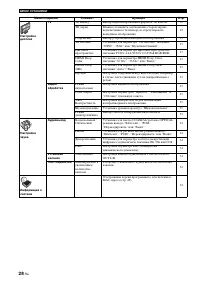
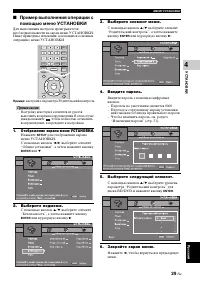
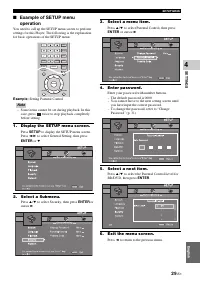
- 29 функций с помощью пульта дистанционного управления.; МЕНЮ УСТАНОВКИ
- 31 Выберите элемент меню.; Выберите следующий элемент.
- 32 Общие установки; Система
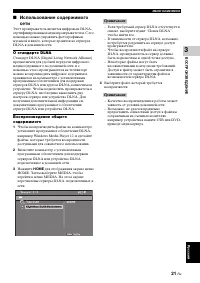
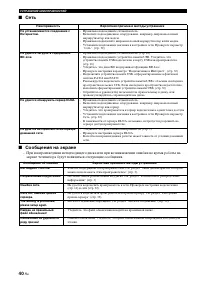
- 34 Сеть; Настройка дисплея
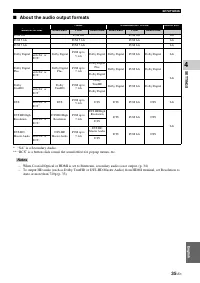
- 36 Настройка звука; Аудиовыход; Коаксиальный / Оптический; Установки колонок; ch Downmix; Информация о системе
- 37 Форматы аудиовыходов
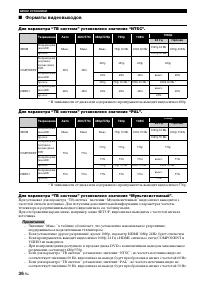
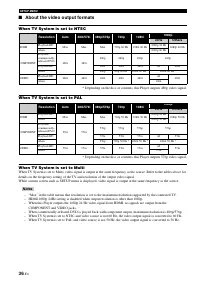
- 38 Форматы видеовыходов; Для параметра “ТВ система” установлено значение “NTSC”.; телевизора и разрешении выходного видеосигнала см. таблицу выше.
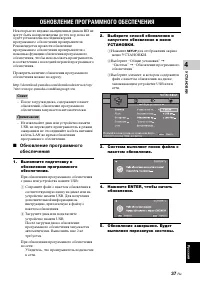
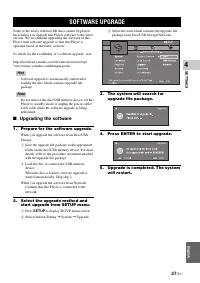
- 39 ОБНОВЛЕНИЕ ПРОГРАММНОГО ОБЕСПЕЧЕНИЯ
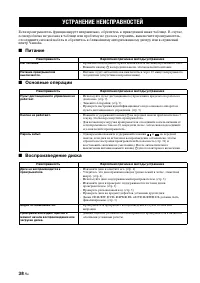
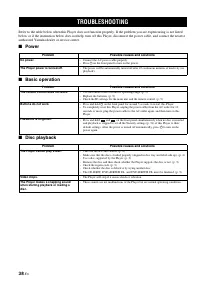
- 40 Питание; УСТРАНЕНИЕ НЕИСПРАВНОСТЕЙ
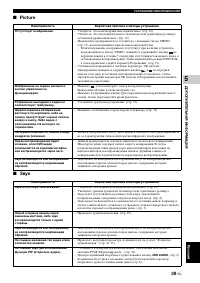
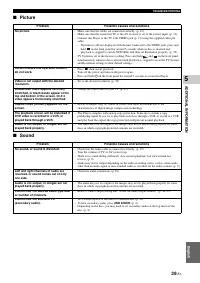
- 41 Picture
- 42 экране телевизора будут появляться следующие сообщения.
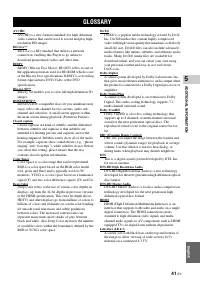
- 43 ГЛОССАРИЙ
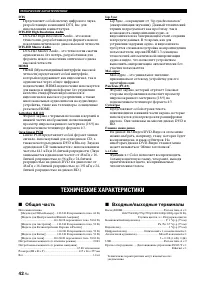
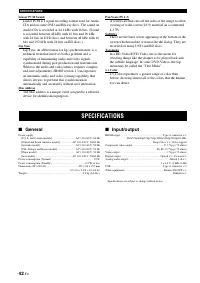
- 44 Общая часть; Входные/выходные терминалы; ТЕХНИЧЕСКИЕ ХАРАКТЕРИСТИКИ
- 45 Авторское право
- 100 БЕЗОПАСНОЕ ИСПОЛЬЗОВАНИЕ ЛАЗЕРА


